How to Configure OpenAI
This guide walks you through the process of setting up OpenAI API integration for your AI Assistant & Knowledge Bot Addon.
Introduction
Before your AI Assistant can start responding to user queries, you need to configure the OpenAI API integration. This involves obtaining an API key from OpenAI and configuring it within your WhatsMark SaaS platform. The AI Assistant uses OpenAI's powerful language models to understand and respond to user queries based on your uploaded knowledge base.
Step 1: Get Your OpenAI API Key
Modern Approach (2024+)
OpenAI now uses a project-based system for API keys. This guide follows the current recommended approach through Projects, which provides better organization and resource management.
1. Create OpenAI Account
- Go to OpenAI Platform
- Sign up for a new account or log in to your existing account
- Complete any required verification steps including phone verification
2. Create a New Project
Navigate to Projects
- Go to the Projects page
- Click Create new project from the left menu
Project Setup
- In the pop-up window, add your project name (e.g., "WhatsMark AI Assistant")
- Click Create project
- Note down the Project ID shown on the next page - you'll need this later
3. Configure Model Access
Set Model Permissions
- Ensure you're in the correct project (check the project name in the top navigation)
- Go to Limits from the left menu
- In the Model usage section, allow access to the models you plan to use:
gpt-3.5-turbo(recommended for most use cases)gpt-4(for advanced reasoning, higher cost)gpt-4o-mini(fast and cost-effective)
Best Practice
Only enable the models you actually plan to use. You can always add more models later as needed.
4. Create API Key
Generate New Key
- Go to the API Keys page
- Click Create new secret key button
Name Your Key
- Add a descriptive name for your API key (e.g., "WhatsMark-AI-Assistant-Production")
- This helps you identify the key's purpose later
- You can create multiple keys for different environments
Save Your Key Securely
- Copy the generated API key immediately
- Store it in a secure location (password manager recommended)
- You cannot view the key again after closing the dialog
Critical Security Notice
- Never share your API key publicly or commit it to version control
- Treat it like a password - keep it secure and private
- If compromised, immediately delete the key and create a new one
- Use descriptive names to easily manage multiple keys
5. Set Up Billing (Required for Production)
Add Payment Method
- Go to Settings → Billing in your OpenAI account
- Add a valid payment method (credit/debit card)
- Set usage limits to control costs
Step 2: Configure OpenAI in WhatsMark SaaS
1. Access Application Settings
- Log in to your WhatsMark SaaS admin dashboard
- In the left sidebar, navigate to Settings section
- Click on Application Settings from the menu
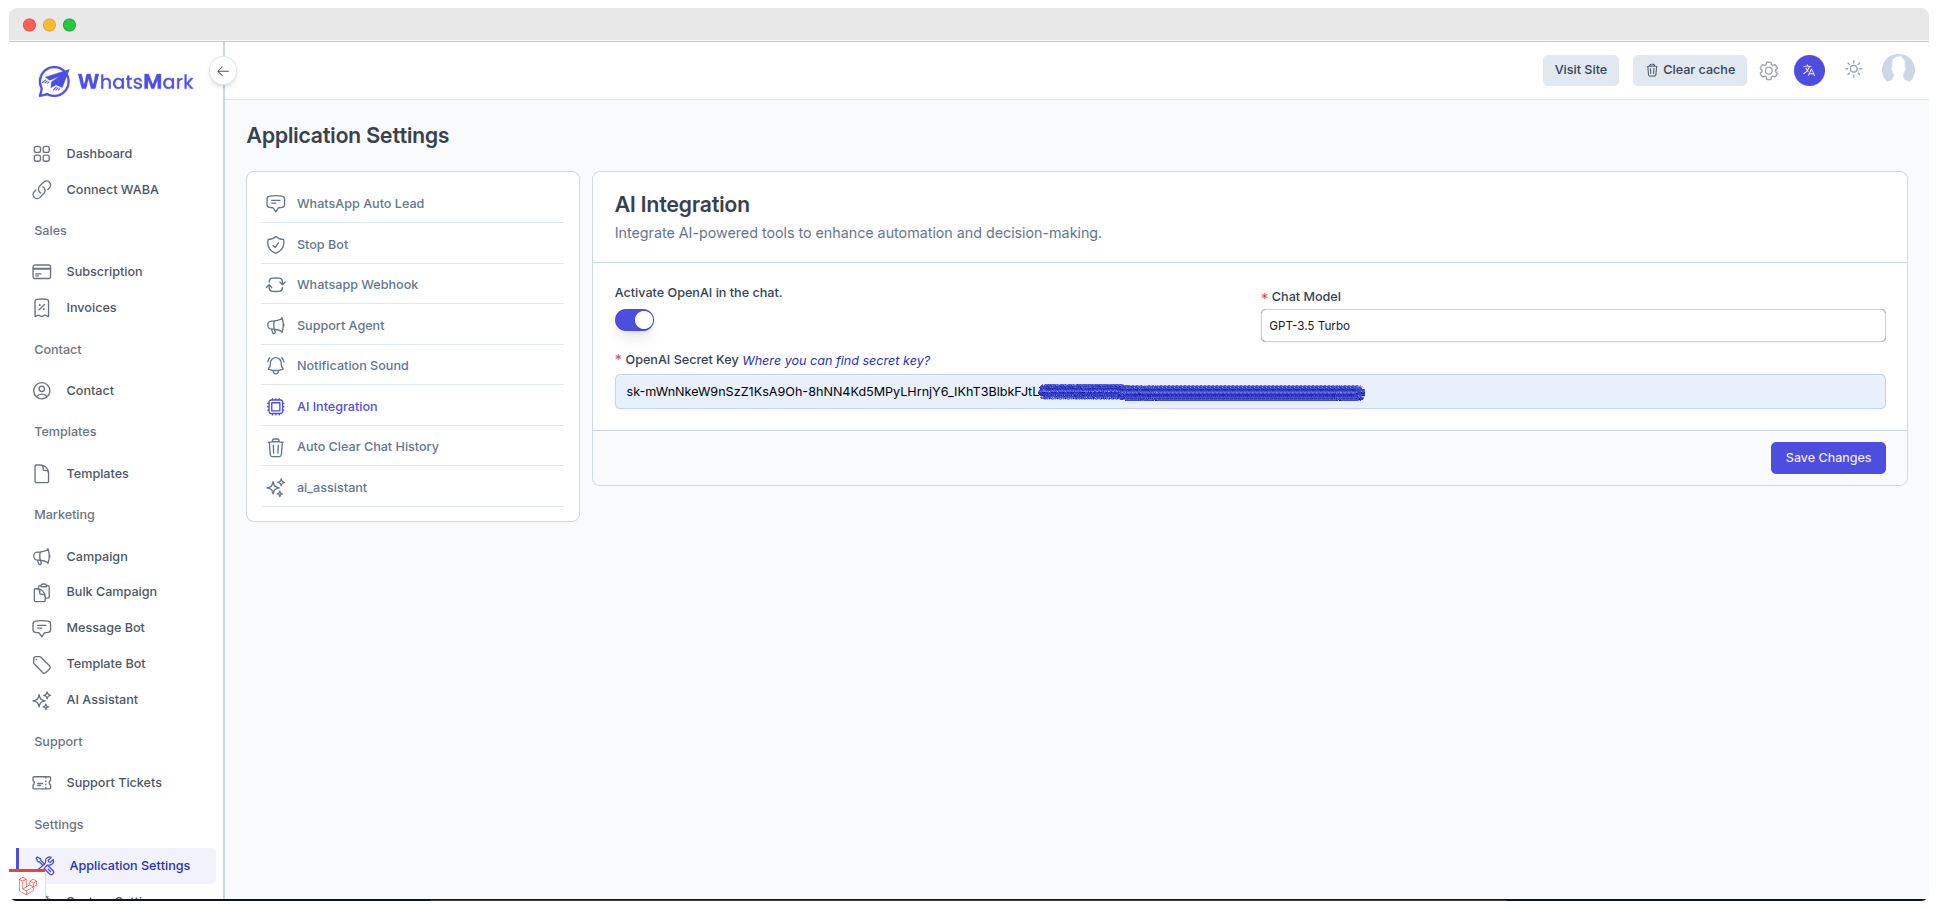
2. Configure AI Integration
Activate OpenAI
- In the AI Integration section, you'll see the toggle for "Activate OpenAI in the chat"
- Turn on the toggle to enable OpenAI integration
Select Chat Model
- From the Chat Model dropdown, select your preferred model:
- GPT-3.5 Turbo (recommended for most use cases - cost-effective)
- GPT-4 (for advanced reasoning - higher cost)
- Other available models as per your OpenAI project settings
Enter OpenAI Secret Key
- In the OpenAI Secret Key field, paste your API key from Step 1
- Ensure there are no extra spaces or characters
- The key should start with "sk-" followed by your unique identifier
Save Configuration
- Click the Save Changes button to apply your settings
- Verify that the configuration is saved successfully
Next Steps
Once OpenAI is configured successfully, proceed to How to Create AI Assistant to set up your knowledge base and train your AI assistant.