🎛️ eCommerce Webhook Management Dashboard
The Webhook Management Dashboard provides a centralized interface to create, configure, monitor, and maintain all your eCommerce webhook integrations within WhatsMarkSaaS. 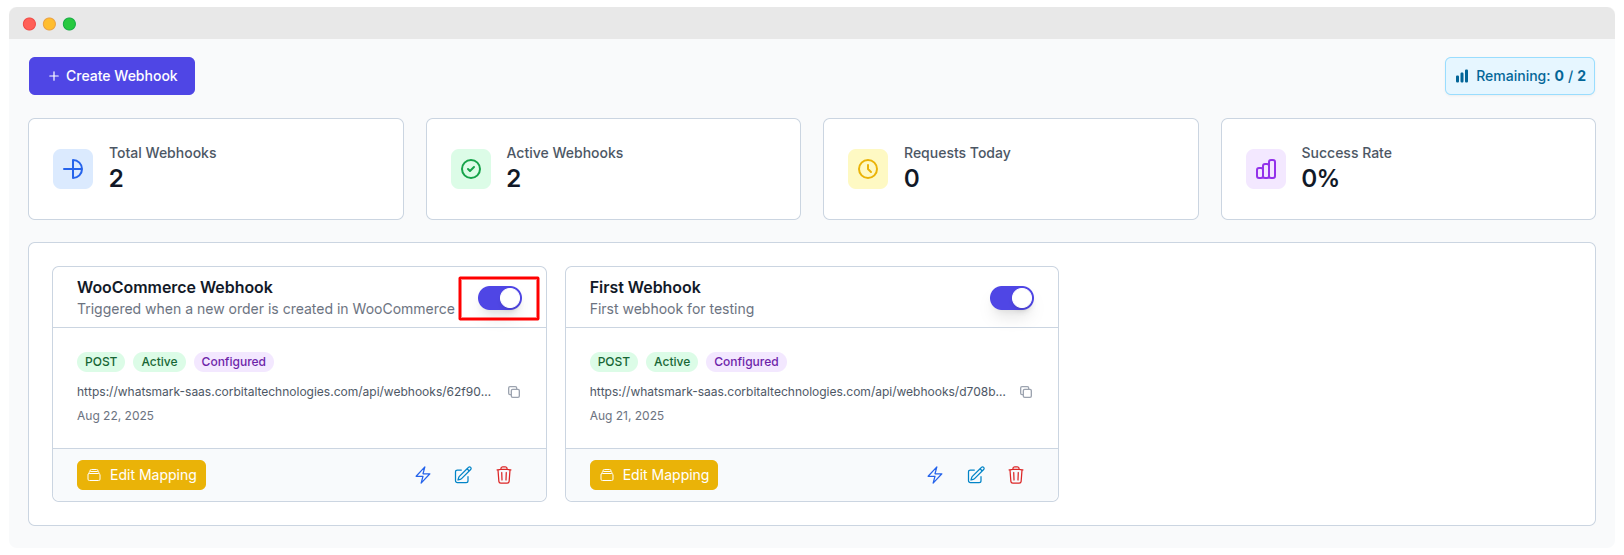
📊 Dashboard Overview
The webhook management system provides a comprehensive control center to:
- ✅ Create and manage multiple webhooks
- 📈 Monitor webhook activity and performance metrics
- ⚙️ Configure webhook endpoints and authentication
- 📊 Track success rates and request statistics
- 🔧 Test and debug webhook integrations
🎯 Dashboard Features
Statistics Overview
The main dashboard displays key performance metrics at a glance:
💡 Quota Management
The "Remaining" counter shows your webhook limit based on your WhatsMarkSaaS plan. Upgrade for higher limits.
➕ Creating a New Webhook
Step 1: Access Creation Form
Click the "+ Create Webhook" button from the main dashboard to open the webhook creation dialog.
Step 2: Configure Basic Settings
Fill in the required webhook information:
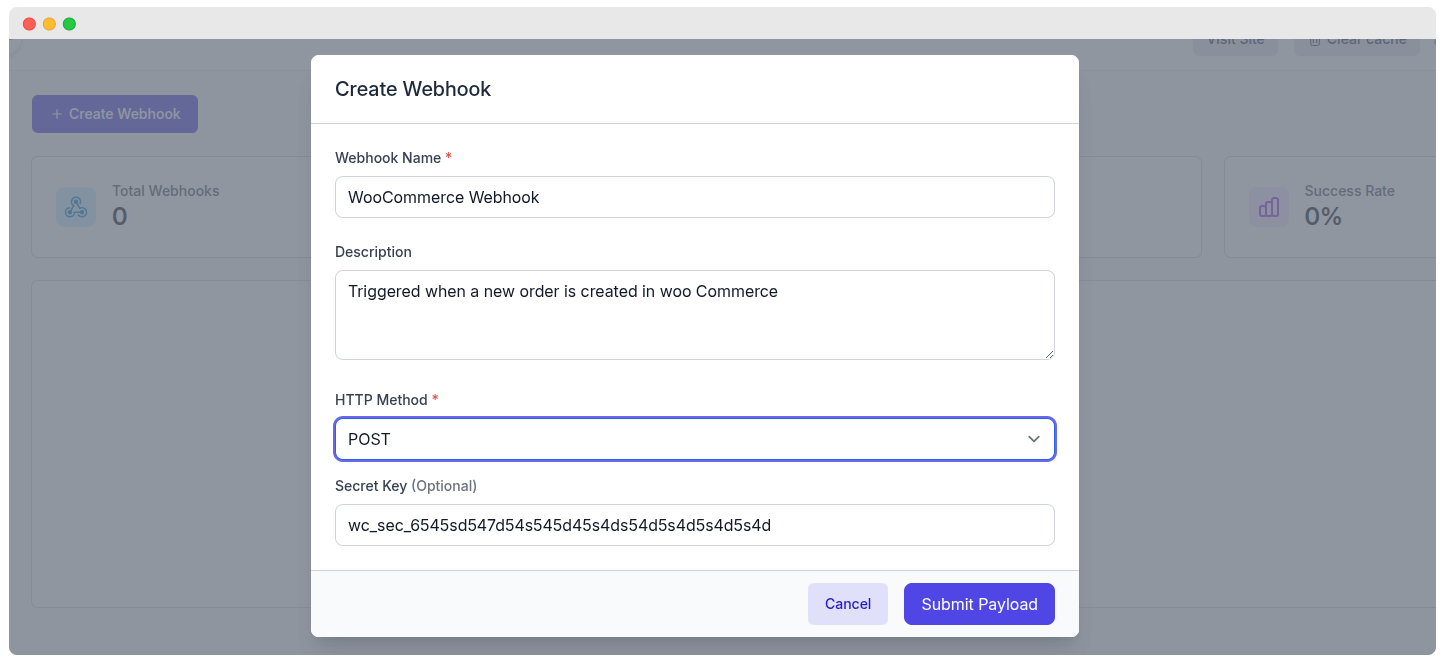
Webhook Name *
- Provide a descriptive name for your webhook
- Example:
"WooCommerce Order Notifications" - Purpose: Helps identify the webhook's function in the dashboard
Description
- Add a detailed description of the webhook's purpose
- Example:
"Triggered when a new order is created in WooCommerce" - Benefits: Improves webhook management and team documentation
HTTP Method *
- Select the HTTP method for webhook requests
- POST: Most common method for webhooks (recommended)
Secret Key (Optional)
- Enter a secret key for webhook authentication
- Format:
wc_sec_[random_string] - Example:
wc_sec_6545sd547d54s545d455d54s54d5s4d54d5s4d - Purpose: Verify webhook authenticity and prevent unauthorized requests
🔐 Security Best Practice
Always use secret keys for production webhooks to ensure secure data transmission.
Step 3: Submit Configuration
Click "save" to create the webhook with your specified configuration.
🔗 Webhook URLs and Integration
Generated Endpoints
Each webhook receives a unique URL in the format:
https://yoursite.com/api/webhooks/[webhook_id]Integration Steps
- Copy the Webhook URL from the webhook card
- Configure your source system (e.g., WooCommerce, Shopify) to send data to this URL
- Set up authentication using the secret key if provided
- Test the integration using the lightning bolt test action
🧪 Testing and Debugging
Webhook Payload Testing
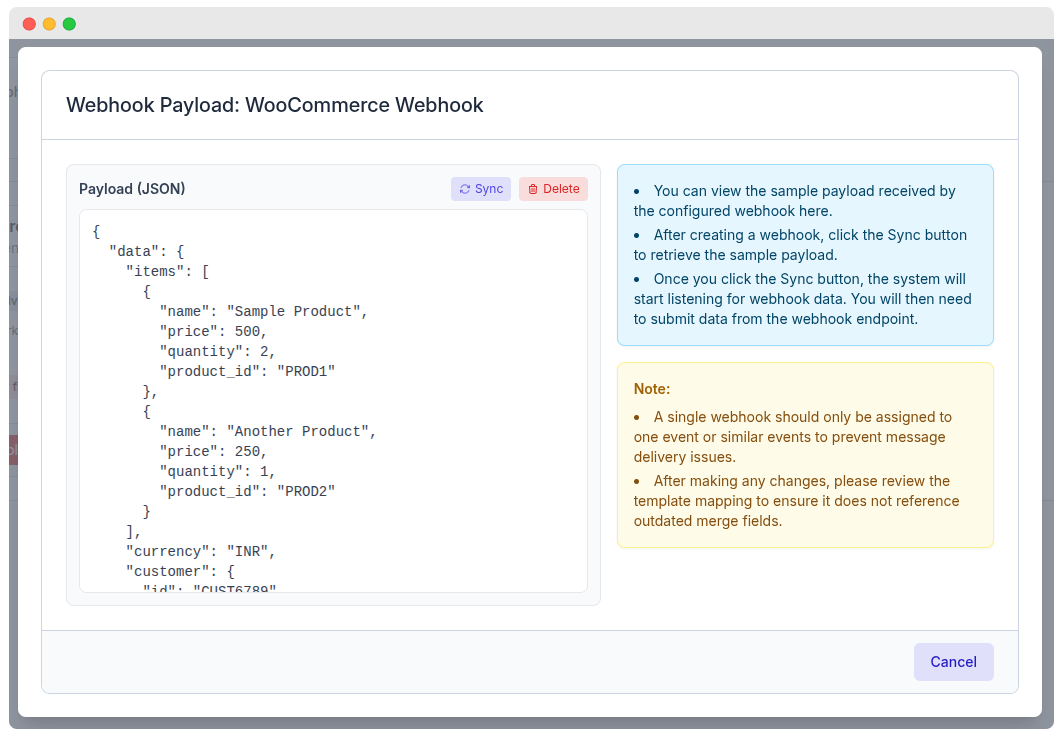
The system provides a payload testing interface with:
- 📋 JSON Payload Display: View sample webhook data
- 🔄 Sync Button: Retrieve real webhook data
- 🗑️ Delete Button: Clear test data
- 💡 Testing Instructions: Step-by-step guidance
Testing Process:
- View sample payload received by the configured webhook
- Click the Sync button to retrieve real data
- System starts listening for webhook data
- Submit test data from your webhook endpoint
- Verify payload structure and content