🛍️ WooCommerce Webhook Setup
Complete guide to configure WooCommerce webhooks for seamless integration with the Ecommerce Webhook Notifications Addon.
What are Webhooks?
A Webhook is an event notification sent to a URL of your choice. Users can configure them to trigger events on one site to invoke behavior on another.
Webhooks are useful for integrating with third-party services and other external APIs that support them.
Webhooks in WooCommerce
Webhooks were introduced in WooCommerce 2.2 and can trigger events each time you add, edit or delete:
- Orders 📦
- Products 🛒
- Coupons 🎫
- Customers 👥
It's also possible to use webhooks with WooCommerce actions, e.g., Create a webhook to be used every time a product is added to the shopping cart, using the action woocommerce_add_to_cart.
Creating Webhooks

Step-by-Step Process:
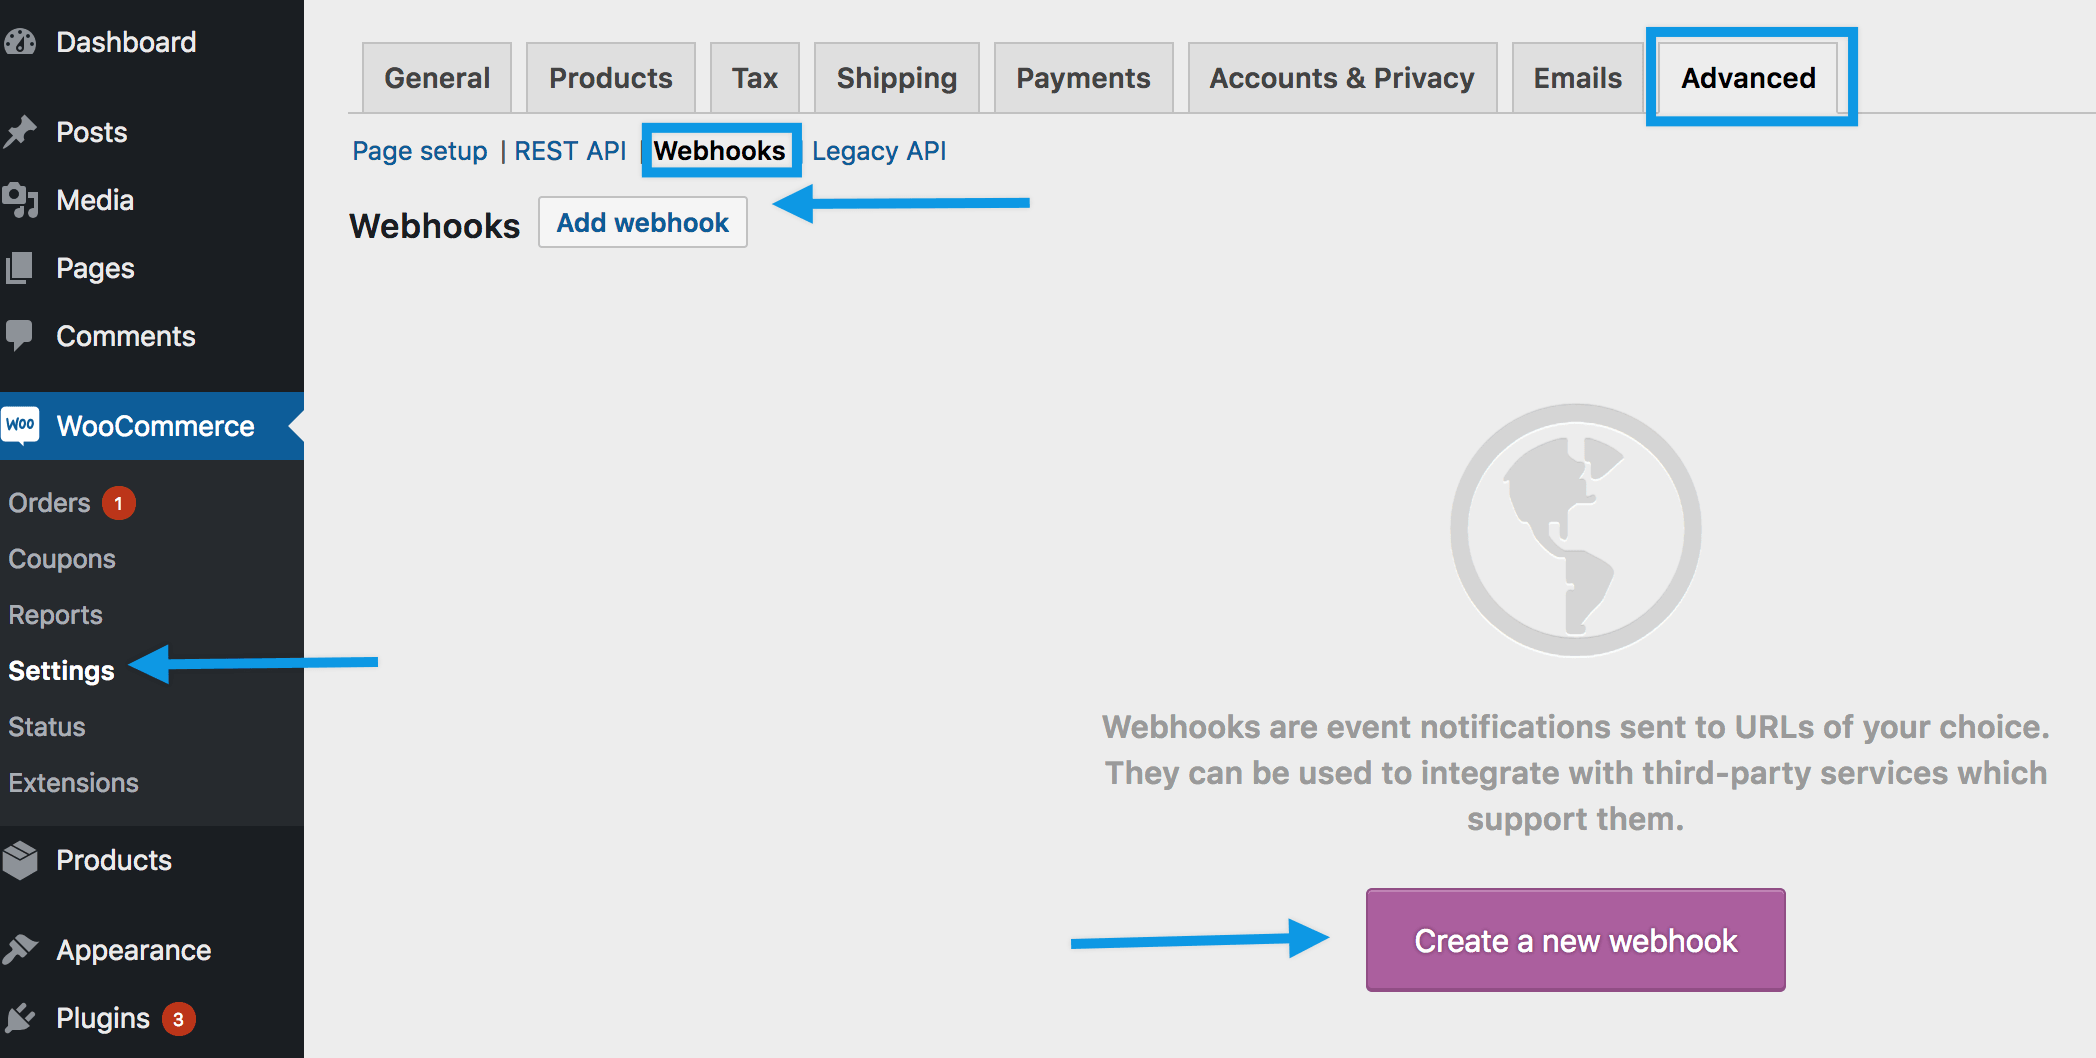
1. Access Webhook Settings
Navigate to: WooCommerce → Settings → Advanced → Webhooks
📍 Location Note
Webhooks were formerly found under WooCommerce → Settings → API prior to WooCommerce 3.4.
2. Create New Webhook
- Select "Create a new webhook" (first time) or "Add webhook"
- The Webhook Data box appears

3. Configure Webhook Settings
Name:
- Auto-generated as "Webhook created on [date and time]"
- Change to a descriptive name like "WhatsMarkSaaS Order Notifications"
Status:
- Active: Delivers payload ✅
- Paused: Does not deliver ⏸️
- Disabled: Does not deliver due to delivery failures ❌
Topic: Choose when the webhook should trigger:
- Order Created - New orders placed
- Order Updated - Order status changes
- Order Deleted - Orders removed
- Product Updated - Product changes
- Customer Created - New customer registrations
- Custom Actions - Advanced WooCommerce actions
Delivery URL: Enter your WhatsMarkSaaS webhook endpoint:
https://yoursite.com/api/webhooks/[webhook_id]4. Save Webhook
Click "Save webhook" to activate
⚠️ First Activation
The first time your webhook is saved with Active status, it sends a ping to the Delivery URL to test connectivity.