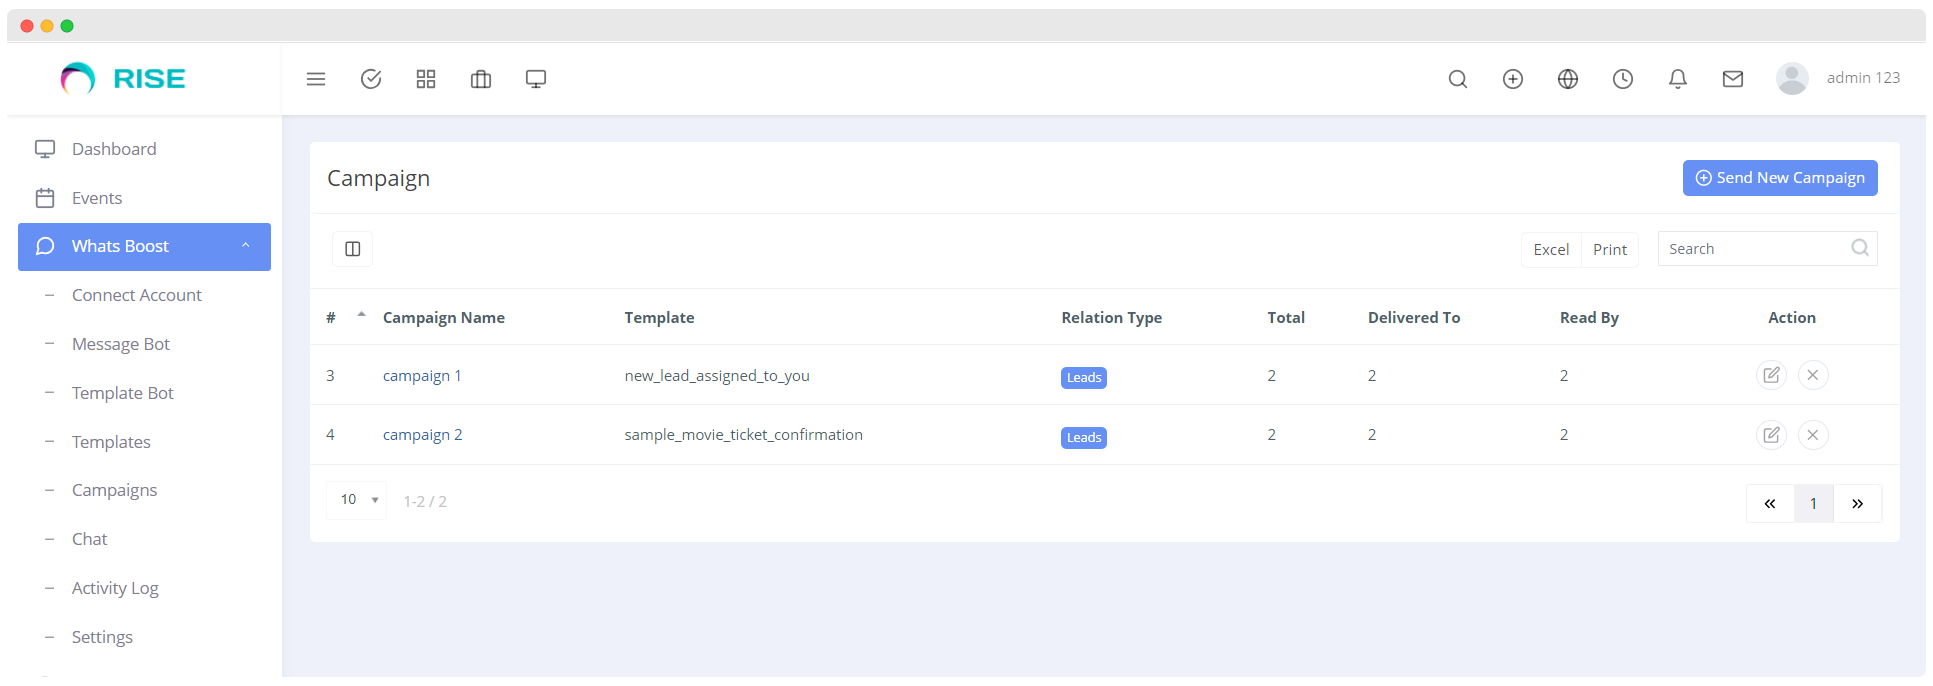
Campaigns 📢
Send New Campaign Feature Documentation
Overview
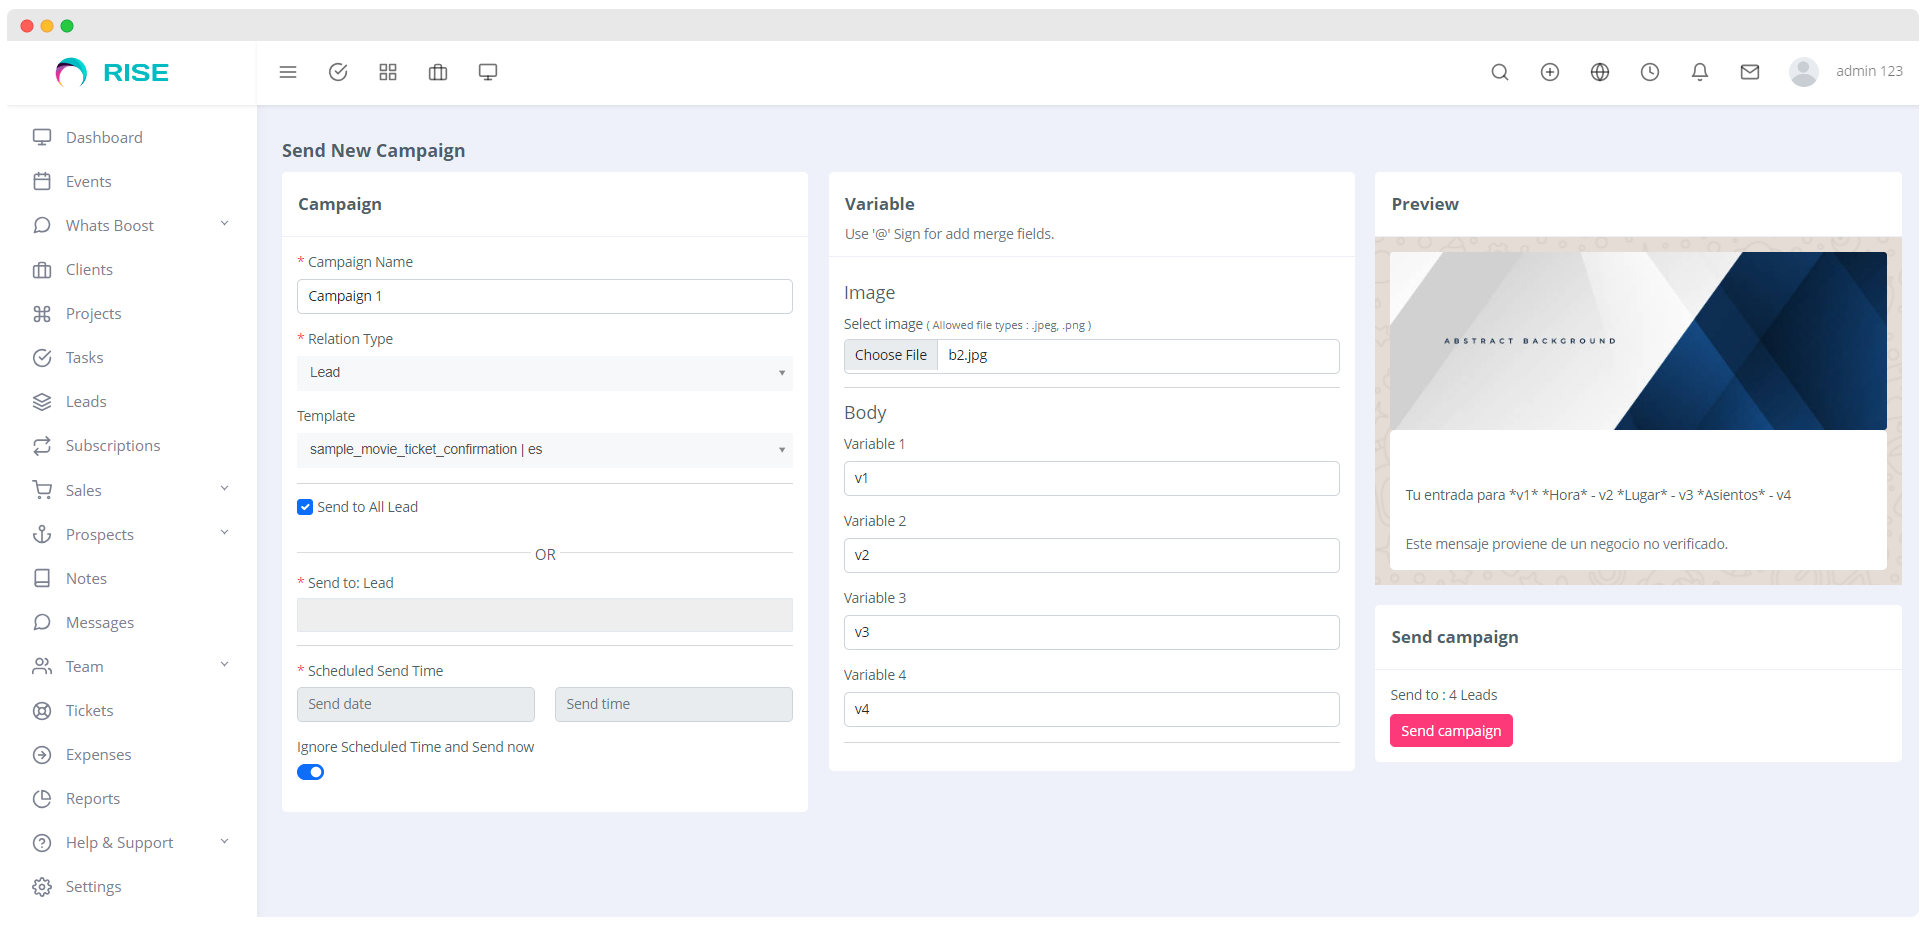
The "Send New Campaign" feature allows users to create and send WhatsApp message campaigns using predefined templates provided by the WhatsApp Cloud API. With options to target specific relation types (Leads or Contacts) and schedule campaigns for future delivery, this feature simplifies mass communication.
Interface Components
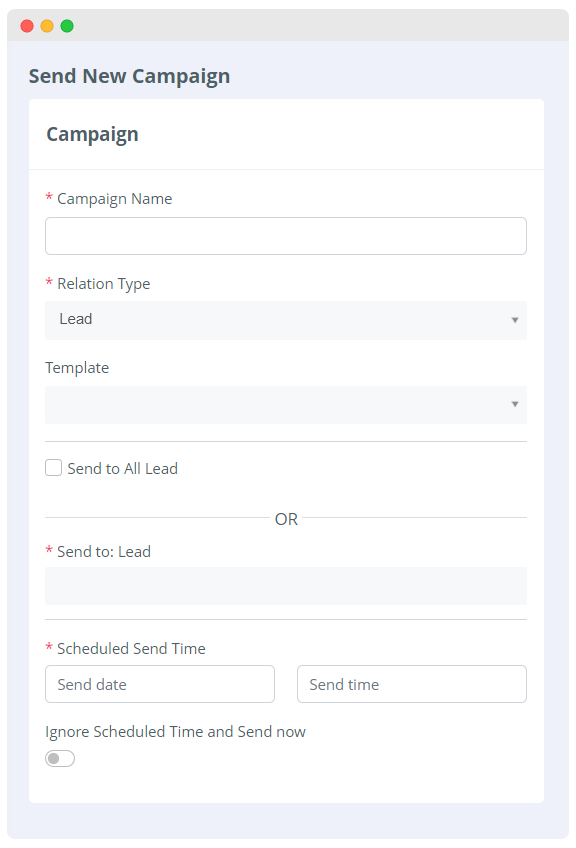
1. Campaign Name
- A required text input field to specify the name of the campaign.
2. Relation Type
- A dropdown menu with the following options:
- Leads: Select this to target leads.
- Contacts: Select this to target contacts.
- Relation Type determines the audience for the campaign.
3. Template
- A dropdown menu listing templates fetched from the Meta WhatsApp Cloud API.
- Templates contain pre-approved message content for WhatsApp.
- Upon selecting a template, additional components will be displayed:
- Status: Dropdown populated with lead statuses.
- Source: Dropdown populated with lead sources.
- Leads: Dropdown to manually select specific leads.
- Select All Leads: Checkbox to target all leads.
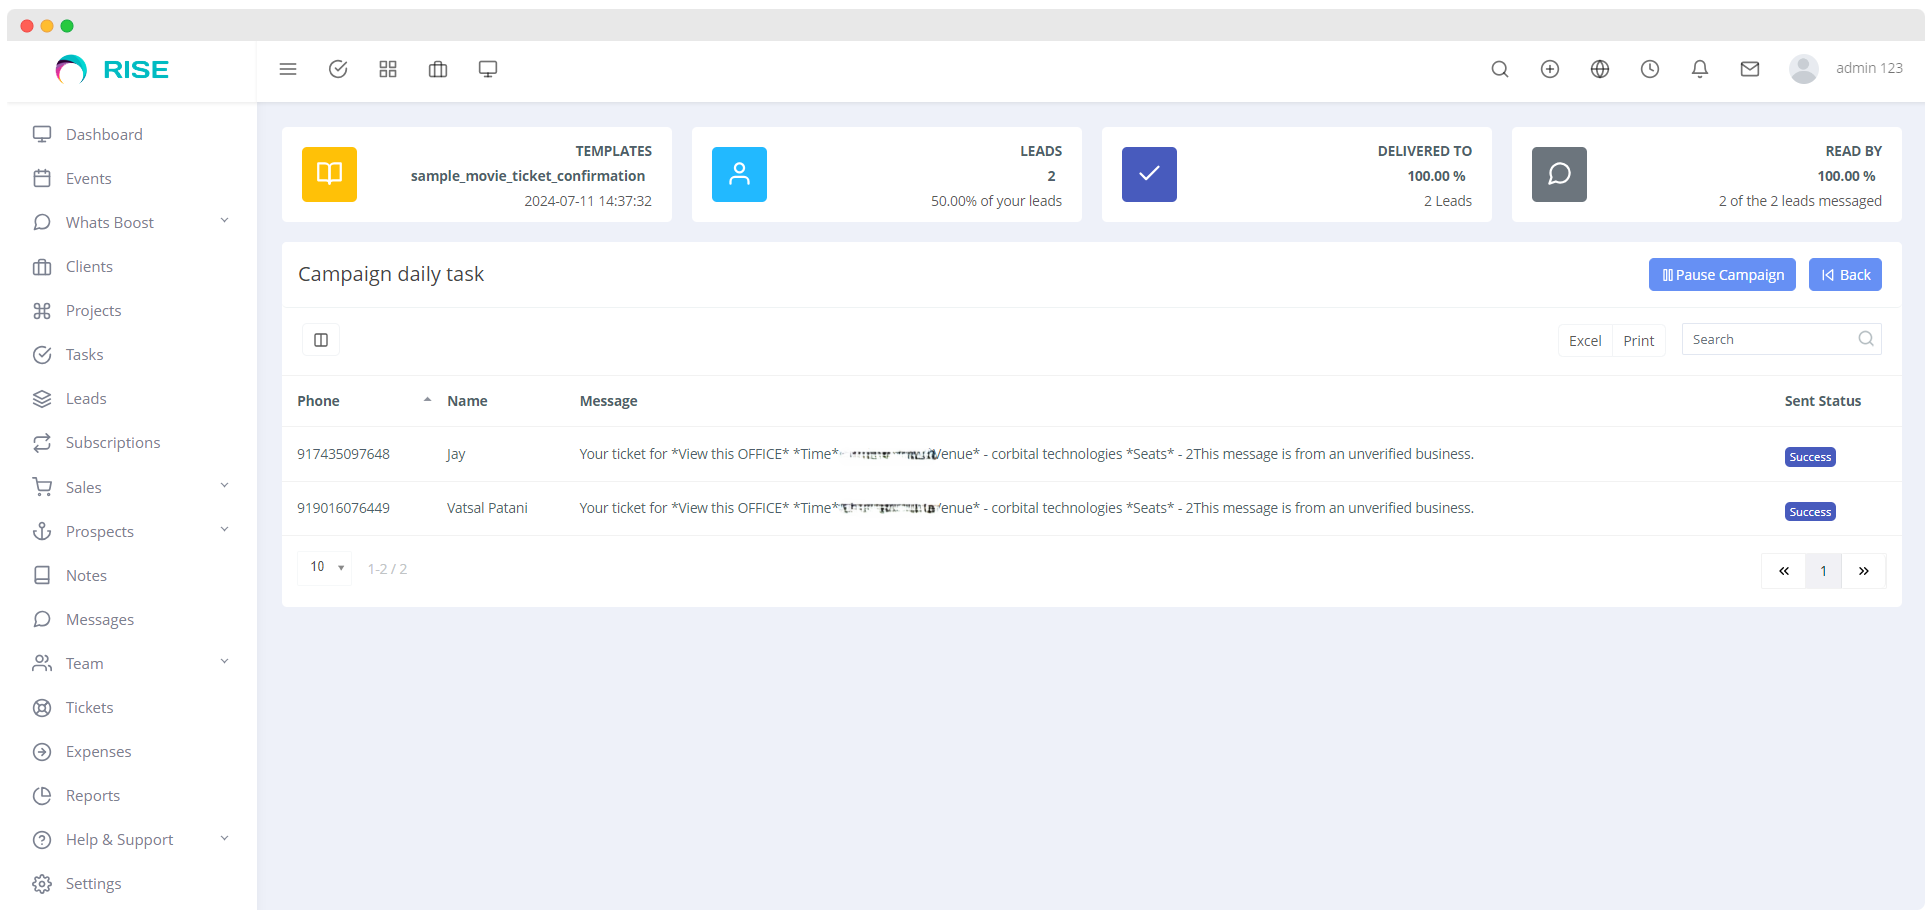
4. Scheduled Send Time
- A datetime picker to schedule the campaign for future delivery.
- If left empty, the campaign will not be scheduled.
5. Ignore Scheduled Time and Send Now
- A toggle switch to bypass the scheduled time and send the campaign immediately.
Step-by-Step Setup Guide
Access the "Send New Campaign" Page
- Navigate to the "Campaigns" section in your dashboard and select "Send New Campaign."
- Navigate to the "Campaigns" section in your dashboard and select "Send New Campaign."
Enter Campaign Details
- Fill in the Campaign Name field with a descriptive name for your campaign.
Select Relation Type
- Use the Relation Type dropdown to choose the audience (Leads or Contacts).
Choose a Template
- From the Template dropdown, select the desired WhatsApp template. Ensure the template matches the context and complies with WhatsApp guidelines.
- Based on the template selection, additional fields will appear:
- Status: Choose a lead status to filter leads.
- Source: Select a lead source to narrow the target audience.
- Leads: Optionally, manually select specific leads.
- Select All Leads: Check this box to include all leads.
Schedule the Campaign
- Use the Scheduled Send Time datetime picker to set a future date and time for sending the campaign.
Toggle Immediate Send (Optional)
- If you want to send the campaign immediately, enable the Ignore Scheduled Time and Send Now toggle.
- If you want to send the campaign immediately, enable the Ignore Scheduled Time and Send Now toggle.
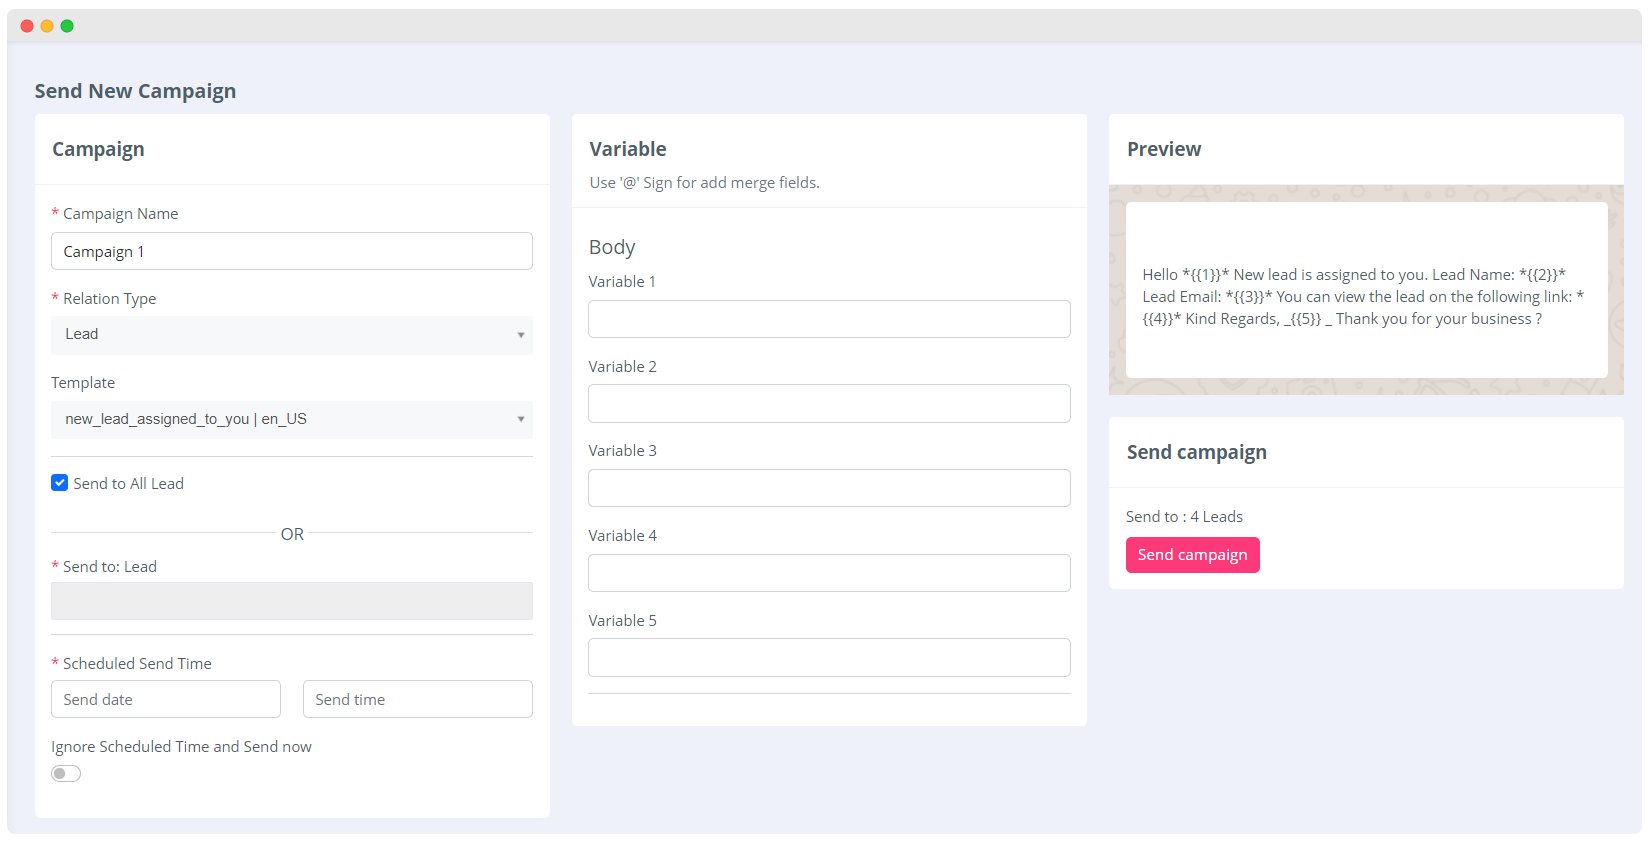

- Review and Submit
- Verify the campaign details and click the "Submit" button to save and schedule the campaign.

- Verify the campaign details and click the "Submit" button to save and schedule the campaign.