Drag-Drop Bot Flow Builder
Introduction
This Flow Builder allows you to easily create interactive bot flows using a simple drag-and-drop interface. Follow this step-by-step guide to get started.

Overview of Interface
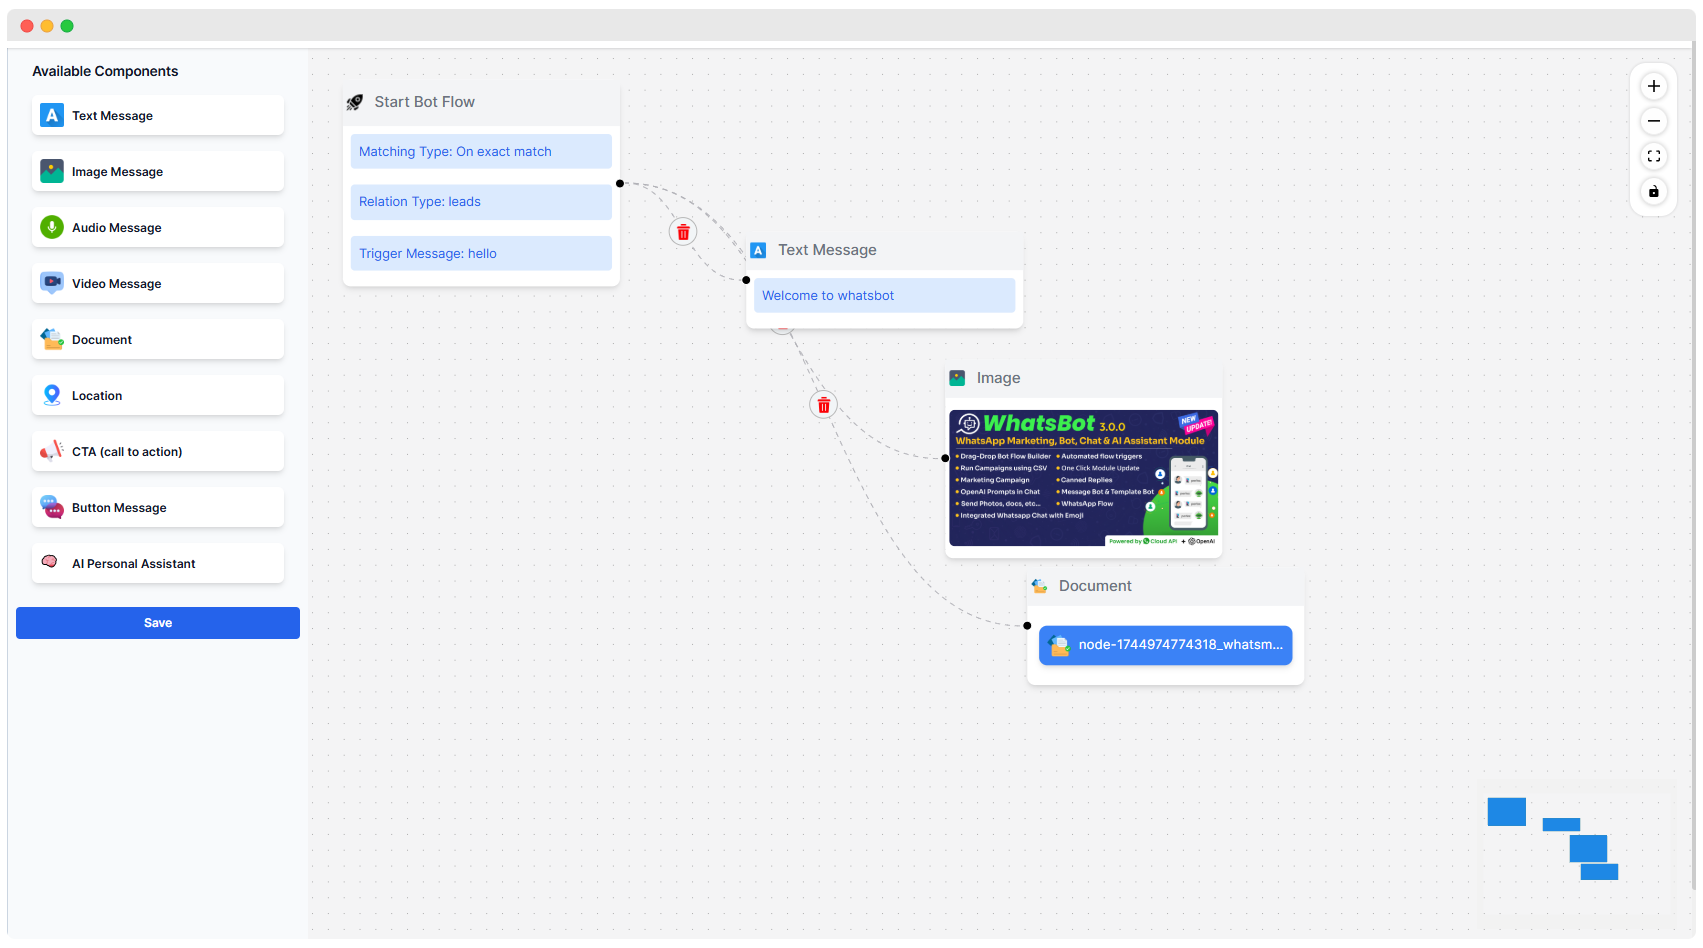
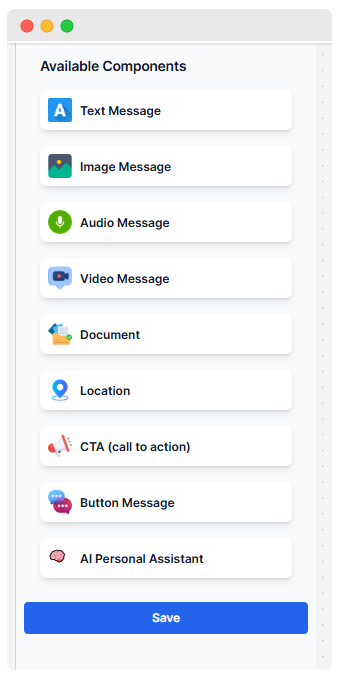
- Available Components: On the left-hand side, you will see various components that you can add to your bot flow. Components include:
- Text Message
- Image Message
- Audio Message
- Video Message
- Document
- CTA (Call to Action)
- Button Message
- AI Assistant
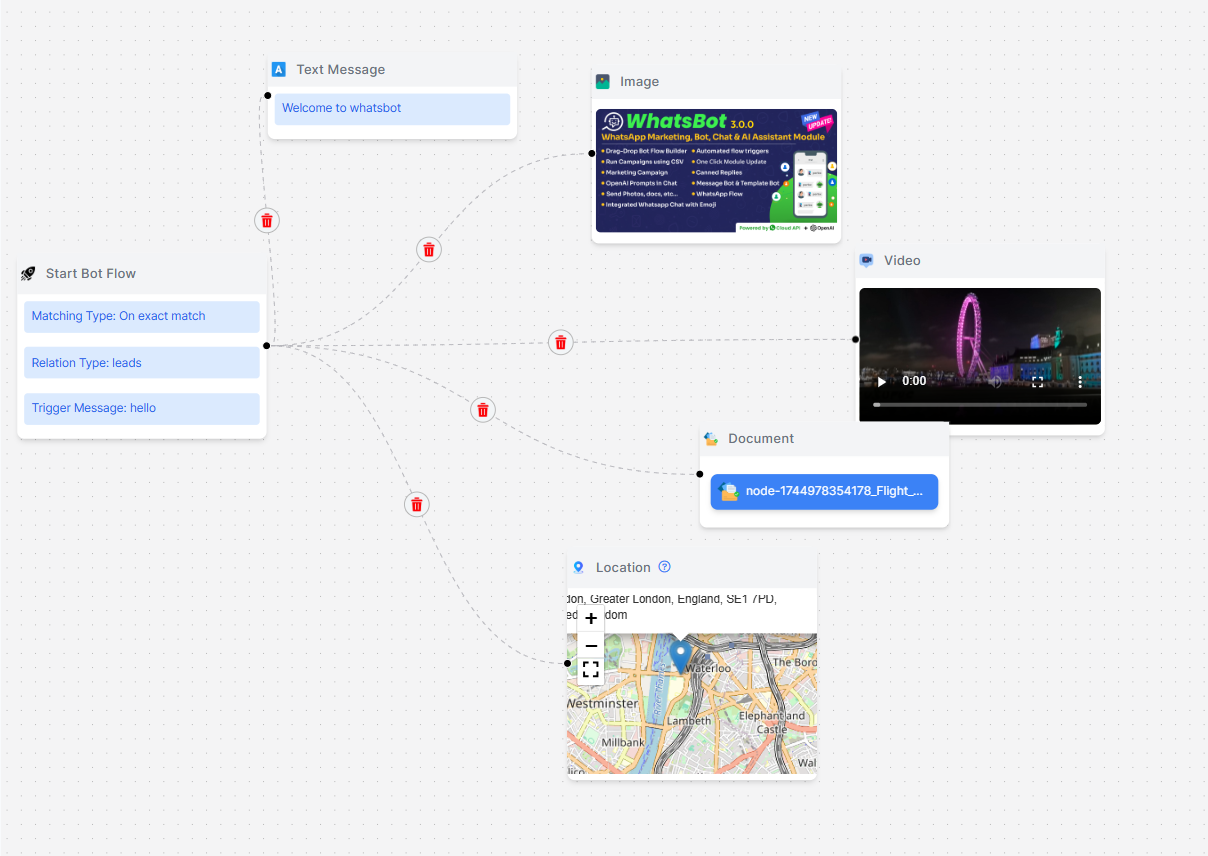
- Flow Canvas: The main area where you build and organize your bot flow.
- Save Button: Located at the bottom left, use this to save your bot flow.

Step-by-Step Guide
Step 1: Start a New Bot Flow
- Click on the
Start Bot Flowcomponent from the Available Components and drag it onto the Flow Canvas. - Configure the
Start Bot Flowcomponent:- Matching Type: Specify the matching type (e.g., Leads, Customer, etc.).
Step 2: Add Text Messages
- Drag the
Text Messagecomponent from the Available Components to the Flow Canvas. - Customize the text message:
- Input your message in the provided text field.
- Connect the
Start Bot Flowto theText Messageby drawing a connecting line from the blue dot ofStart Bot Flowto the blue dot ofText Message.
Step 3: Add Images
- Drag the
Image Messagecomponent into the Flow Canvas. - Upload or select your image and any accompanying text.
- Link the
Text Messageto theImage Messageby drawing a line between their blue dots.
Step 4: Add Audio
- Drag the
Audio Messagecomponent into the Flow Canvas. - Upload or select your audio and any accompanying text.
- Link the
Image Messageto theAudio Messageby drawing a line between their blue dots.
Step 5: Add Video
- Drag the
Video Messagecomponent into the Flow Canvas. - Upload or select your video and any accompanying text.
- Link the
Audio Messageto theVideo Messageby drawing a line between their blue dots.
Step 6: Add Document
- Drag the
Documentcomponent into the Flow Canvas. - Upload or select your document and any accompanying text.
- Link the
Video Messageto theDocumentby drawing a line between their blue dots.
Step 7: Add Location
- Drag the
Locationcomponent into the Flow Canvas. - Upload or select and search your location and any accompanying text.
- Link the
Documentto theLocationby drawing a line between their blue dots.
Step 8: Add Call-to-Action (CTA)
- Drag the
CTA (Call to Action)component onto the Flow Canvas. - Configure the CTA component:
- Header Text: Add the header text.
- Header Value: Provide the value or description for the header.
- Link 1: Add the link for the CTA.
- Footer Text: Add any footer text.
- Connect the
Image Messageto theCTAby drawing a line between their blue dots.
Step 9: AI Assistant
- Drag the
AI Assistancecomponent onto the Flow Canvas. - Configure the AI Assistance component:
- Personal Assistant: Add the link for the CTA.
- Footer Add any footer text.
- Connect the
Image Messageto theAI Assistanceby drawing a line between their blue dots.
The AI Assistant Settings allow you to configure and customize the behavior of the AI assistant integrated into the WhatsBot module. This guide will help you understand each option and configure the settings for optimal performance.
Step 10: Add Additional Components
- Continue adding other components like:
Button Message: Adding interactive buttonsAudio Message: Incorporate audio messagesVideo Message: Embed videosDocument: Attach documents
- Link each component sequentially as per your bot flow logic, ensuring that all components are connected via the blue dots.
Step 11: Review and Save
- Review your bot flow on the canvas to ensure all components are properly linked.
- Click the
Savebutton on the left-hand side to save your bot flow.

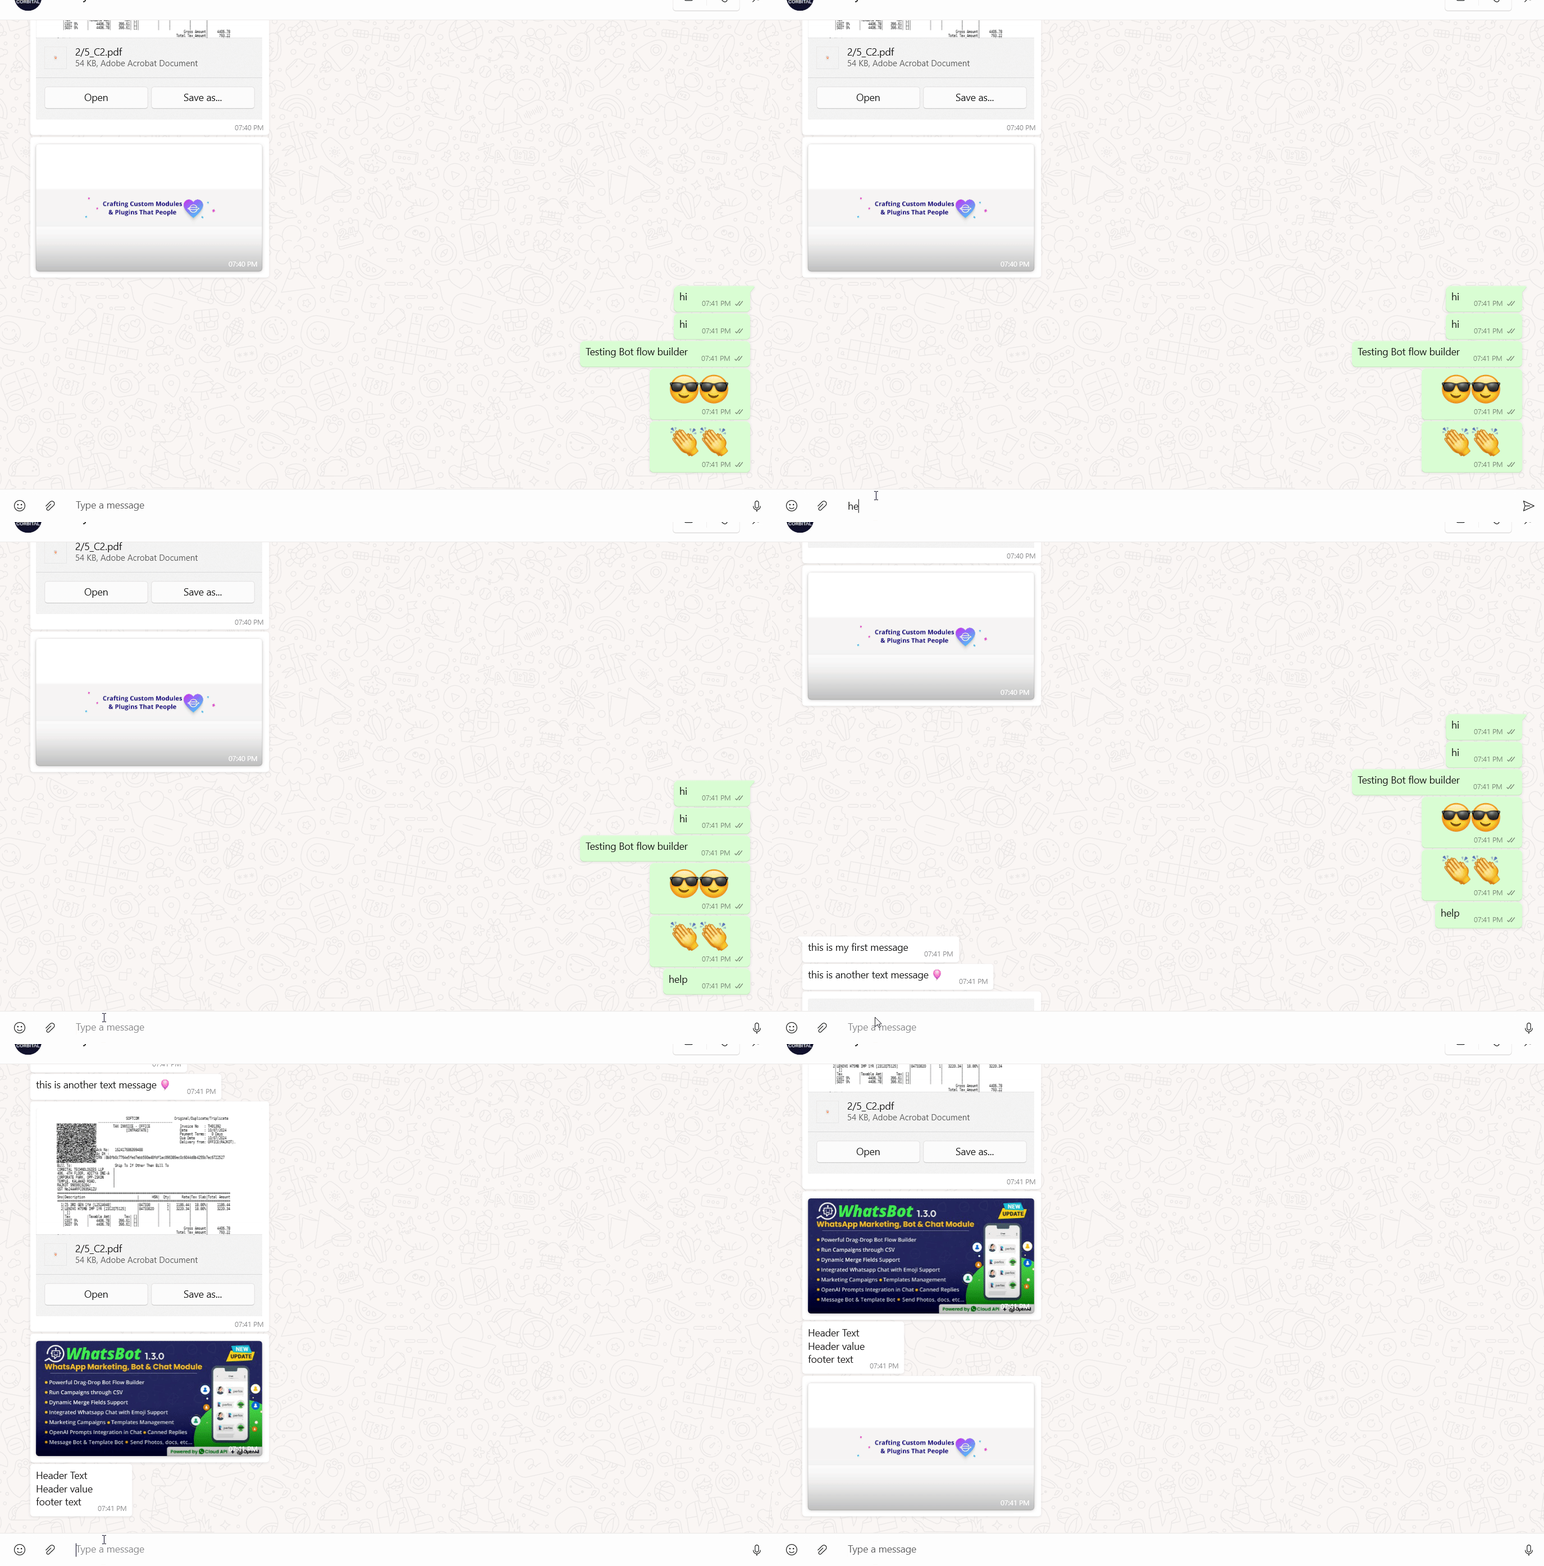
How it works
