Sending Bulk Campaigns Through CSV
Creating a Bulk Campaign
Bulk campaigns allow you to send messages to multiple recipients efficiently. To create one:
- Navigate to Send Bulk Campaign: Find this option in the main menu.
- Campaign Naming:
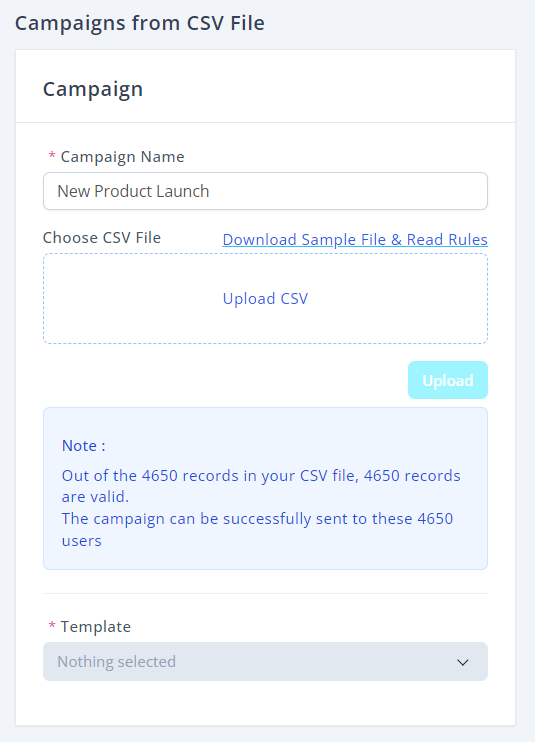
- Enter a unique Campaign Name that reflects the purpose (e.g., "New Product Launch").
- Select CSV File:
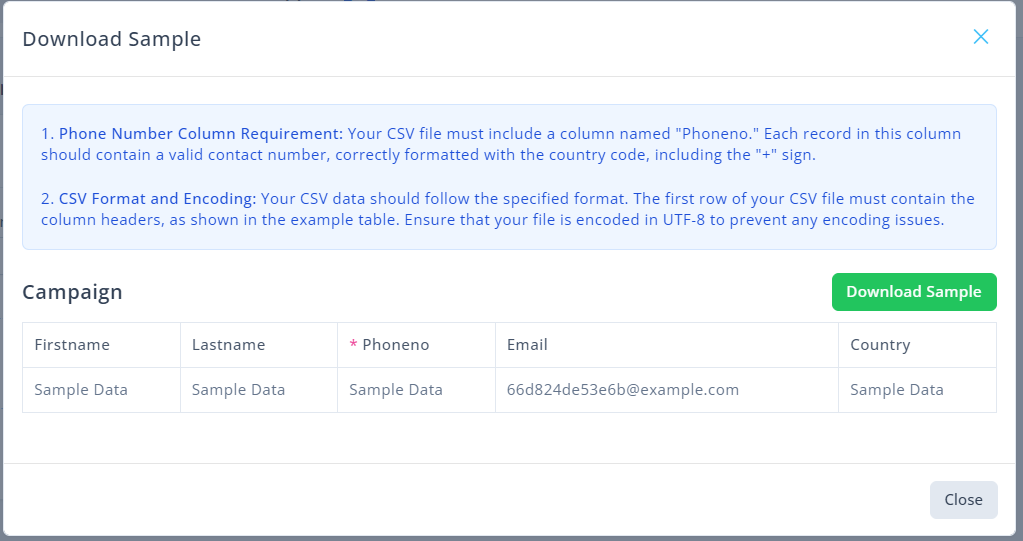
- Choose an appropriate CSV file containing recipient information. Make sure it adheres to the required format.
- Make sure you are using correct format or you can download sample csv file to understand rules.

Uploading CSV Files
To upload your CSV:
- Click Upload: Use the Upload CSV button to select and upload your file.
- Validation Message: Upon upload, a message will indicate how many records are valid and ready for your campaign. For example, "Out of 4650 records in your CSV file, 4650 records are valid."

Using Dynamic Merge Fields
Using dynamic merge fields enhances personalization in your messages. Here’s how:
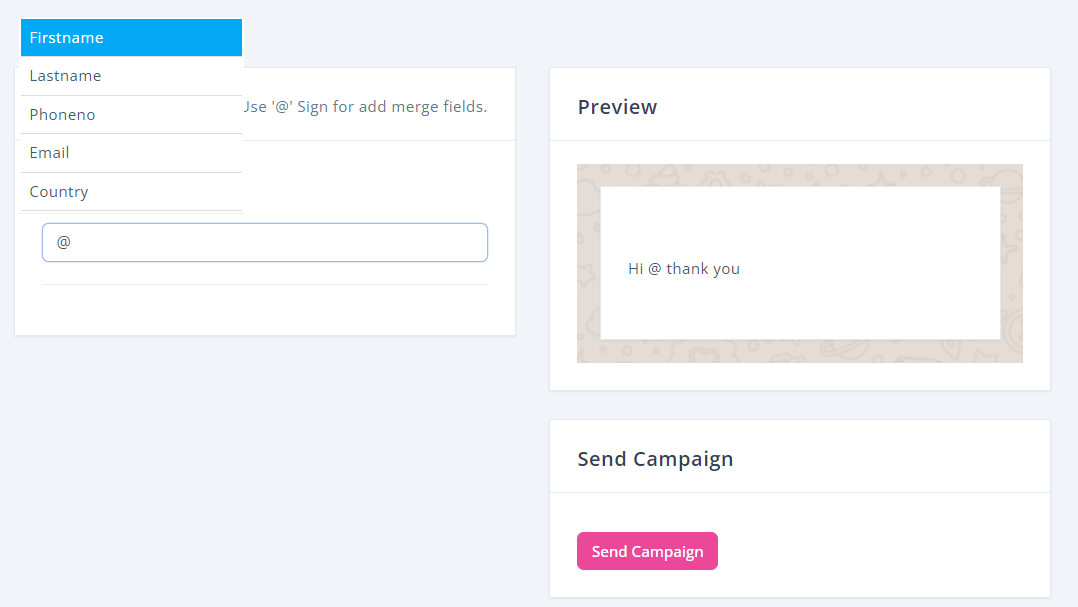
- Dynamic Fields: To include recipient-specific data, use the '@' sign followed by the variable name within your message template.
- Check Availability: Ensure that the selected template supports dynamic fields. This can usually be verified within the campaign setup section.
Previewing and Sending Campaigns
Before dispatching your messages:
- Previewing:
- After configuring your campaign, you’ll see a preview on the right side of the screen. Adjust the content as necessary to ensure it meets your expectations.
- Final Review: Take a moment to double-check all details.
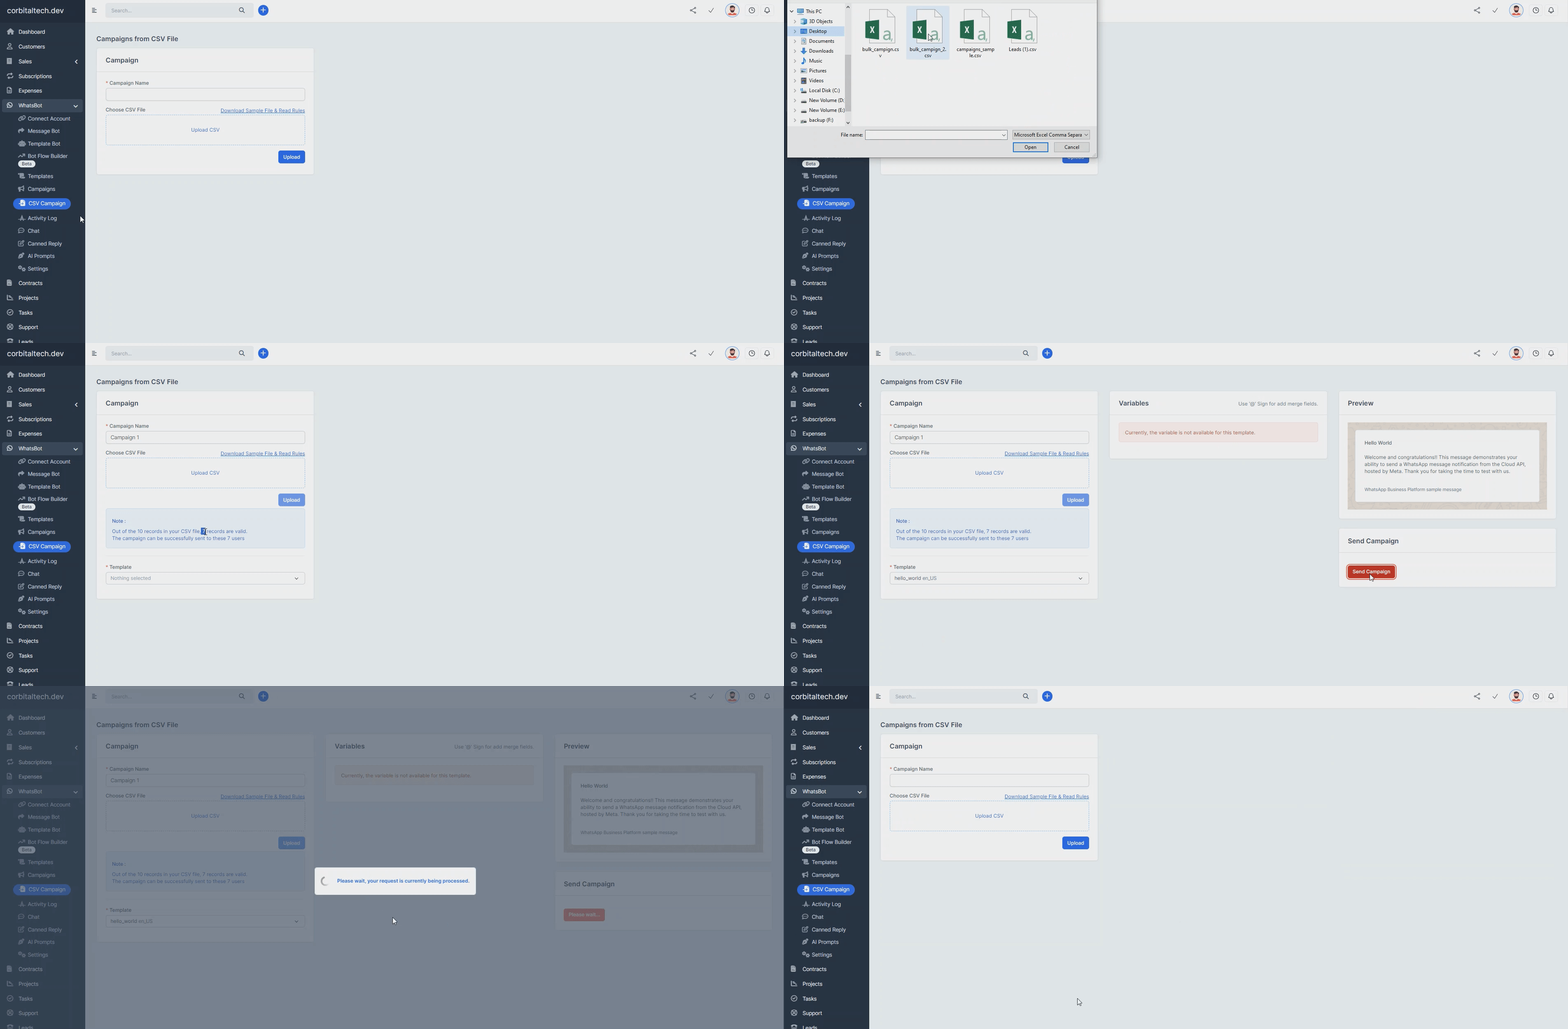
- Sending: Once satisfied, click the Send Campaign button to launch your message to your audience.

How it works
