Contacts
The Contacts tab shows the contacts saved in your workspace. These are the same contacts you see on the website.
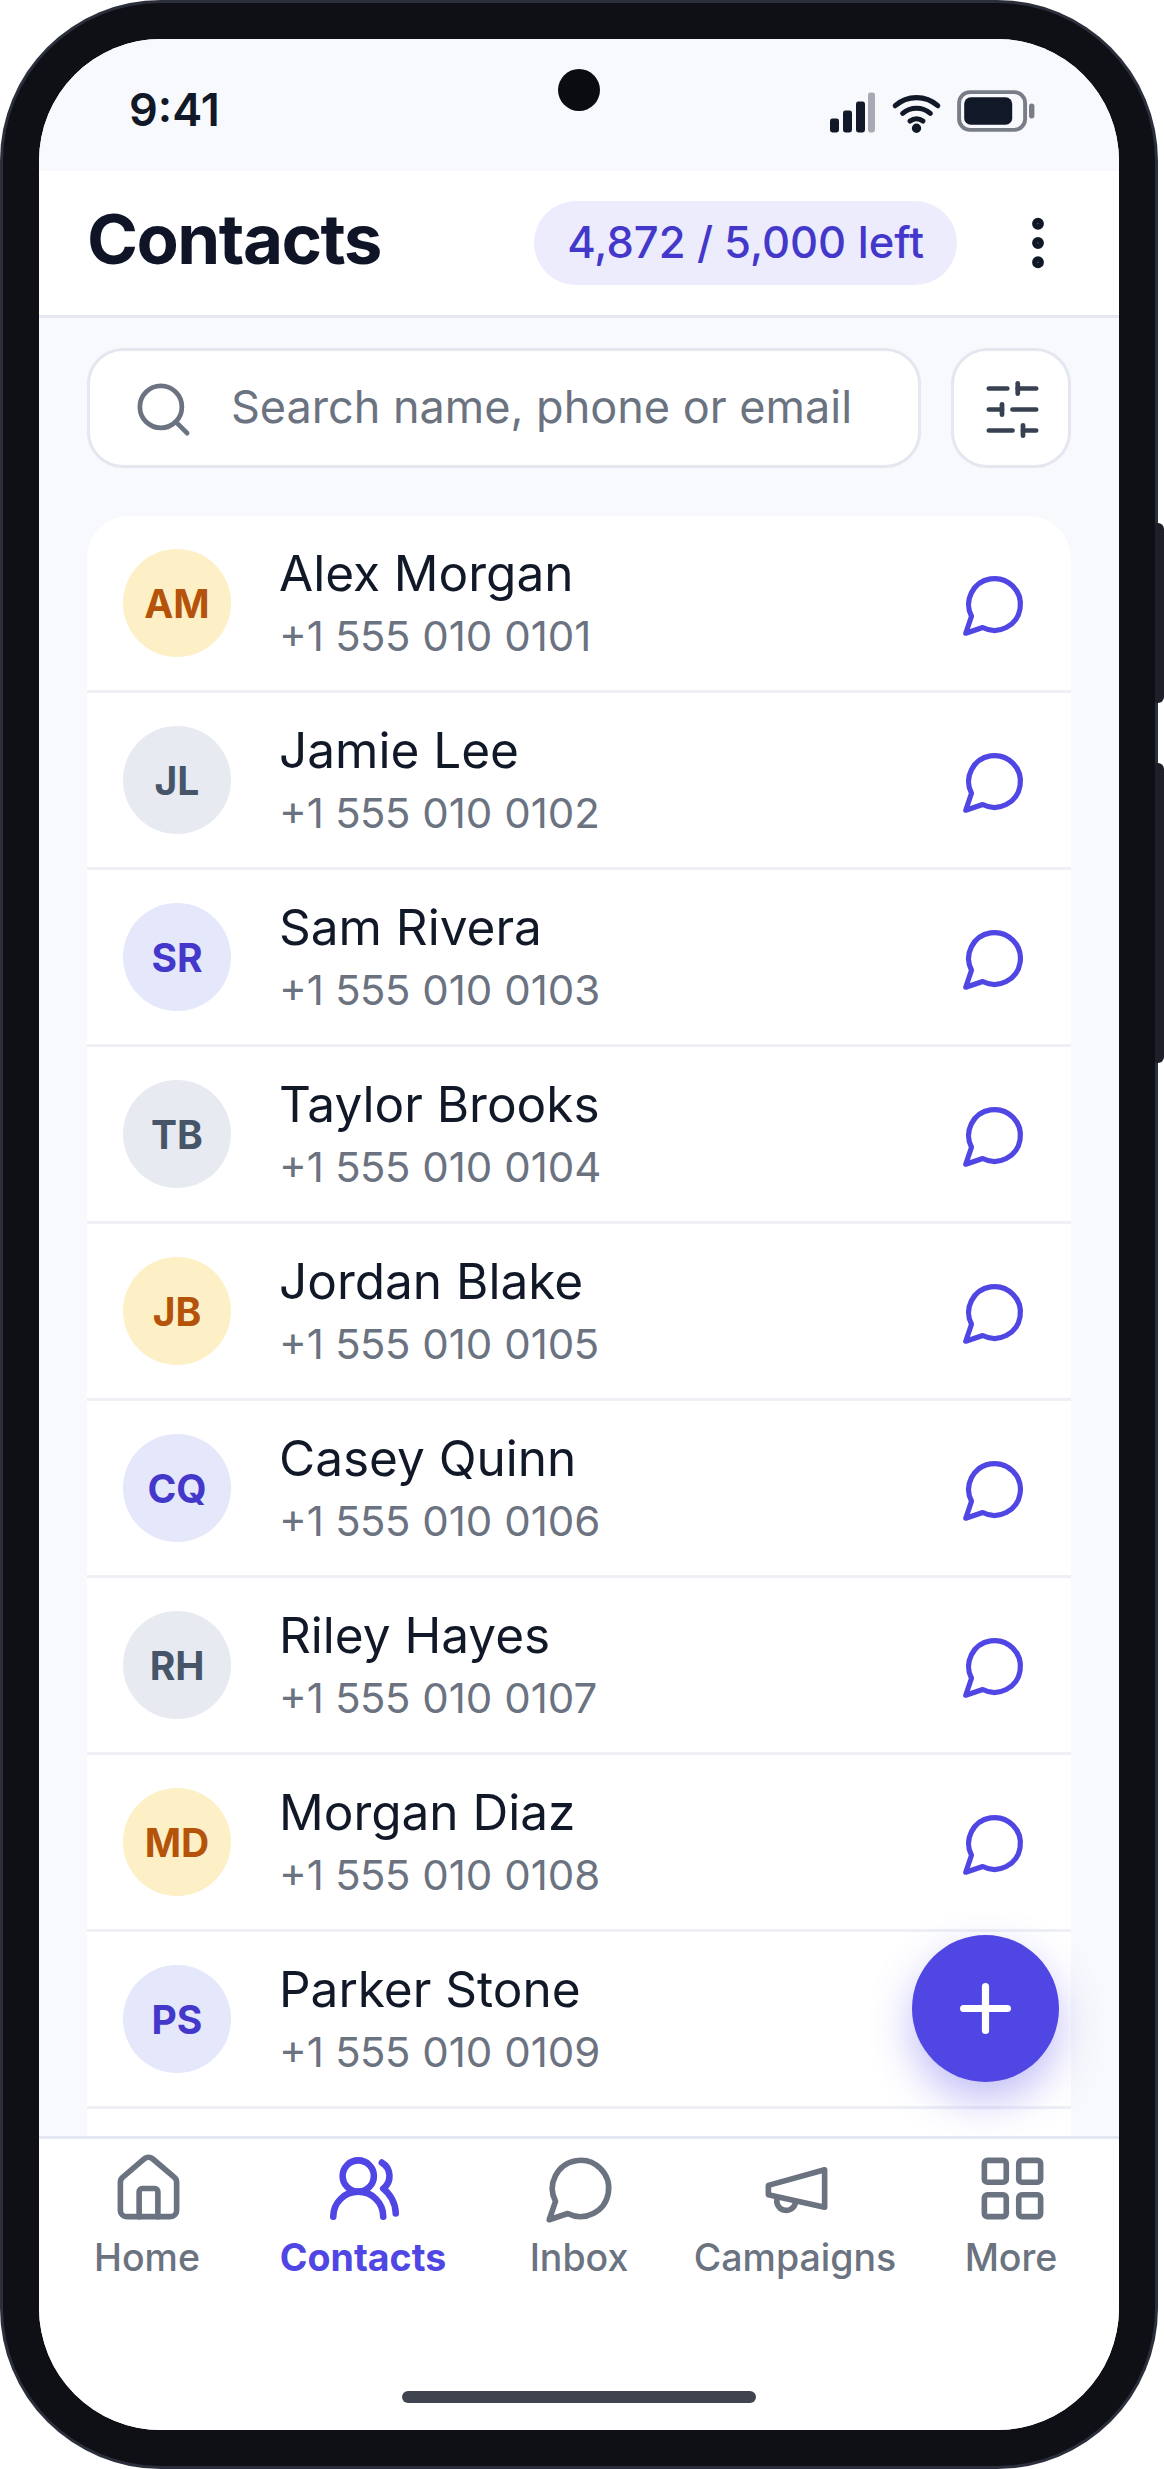
The Contact List
Next to the Contacts title, a label shows how many contacts your plan still allows, for example "4,872 / 5,000 left".
Each row shows the contact's picture or initials, name, phone number and a Message button.
- Tap a contact to open the contact page.
- Tap Message to open the chat with this contact. If there is no chat yet, the app asks you to choose a template to start one.
Search Contacts
Type in the search box. The app searches names, phone numbers, email addresses and company names.
Filter Contacts
Tap the filter button next to the search box to open Filters.
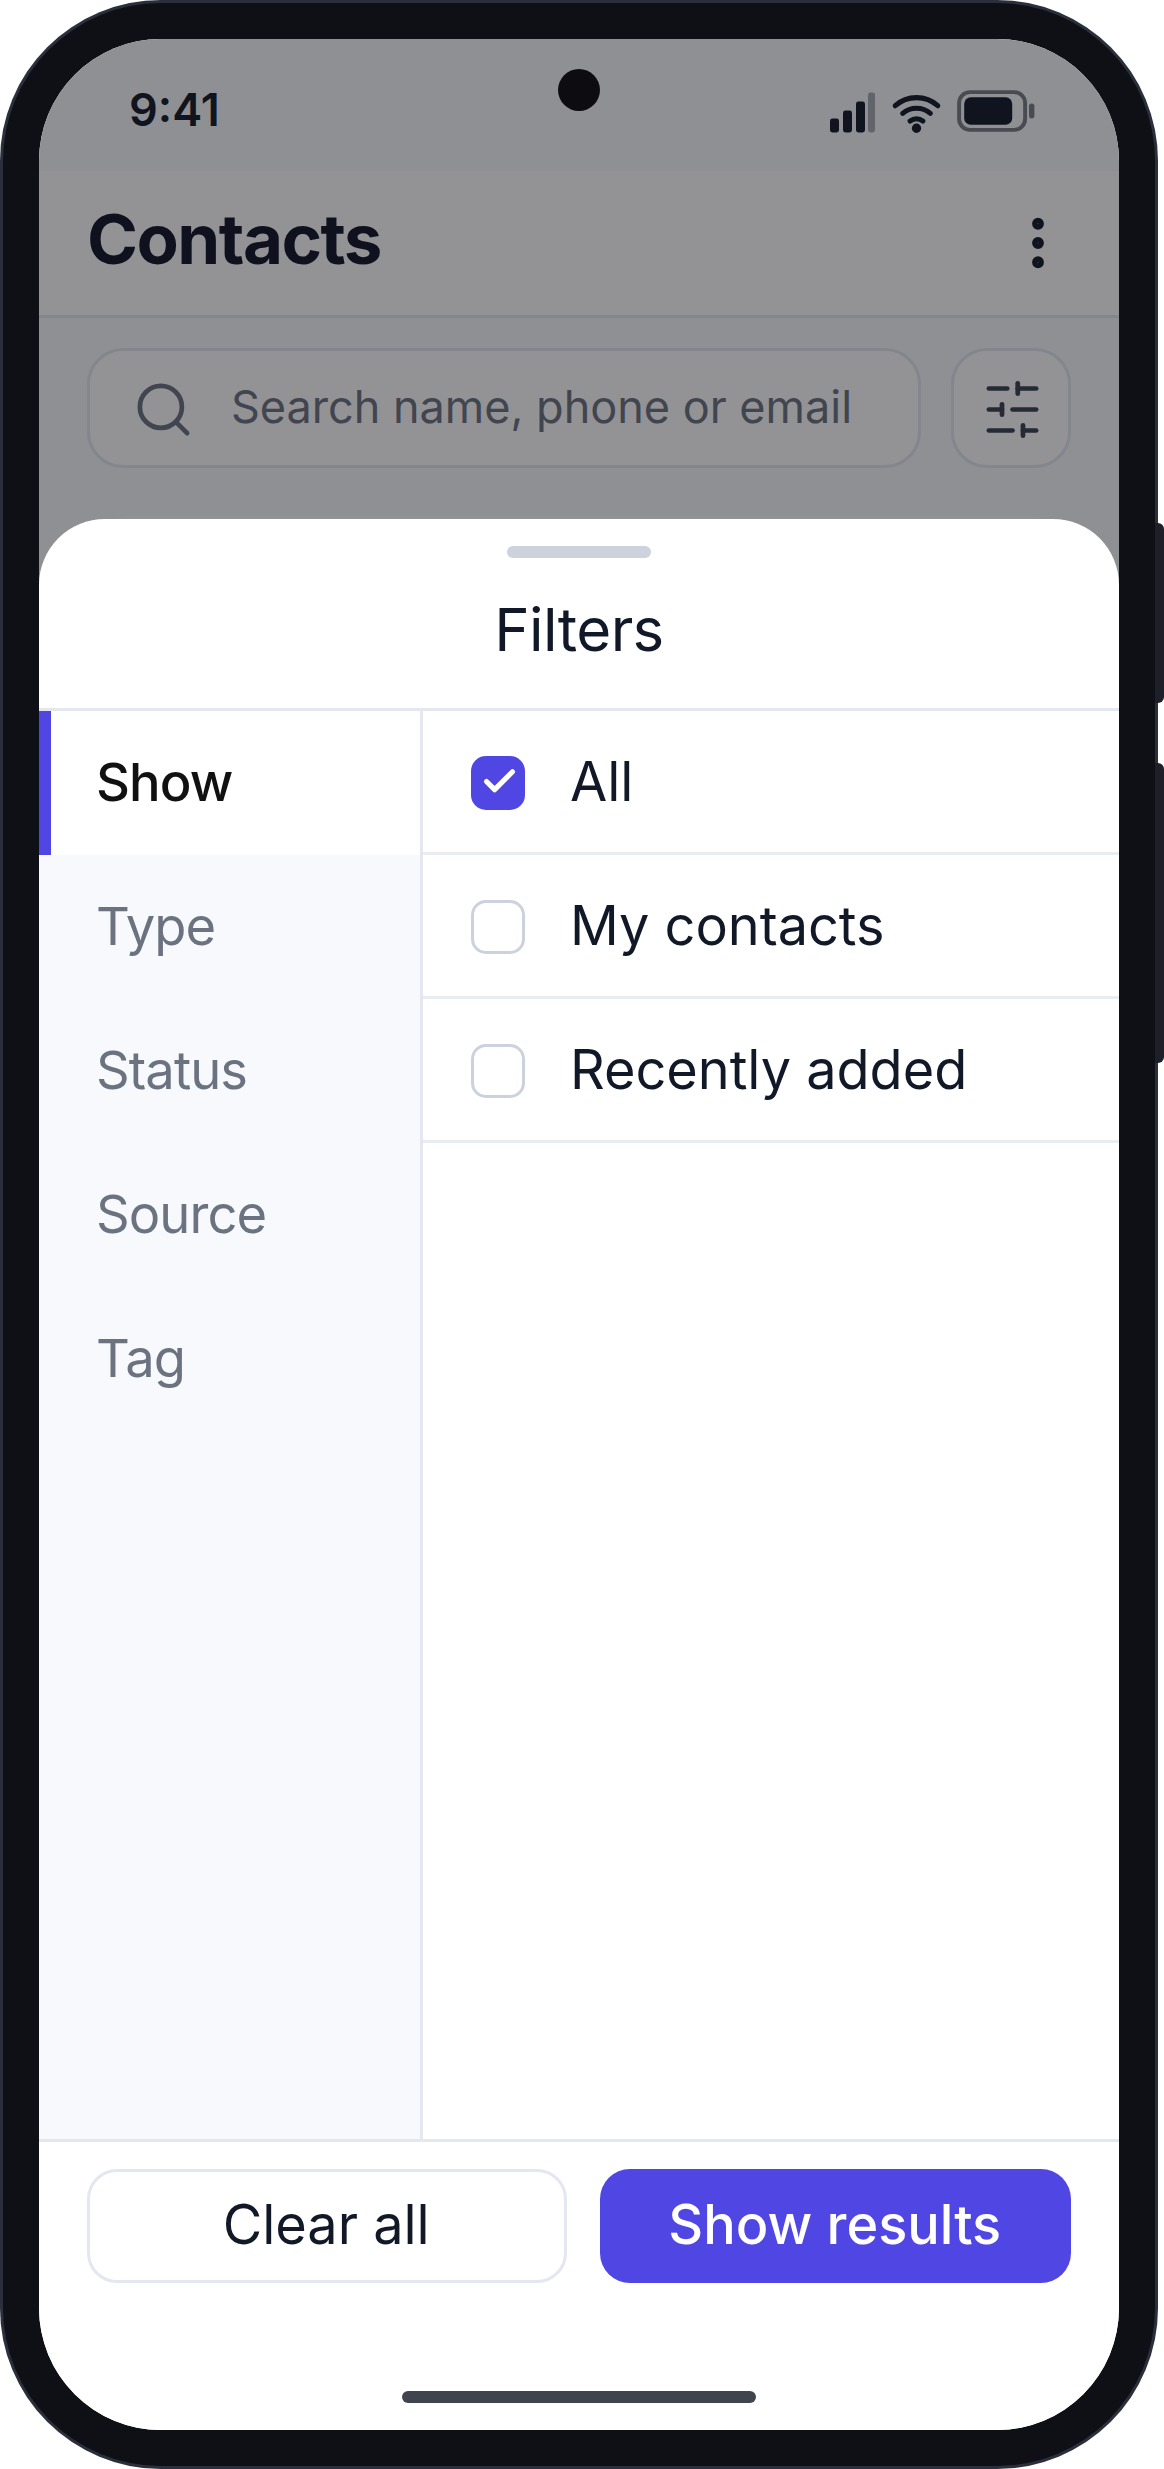
The categories are on the left. Tap a category to see its choices on the right. A dot shows on each category where you picked something.
| Category | Choices |
|---|---|
| Show | All, My contacts (contacts assigned to you) or Recently added (added in the last 7 days) |
| Type | Lead, Customer or Guest |
| Status, Source, Group, Tag | The values set up on your website |
You can pick one choice in each category. Tap a choice again to remove it.
Tap Show results to apply the filters. Tap Clear all to remove them.
The Contact Page
Tap a contact to open the contact page.
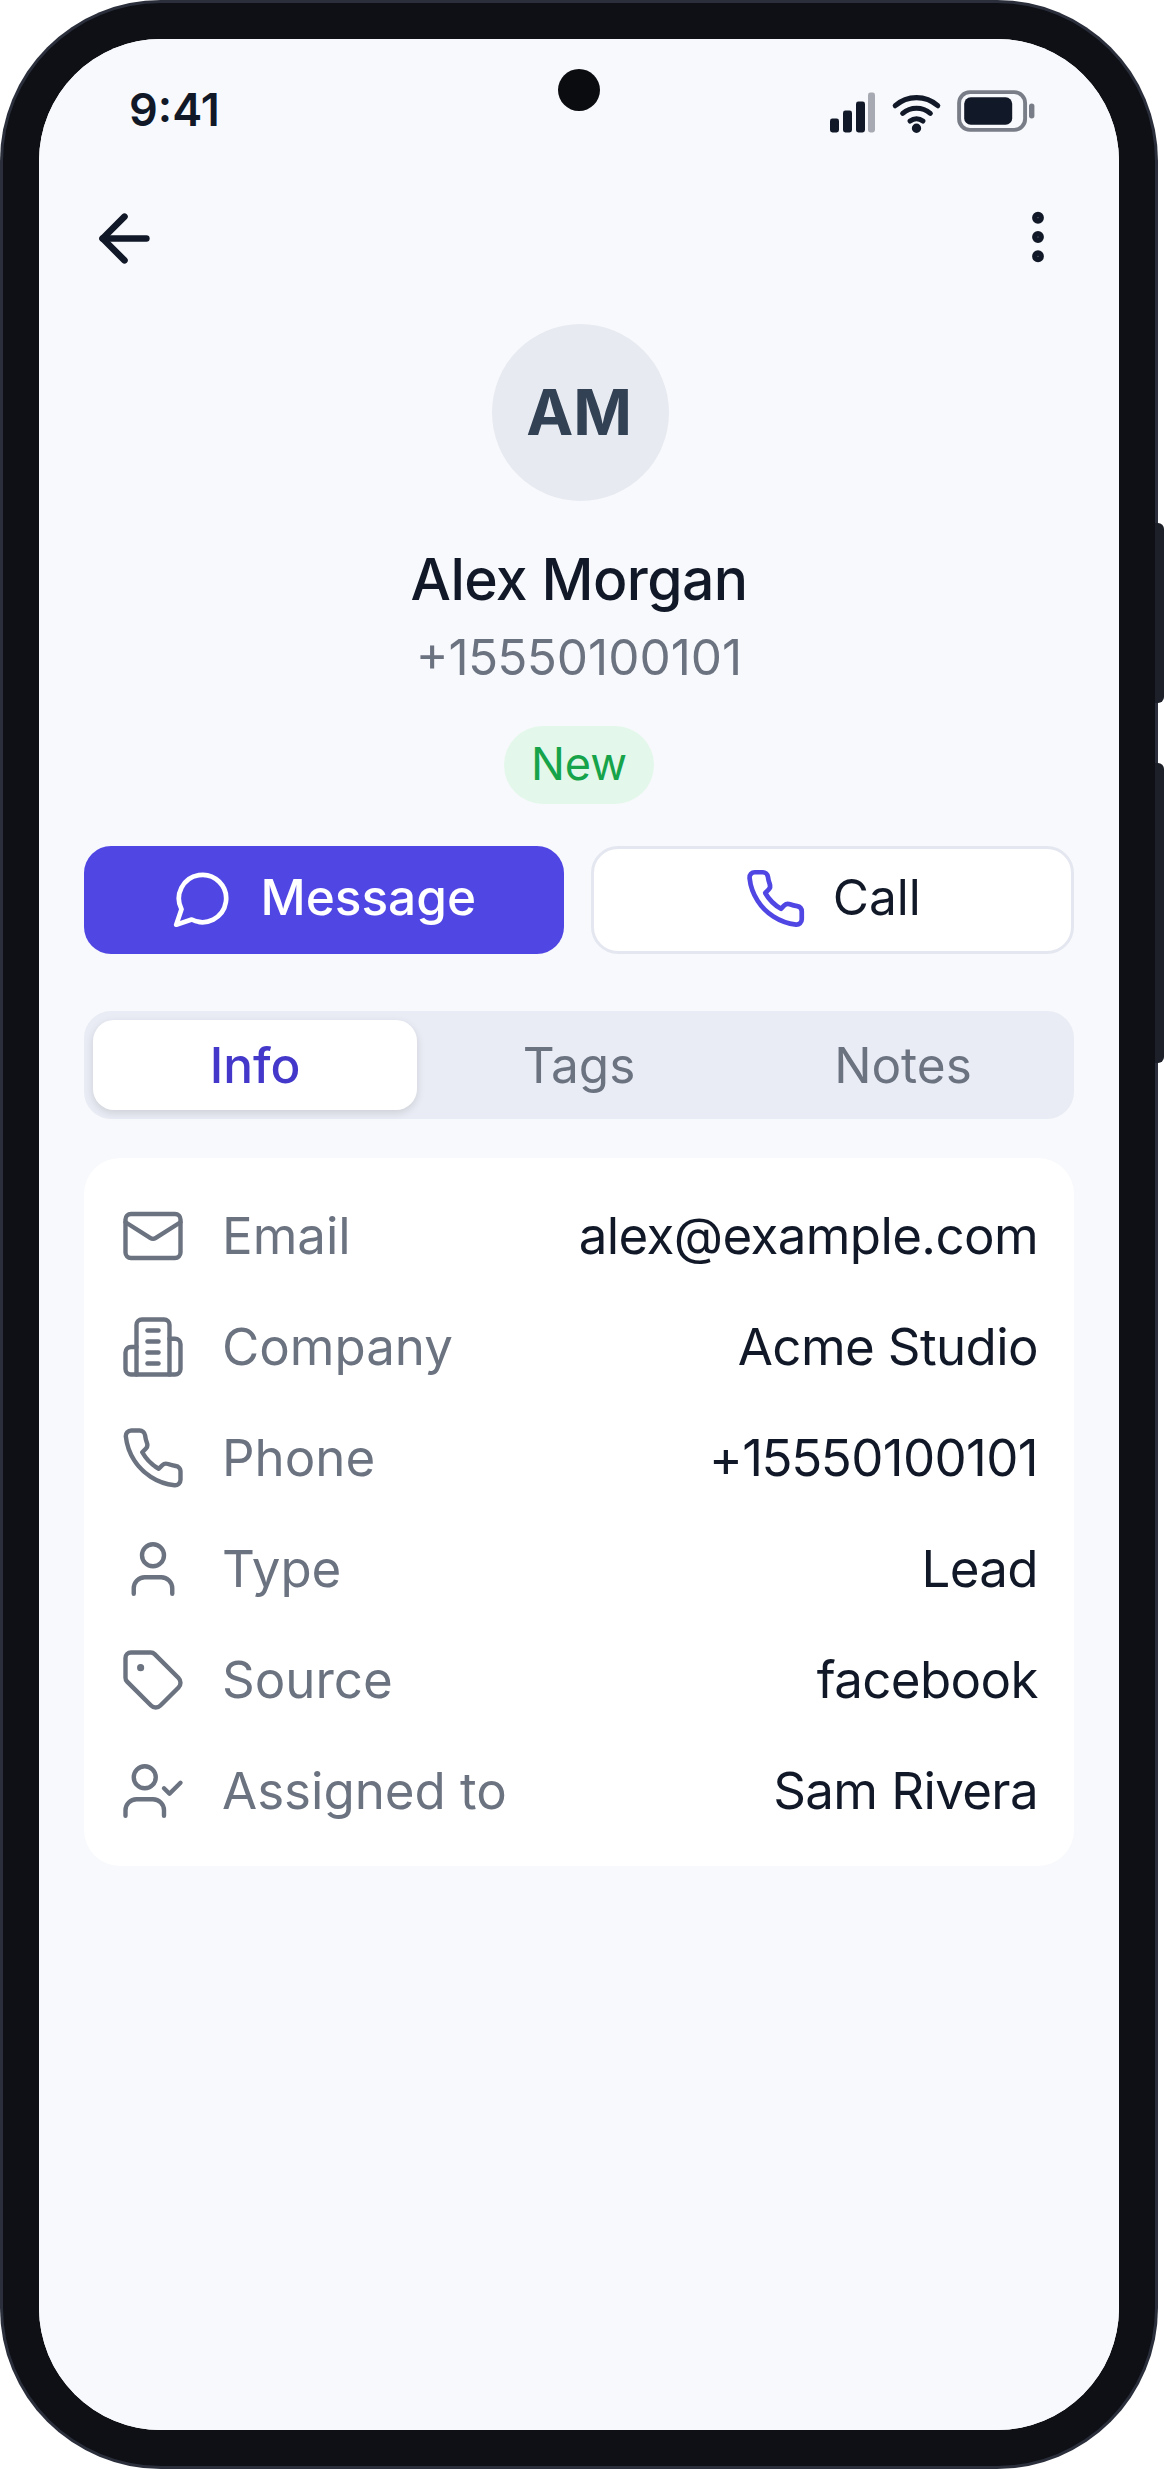
The contact page shows the contact's information, tags, who the contact is assigned to, custom fields and notes. From here you can:
- Message: open the chat with this contact. If there is no chat yet, choose a template to start one. See Template Sending.
- Call: open your phone's dialler with the contact's number.
- Add a note: type the note and add it. Notes are shared with your team.
- Delete a note: tap the bin icon. The app asks "Delete this note?" first.
- Edit: change the contact's details.
- Delete contact: the app asks you to confirm. The contact is deleted, but the chat history stays in the Inbox.
Add or Edit a Contact
To add a contact, tap the + button on the Contacts tab. To edit a contact, open it and tap Edit.
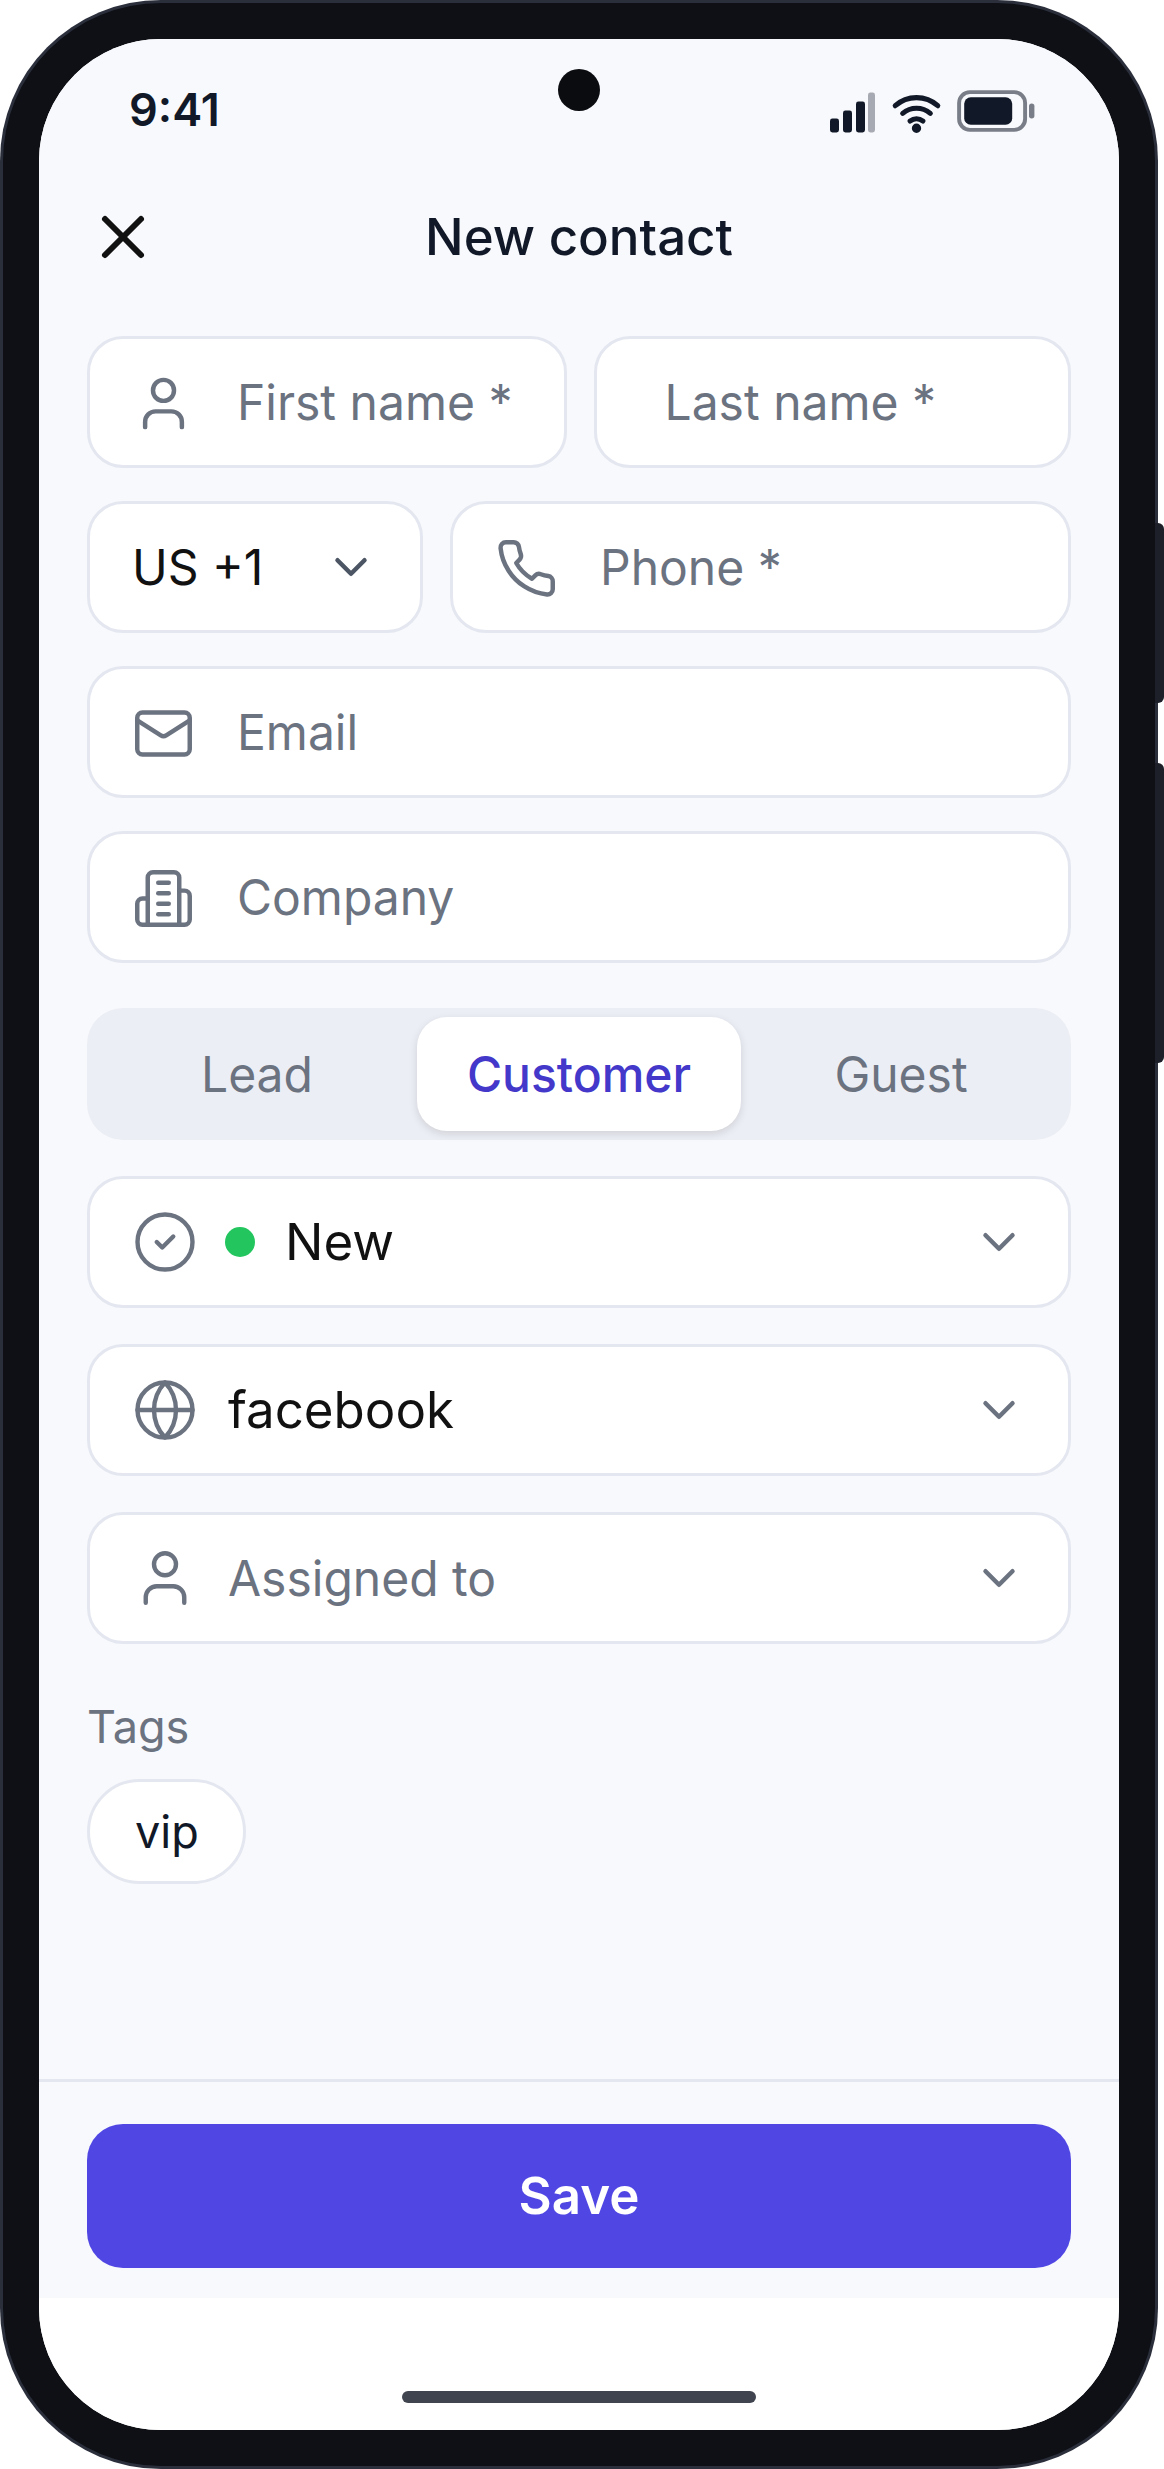
Fill in the form. Fields with a red * are required.
| Field | Notes |
|---|---|
| First name, Last name | |
| Phone | Includes the country code. Your workspace's country is picked for you. Type the rest of the number. Spaces and dashes are removed when you save. |
| Email, Company | |
| Type | New contacts start as Customer. Contacts saved from a chat start as Lead. |
| Status, Source | |
| Assigned to | The staff member responsible for this contact. |
| Tags, Groups | |
| Custom fields | Any extra fields your workspace has set up on the website. |
Tap Save.
If something is wrong, the app shows a message under the field. For example, the website does not allow two contacts with the same phone number.
If your plan's contact limit is reached, a banner says so. Upgrade your plan on the website to add more contacts.
Select Several Contacts
You can act on several contacts at once.
- Tap ⋮ → Select contacts, or press and hold a contact.
- Tap each contact you want, or tap Select all.
- Choose an action from the bar at the bottom.
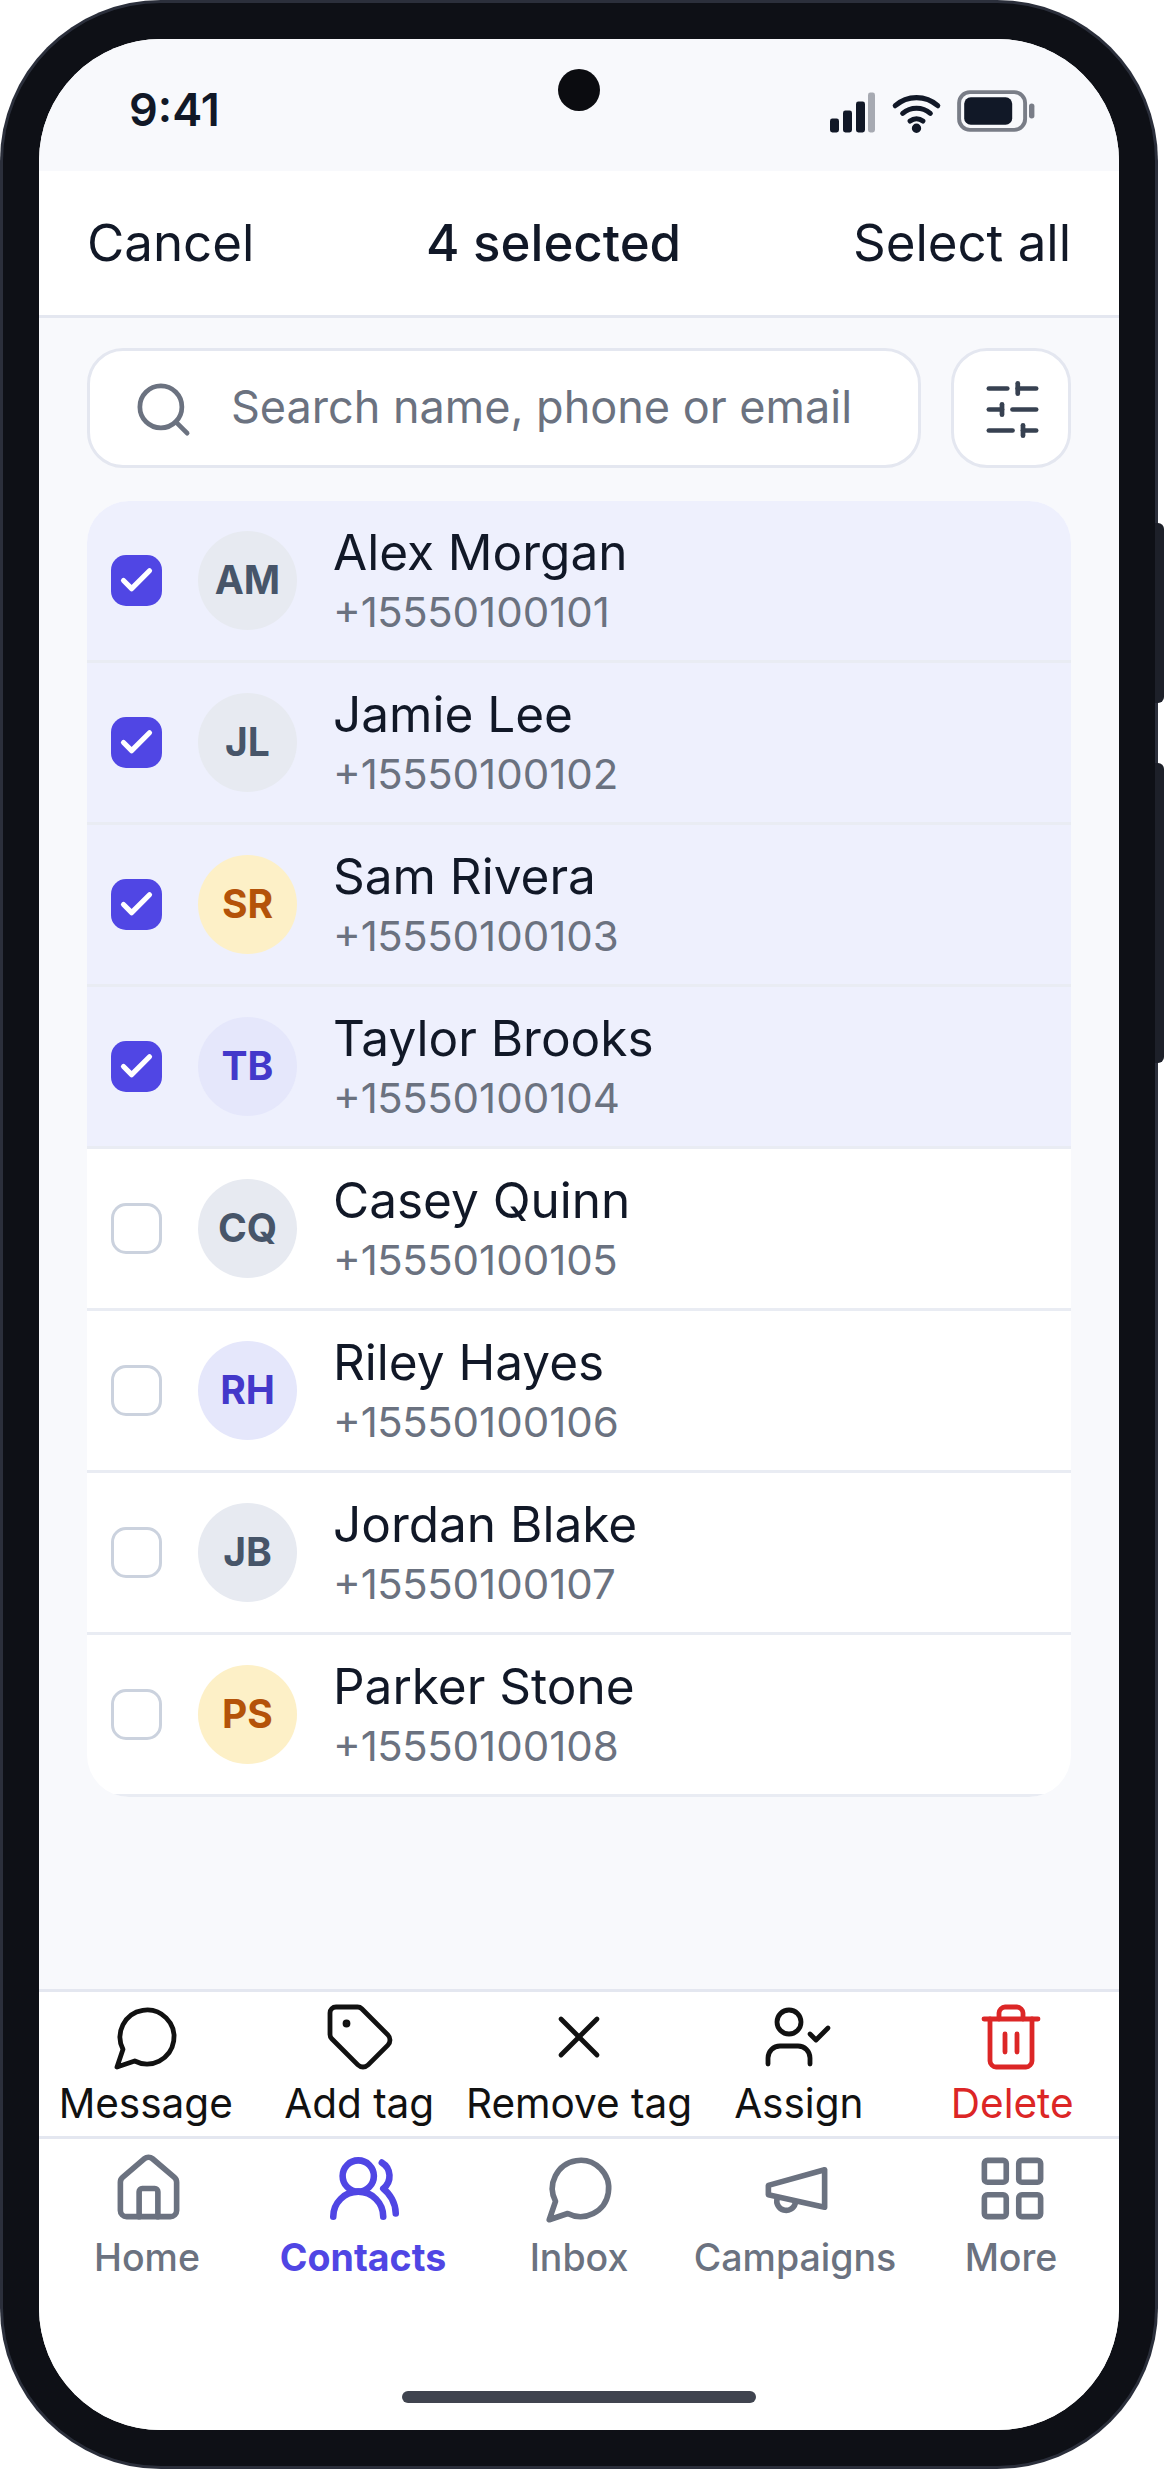
| Action | What it does |
|---|---|
| Message | Send a template to up to 50 contacts at once. Choose a template, fill in the values, and tap Send. Customer details, such as the first name, are filled in for each contact. The app then tells you how many chats were started, for example "Started chats with 3 of 4 contacts". |
| Add tag | Add a tag to all selected contacts. |
| Remove tag | Remove a tag from all selected contacts. |
| Assign | Assign the selected contacts to a staff member. Owners and admins only. |
| Delete | Delete the selected contacts. The app asks you to confirm first. |
Next Step
Continue with Import and Export Contacts.