Import and Export Contacts
Add many contacts at once from a CSV file, or download your contacts as a CSV file. A CSV file is a spreadsheet you can open in Excel or Google Sheets.
To start, open the Contacts tab and tap ⋮ at the top right.
Export Contacts
- Tap ⋮ → Export contacts.
- If you have a search, My contacts or a tag selected, the file only includes those contacts.
- Otherwise, the file includes all your contacts.
- The app creates the file and opens your phone's share menu.
- Choose where to send or save the file, for example your phone's Files app, Google Drive or email.
The file has the same columns as the export on the website: name, company, type, phone, email, status, source, assigned staff member, active, opted out and created date.
INFO
The Recently added filter is not applied to exports. If you use it, the export includes all contacts.
Staff members who are not allowed to see phone numbers get the numbers hidden in the file, the same as in the app.
Import Contacts
The import screen has three steps.
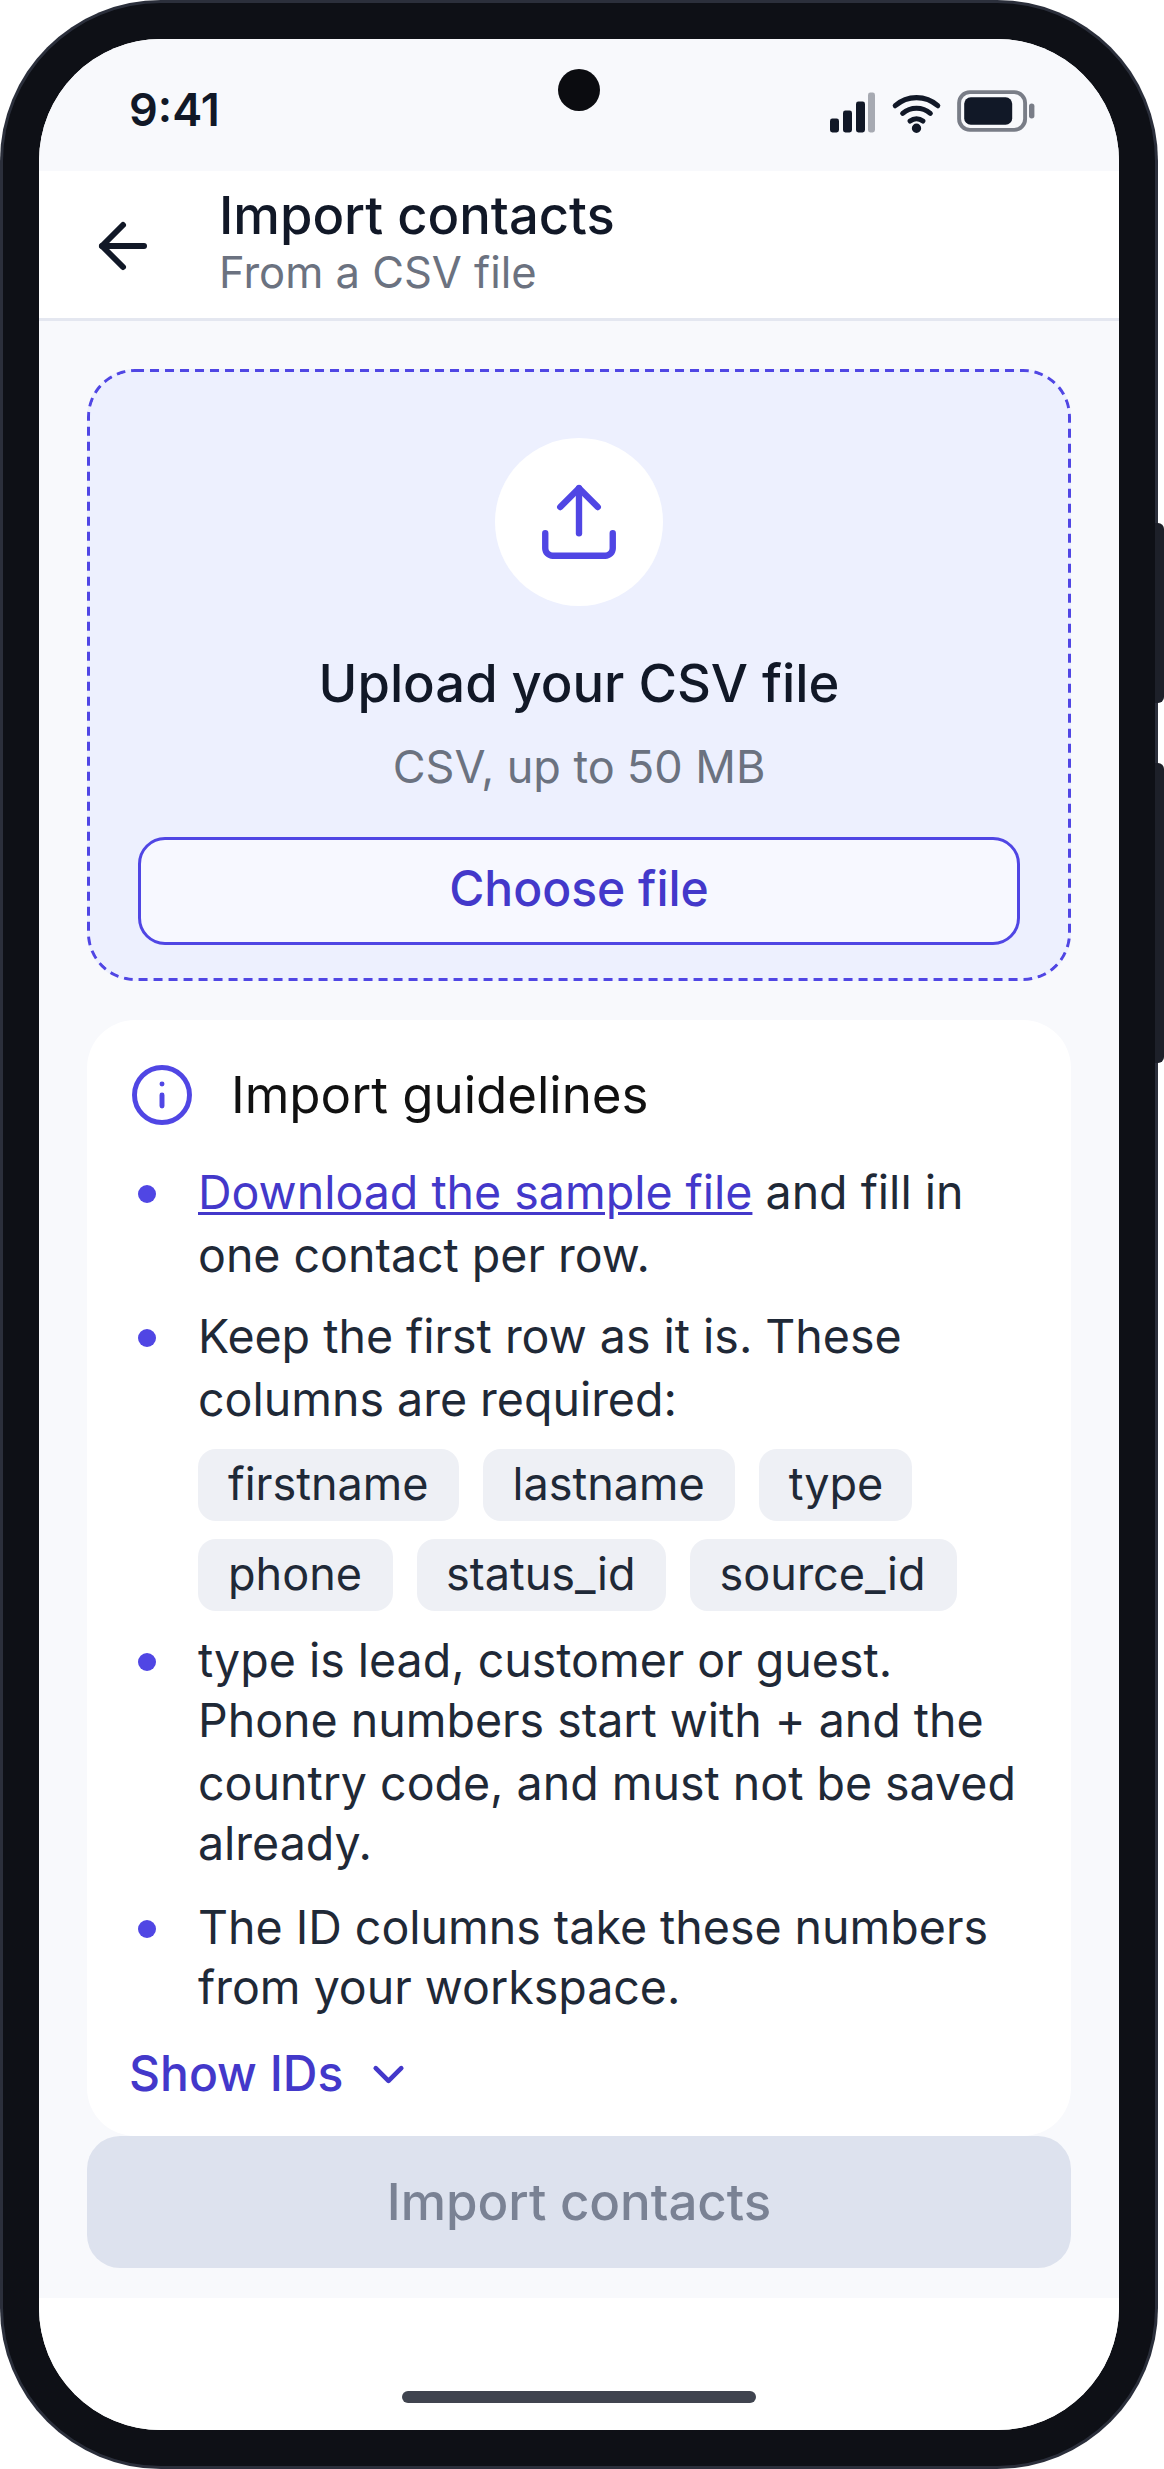
Step 1: Get the Sample File
Under Import guidelines, tap Download the sample file to get a sample CSV file.
The sample file already includes a column for each custom field in your workspace.
These columns are required:
| Column | What to put in it |
|---|---|
firstname | The contact's first name |
lastname | The contact's last name |
type | The contact type, for example lead or customer |
phone | The phone number with the country code |
status_id | The ID number of the contact's status (see Step 2) |
source_id | The ID number of the contact's source (see Step 2) |
Do not rename the columns. The import only works when the column names are exactly the same as in the sample file.
Step 2: Find Your ID Numbers
Some columns need an ID number instead of a name. For example, the status "New" might have the ID 1.
Tap Show IDs to see the ID numbers for your workspace's statuses, sources, groups and staff members. Use these numbers in your CSV file.
Step 3: Upload Your File
- Under Upload your CSV file, tap Choose file and pick your CSV file. The file must be a CSV file and can be up to 50 MB.
- Tap Import contacts.
The app uploads the file and shows the progress. The website then checks the columns.
| Message | What to do |
|---|---|
| Choose a .csv file. | The file is not a CSV file. Save your spreadsheet as CSV and try again. |
| Missing required columns: phone | A required column is missing. Add it, using the sample file as a guide. |
| The file is empty | Add your contacts to the file and try again. |
| Contact limit banner (red) | Your plan's contact limit is reached. Upgrade your plan on the website. |
Import Results
After the upload, the import results screen opens.
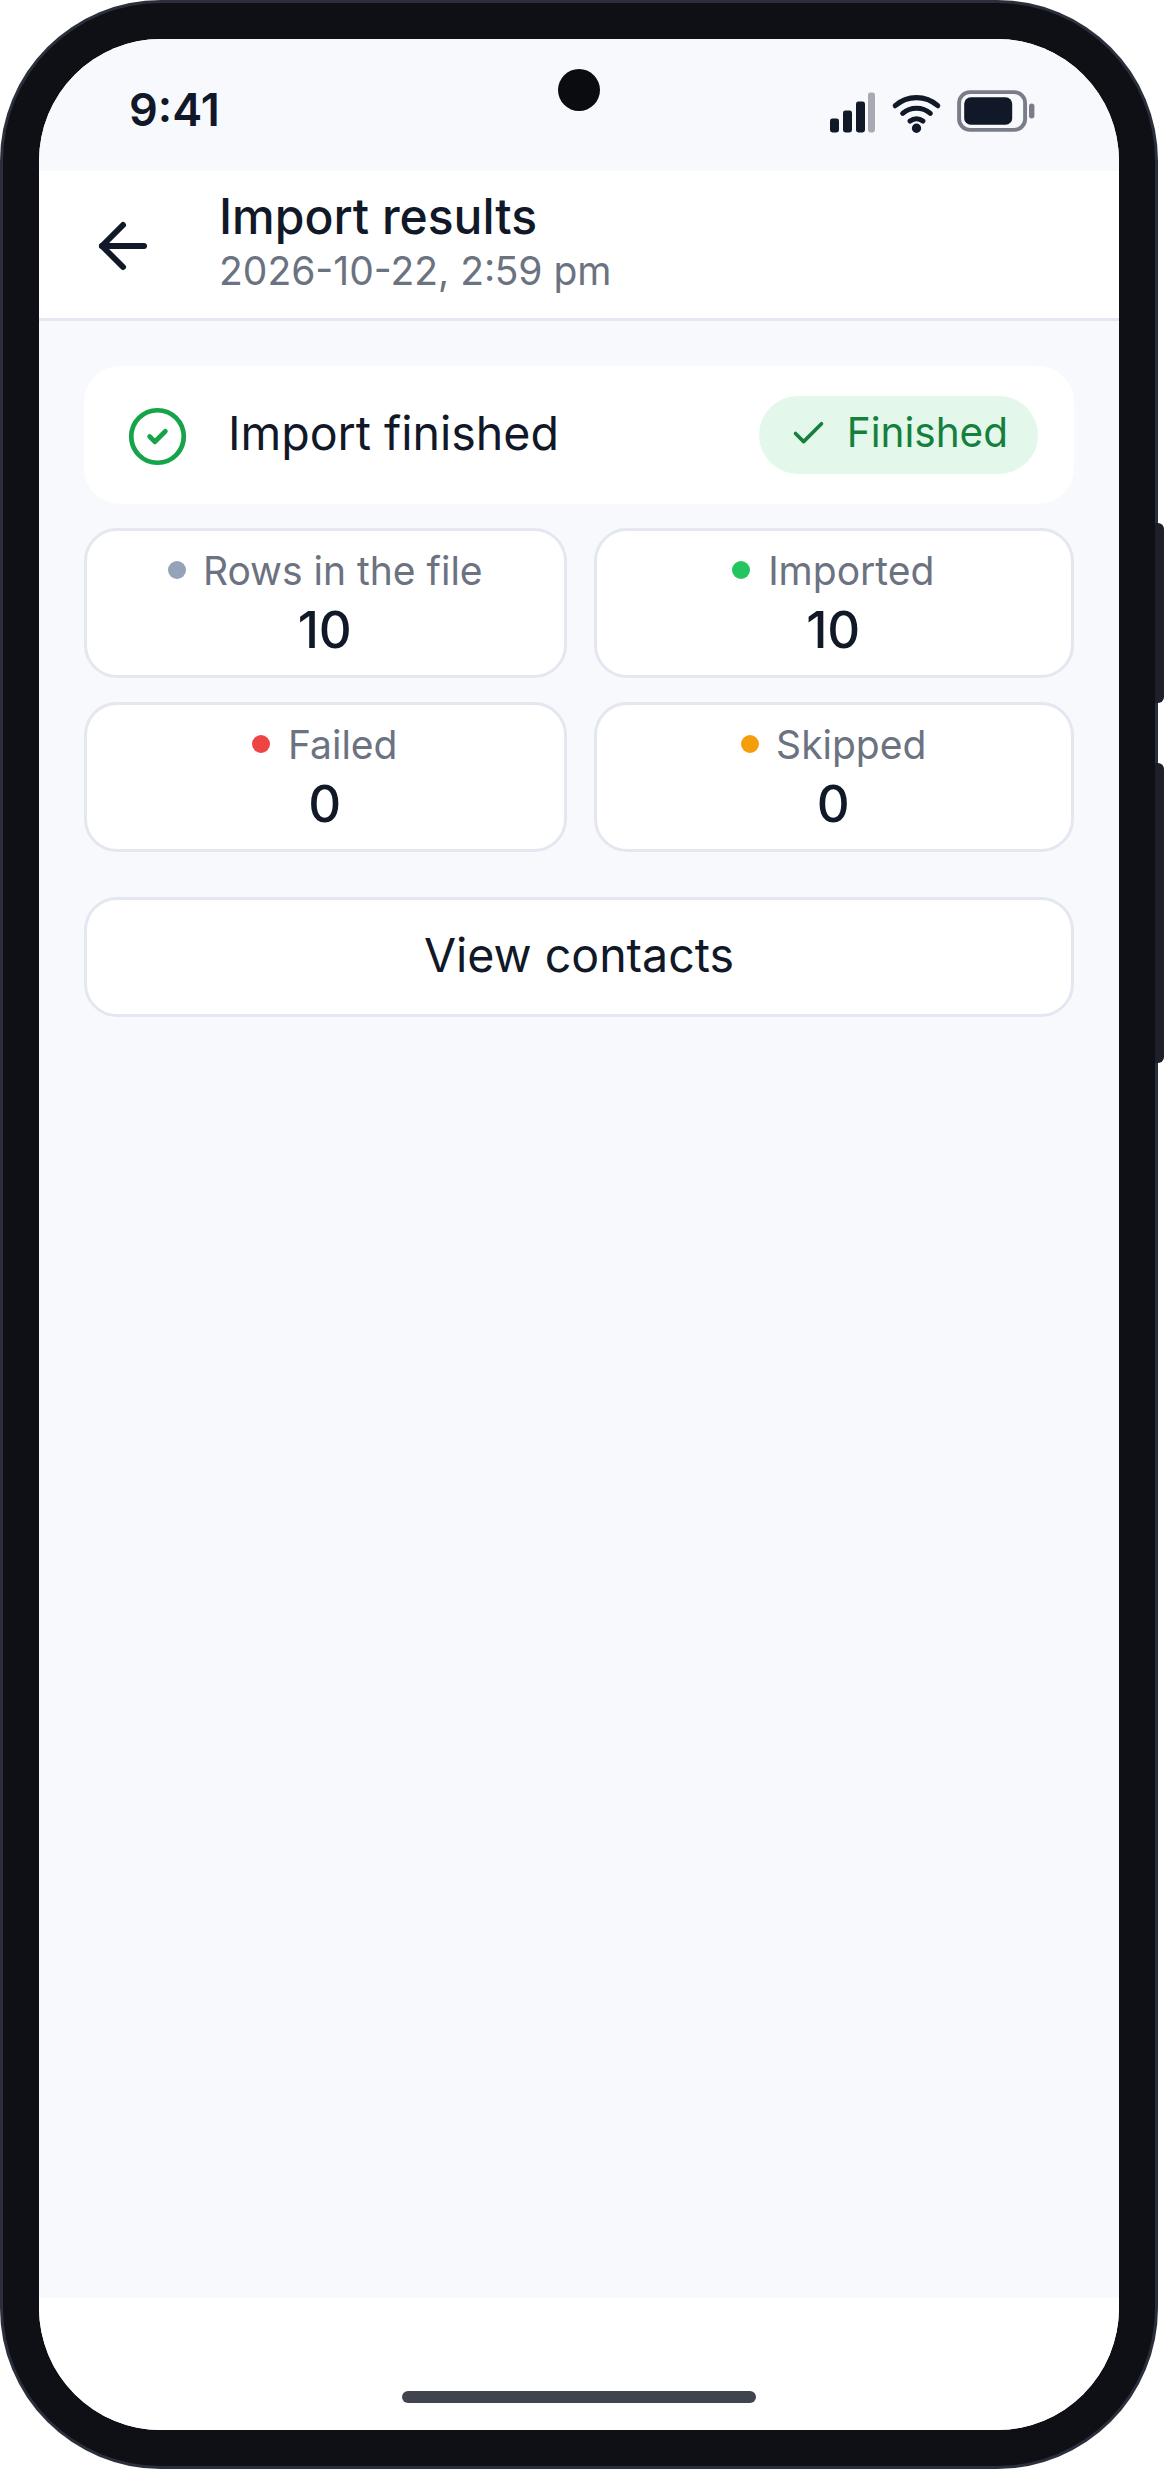
While the import runs, the screen shows Importing… with a progress bar, for example "60 of 150 rows checked".
When the import finishes, you see Import finished (or Import failed) with:
- The number of rows in the file.
- How many contacts were imported, failed and skipped.
- Rows not imported: each row that failed and why, for example "Row 4 · phone: The phone has already been taken." Up to the first 200 rows are shown.
Tap View contacts to go back to your contact list. The list reloads with the new contacts.
You can leave the screen
The import keeps running if you leave the screen. To see it again, open the import screen and tap Past imports.
Next Step
Continue with Campaigns.