Create a New Campaign
You can create a WhatsApp campaign from your phone in five short steps. A campaign sends one approved template to one type of contact: leads, customers or guests.
Before You Start
Make sure:
- Your role allows you to create campaigns.
- Your workspace's WhatsApp account is connected on the website.
- You have at least one approved WhatsApp template.
- Your plan's campaign limit is not reached.
Open New Campaign
On the Campaigns tab, tap +. If you have no campaigns yet, tap Create campaign.
The app first shows "Checking your workspace…". It checks your permission, your WhatsApp connection and your plan's campaign limit. If something is missing, a screen explains what to do:
| Screen | What to do |
|---|---|
| No permission | Ask your workspace owner for permission to create campaigns. |
| WhatsApp not connected | Tap Connect on the website and connect WhatsApp there. |
| Plan limit reached | The screen shows your usage. Tap Upgrade on the website to upgrade your plan. |
The Setup List
When the checks pass, you see the setup list.
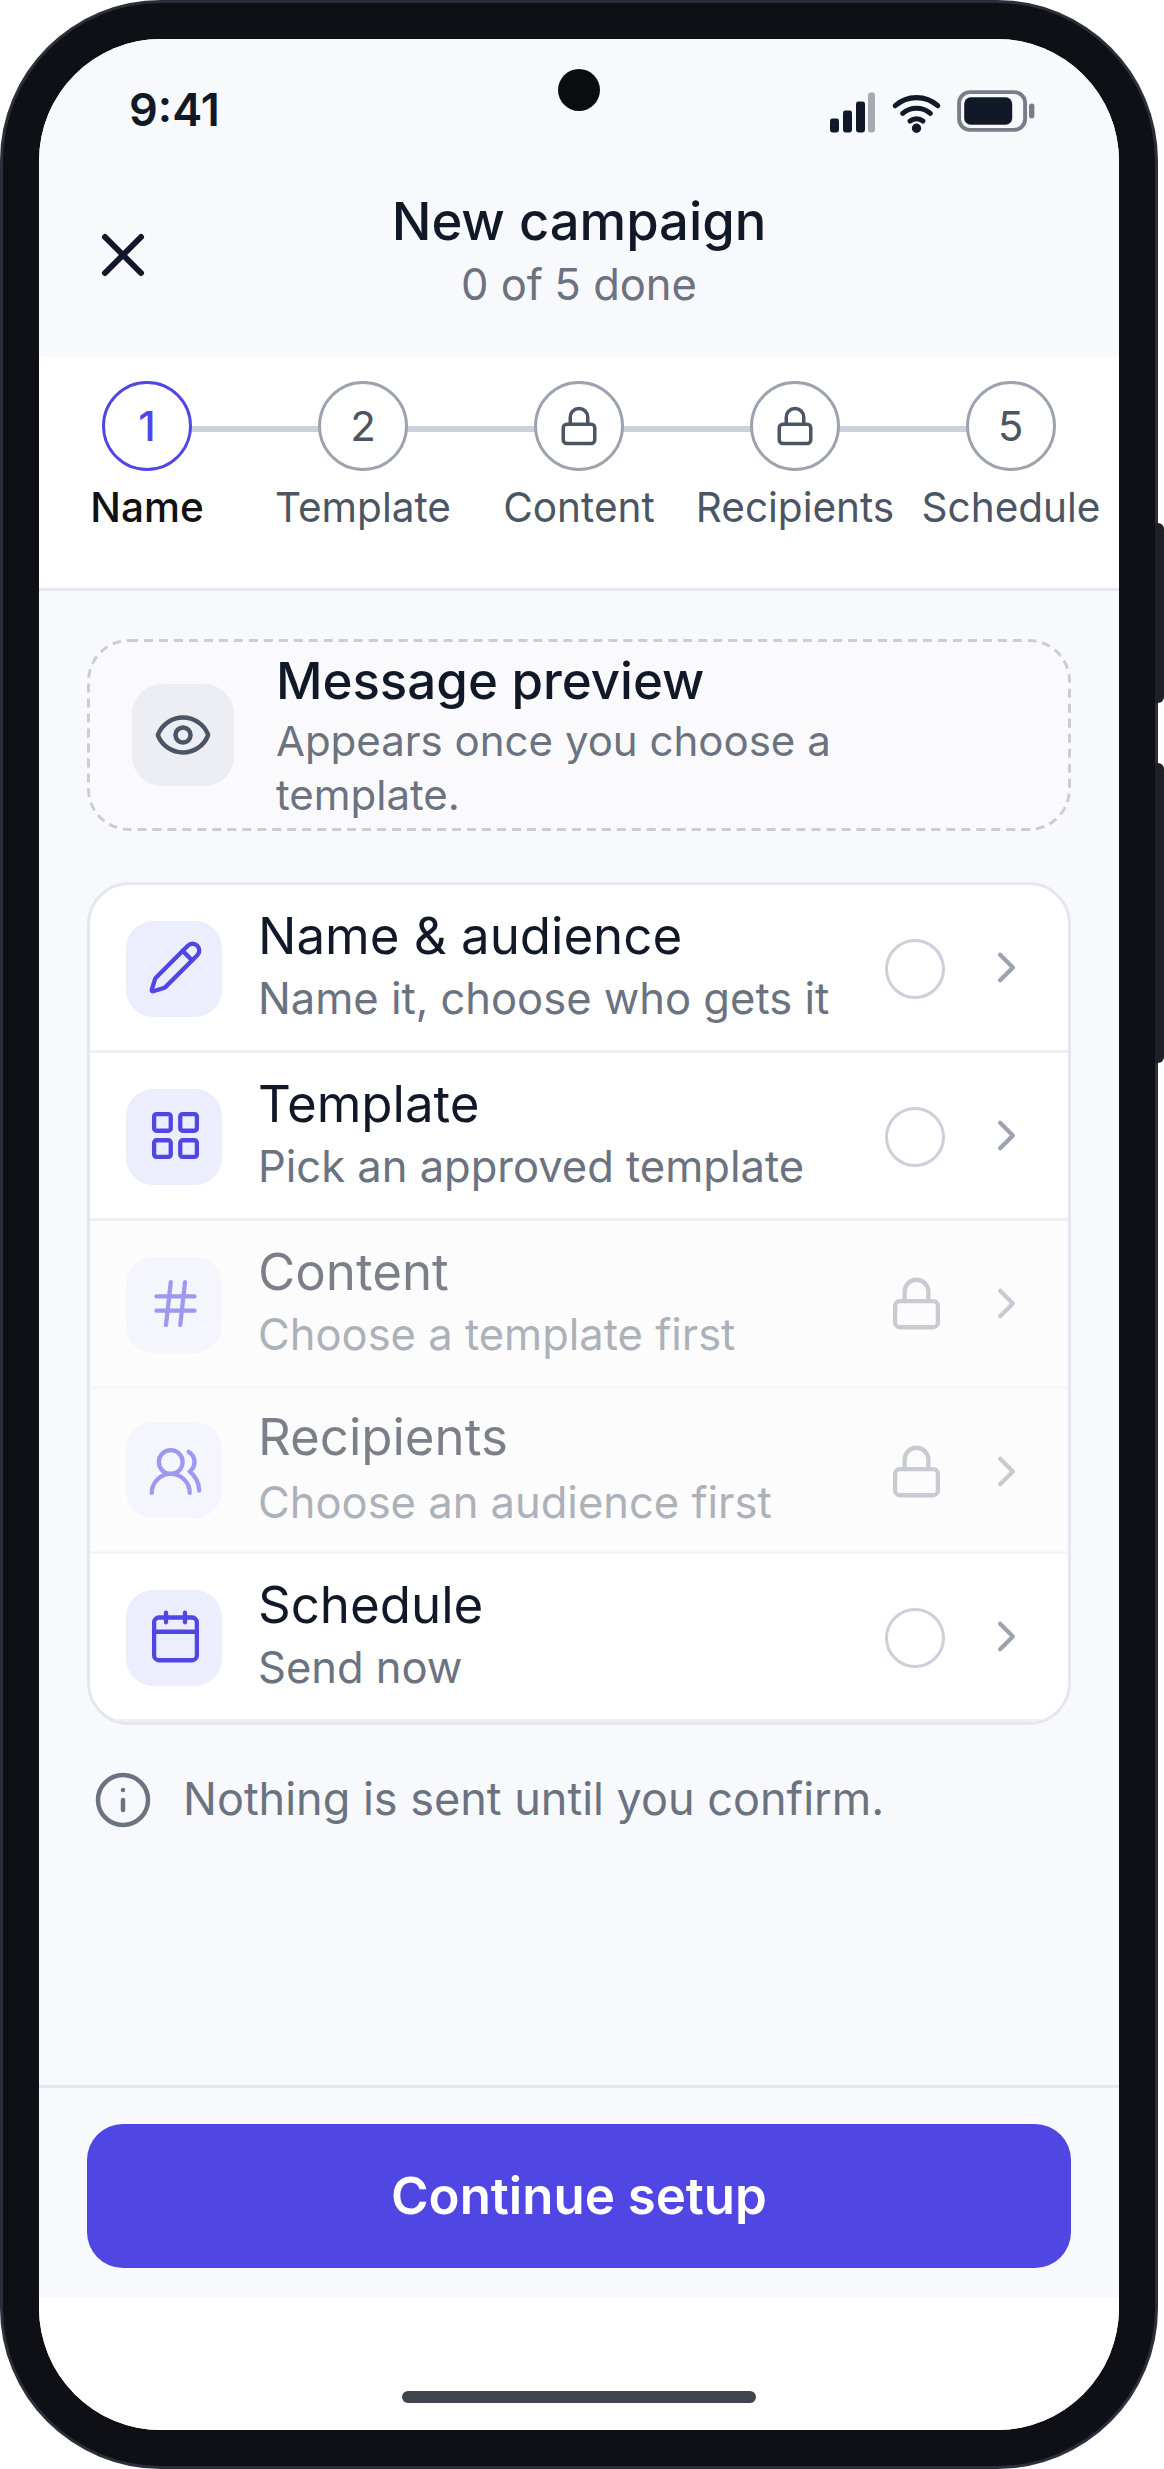
The top shows "New campaign · 2 of 5 done" with a progress bar, and a preview of your message once you have chosen a template.
The list has five sections. Each section has a label:
| Label | Meaning |
|---|---|
| To do | You have not done this section yet. |
| In progress | You started this section. |
| Done | This section is complete. |
| Fix | Something in this section needs your attention. |
| Locked | Finish an earlier section first. |
Tap Continue setup to open the next section you need to do. You can also tap any section to open it.
In each section, tap Save & next to save it and open the next section. If something is missing, a message shows under the box.
Step 1: Name & Audience
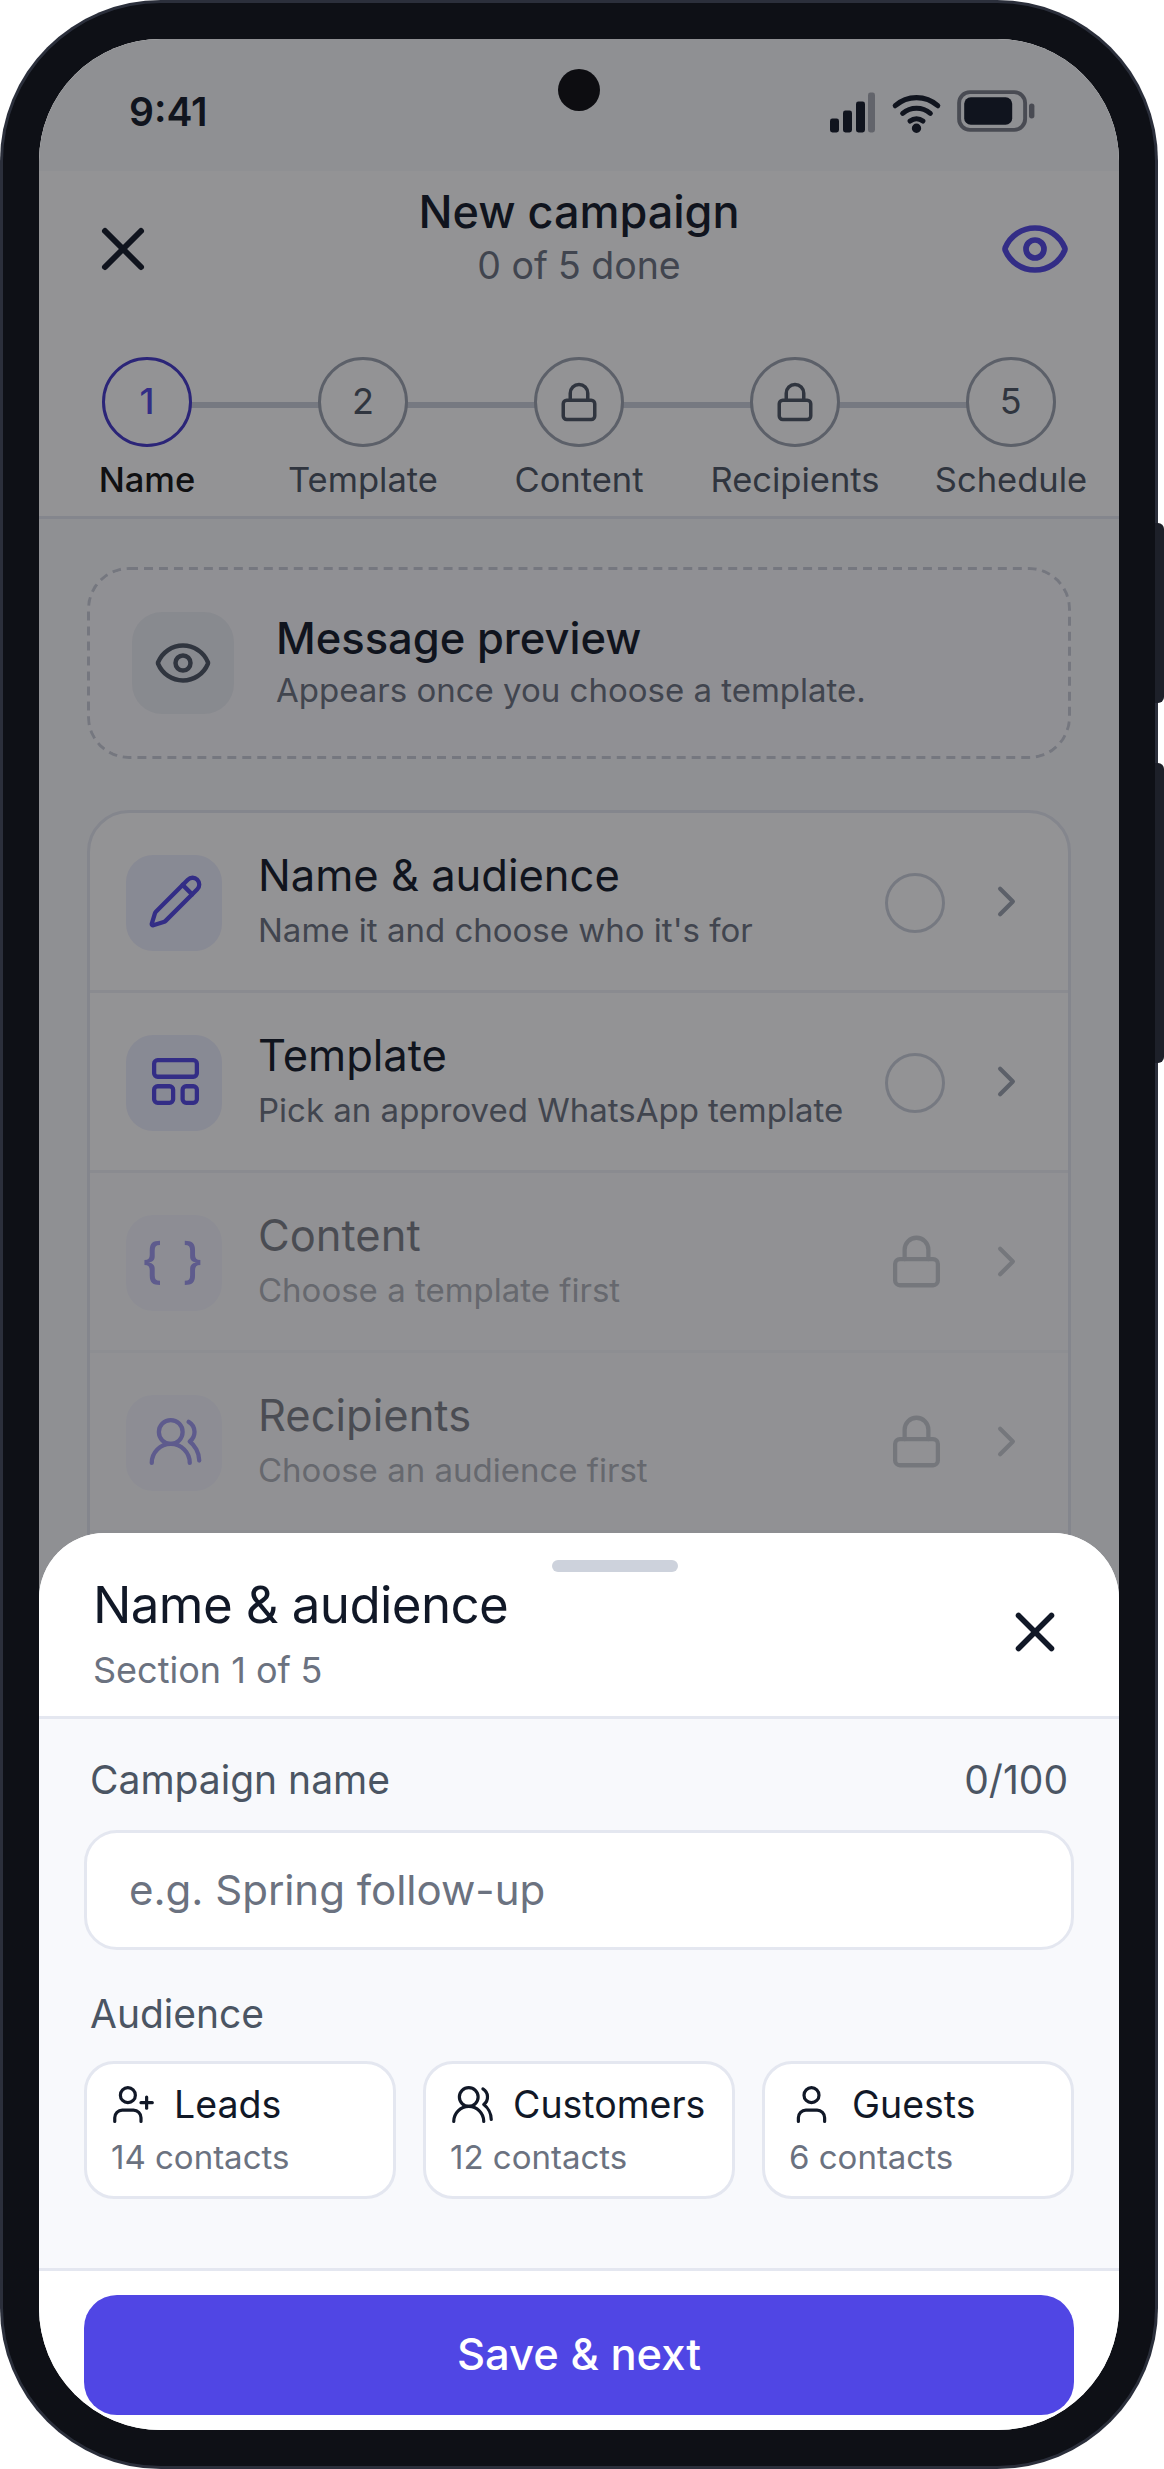
- Type a name for the campaign. The name must have 3 to 100 characters. Only your team sees it.
- Choose who the campaign is for: Leads, Customers or Guests. Each option shows how many contacts of that type you have.
If a type has no contacts, it says "No contacts". You cannot send a campaign to that type.
Step 2: Template
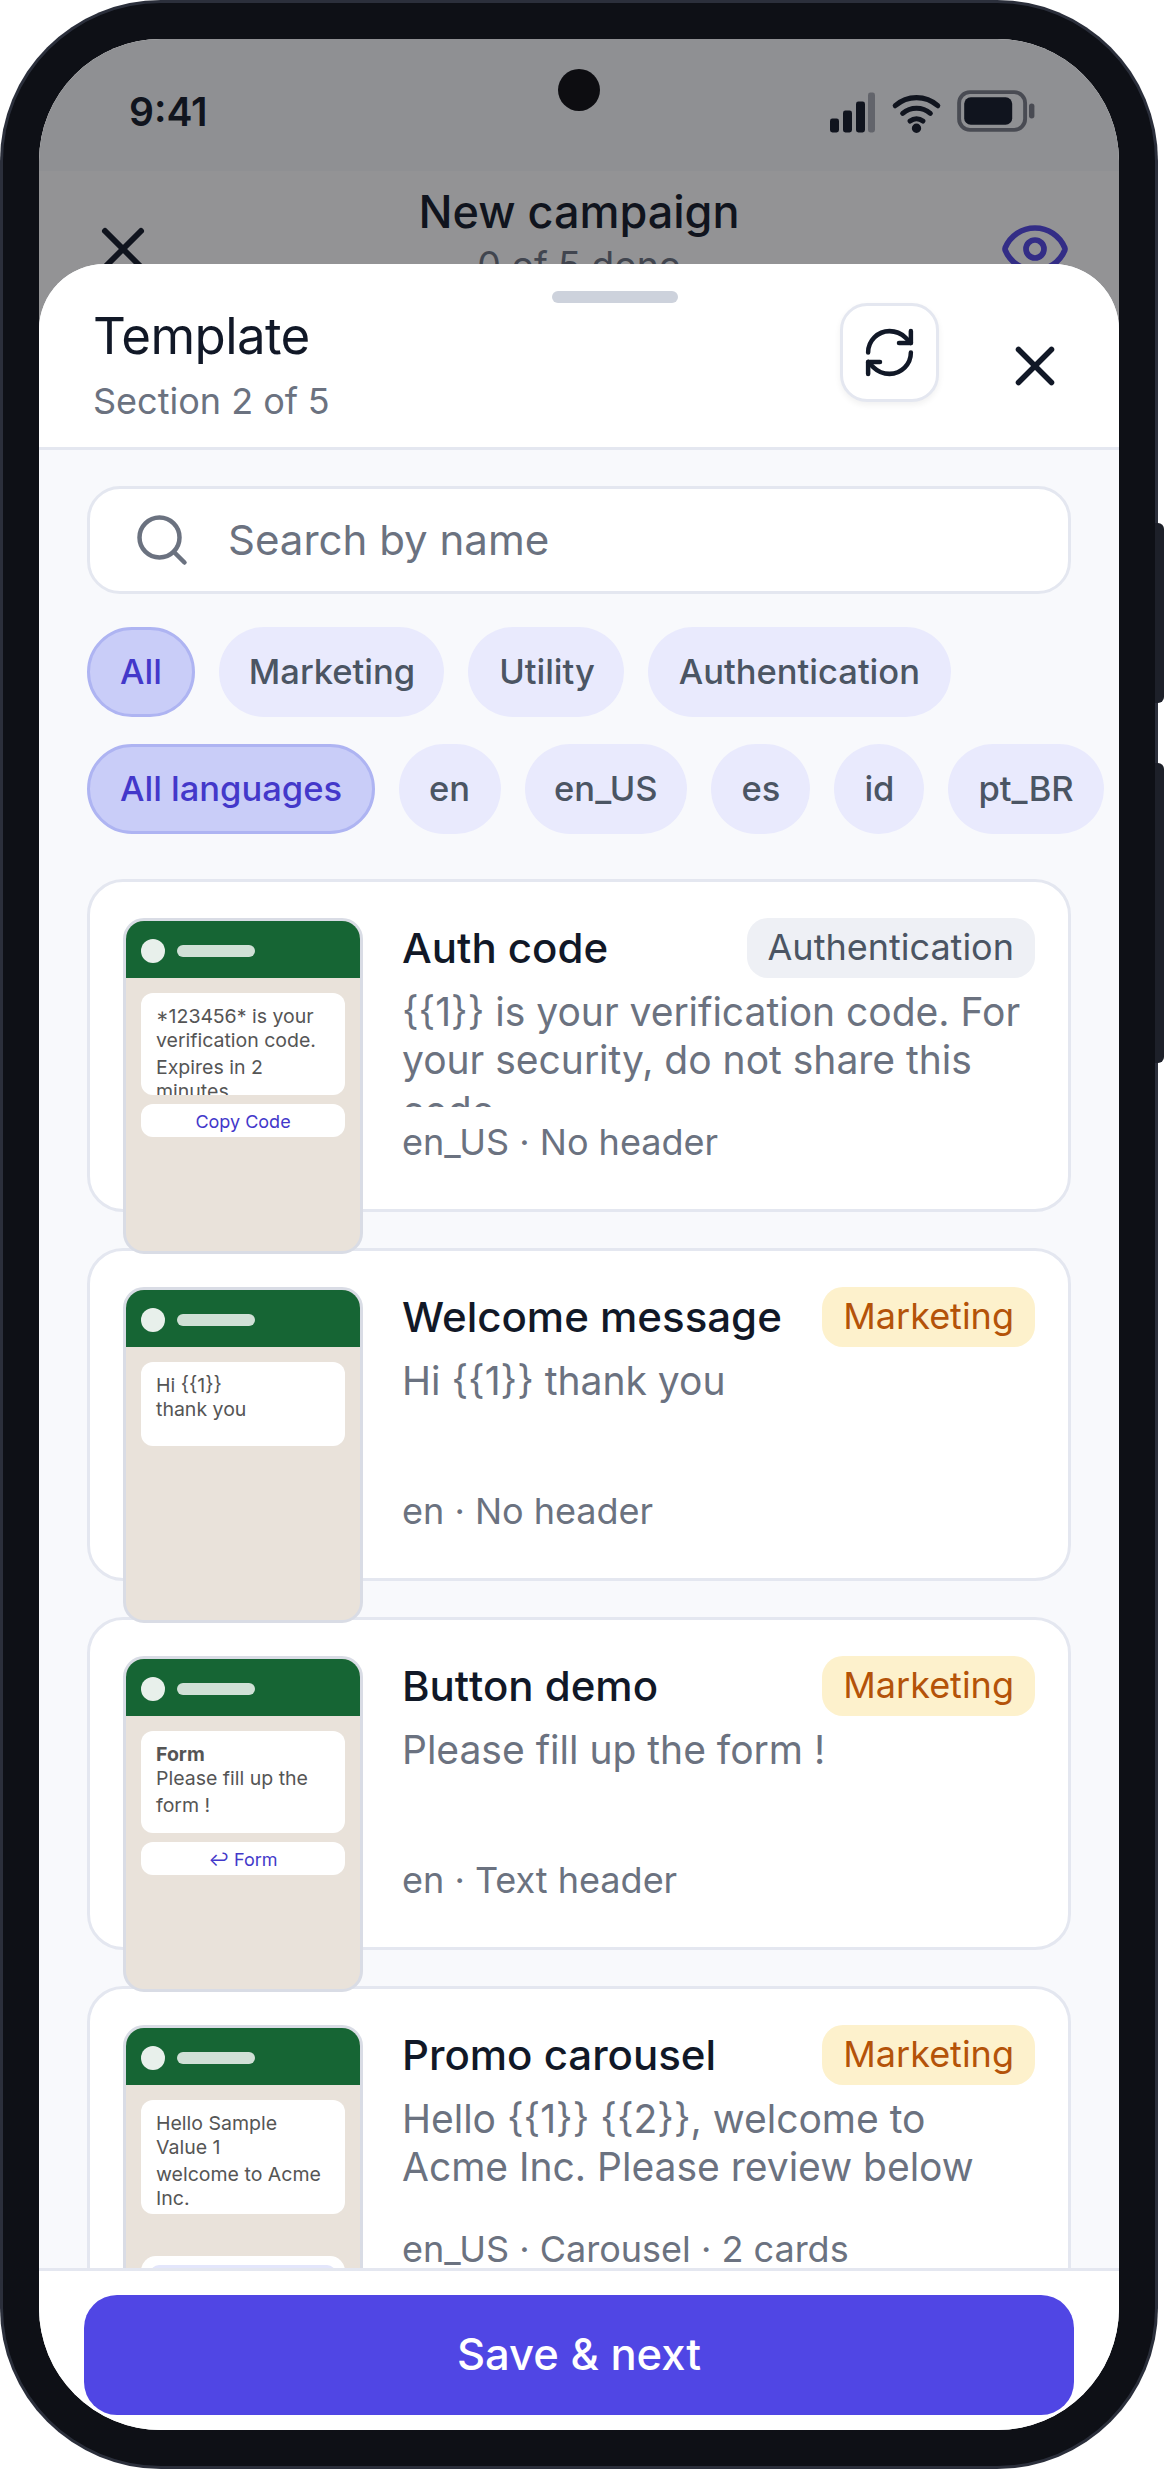
Choose the approved template to send.
- Use the search box, or the category and language chips, to find a template.
- Tap Sync to load templates that Meta approved recently.
- Carousel templates (templates with several swipeable cards) can also be used.
If you change the template after filling in values, the app asks you to confirm first, because the values will be cleared.
Step 3: Content
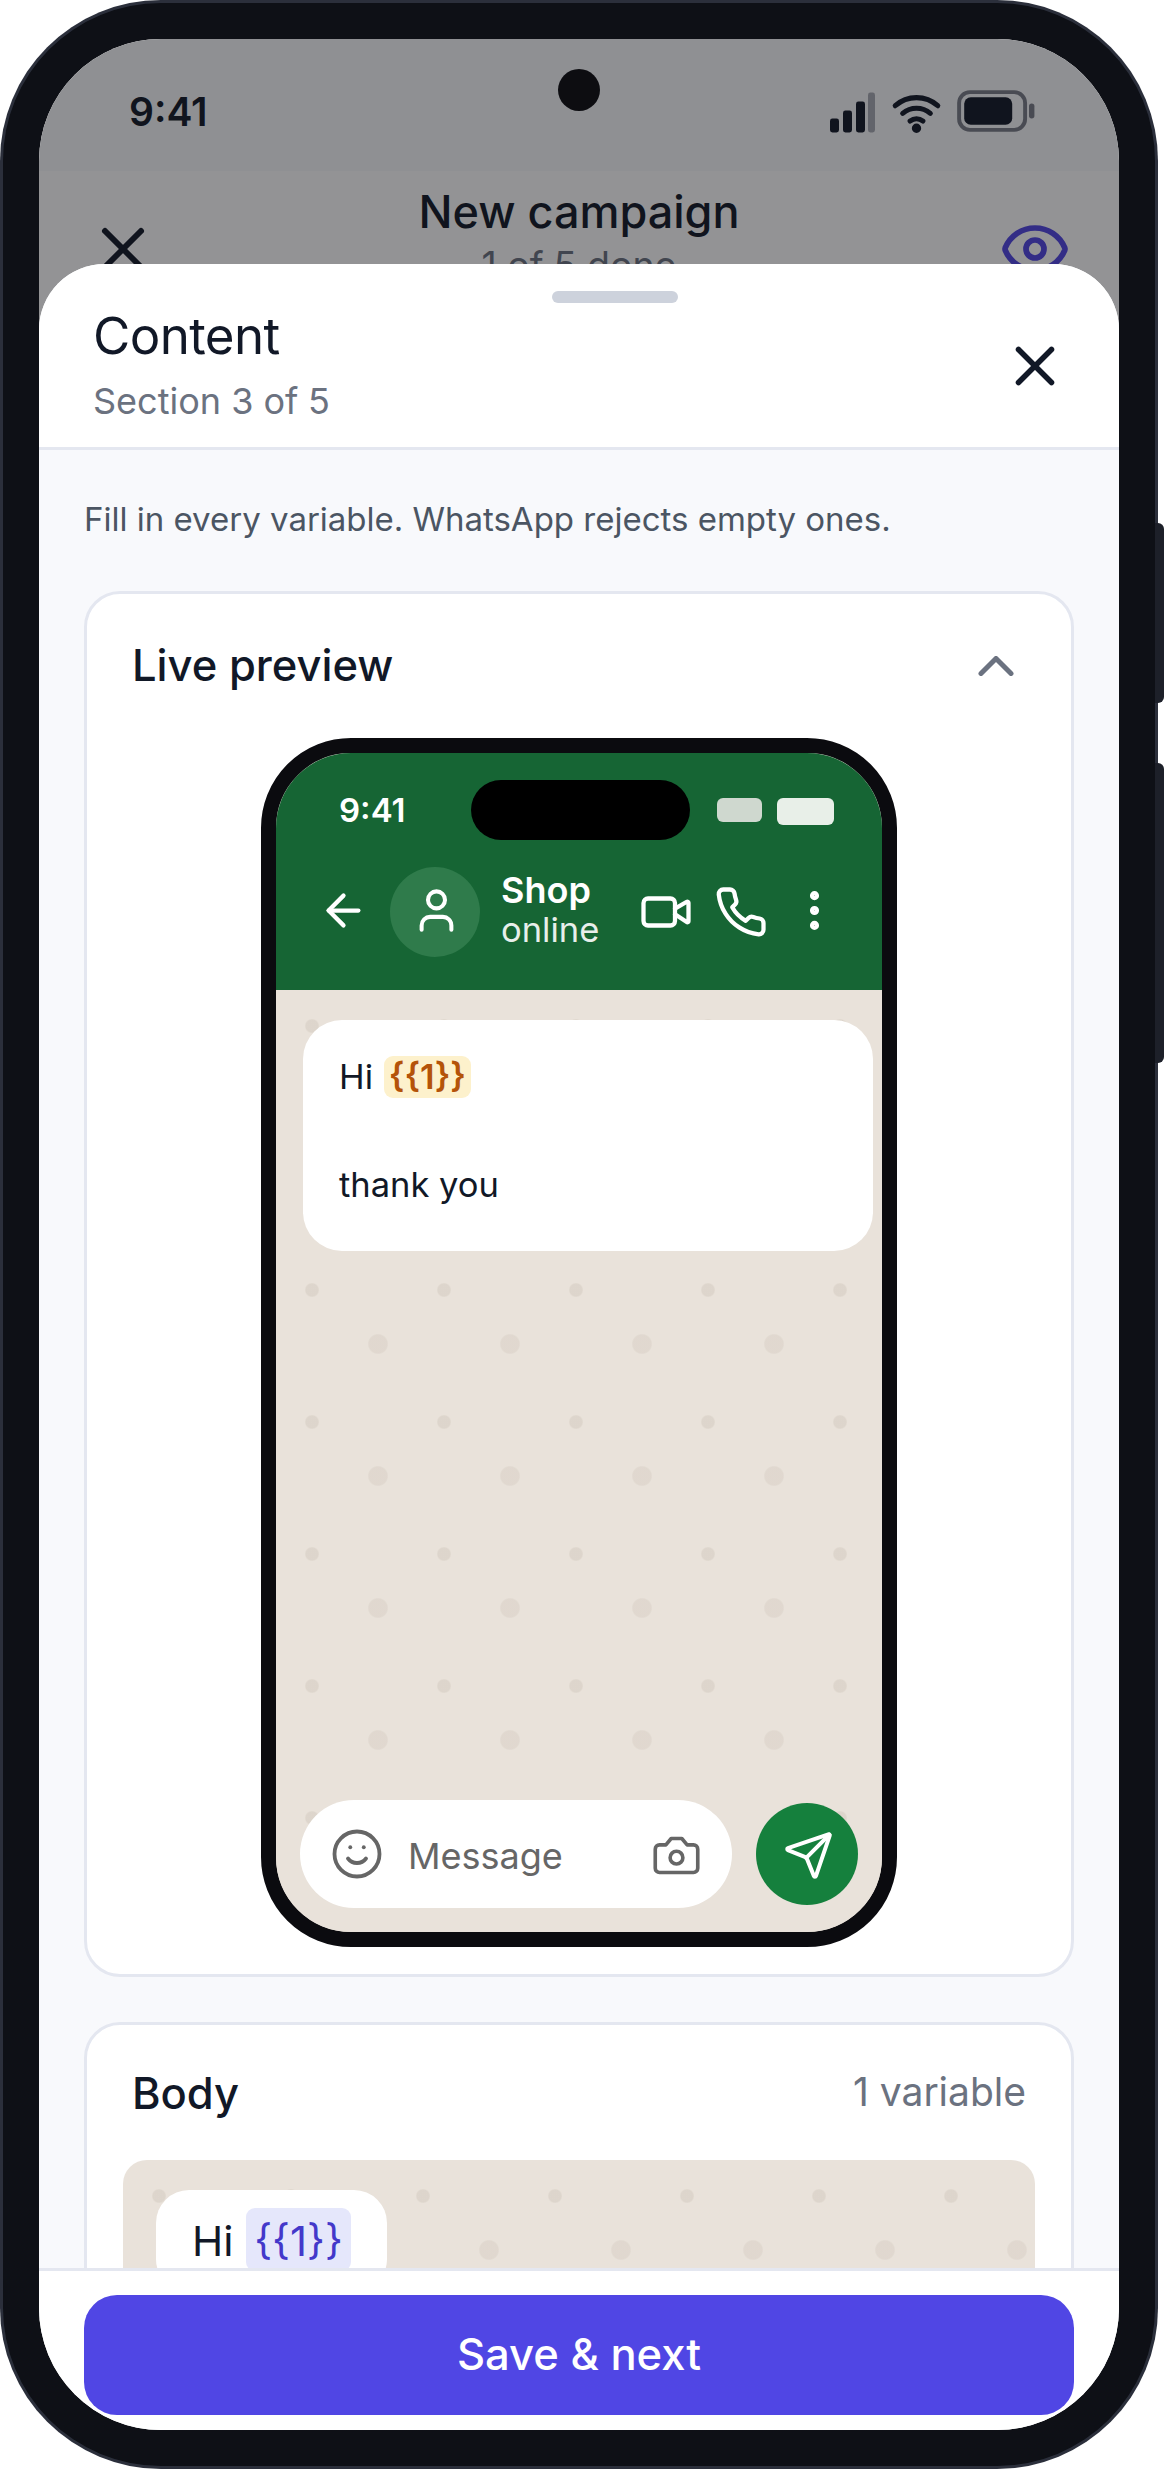
Fill in the template's details.
- Live preview: shows the message as your contacts will see it. Tap to fold or open it.
- Header file: if the template has a picture, video or document at the top, choose the file from Camera, Gallery or Files. Allowed files: JPG or PNG pictures up to 5 MB, MP4 or 3GP videos up to 16 MB, and documents up to 100 MB.
- Value boxes: one box for each empty space in the template, grouped under Header, Body, Footer and Button links. Type a value, or tap Insert field to add a customer detail, such as the first name. Each contact gets their own value. To remove the last detail you added, press backspace in an empty box.
- Use OTP code field: only for login code templates.
- Carousel cards: only for carousel templates. Each card has a tab. Each card needs its own picture or video and values. The top shows how many cards are ready, for example "2 of 3 cards ready".
Step 4: Recipients
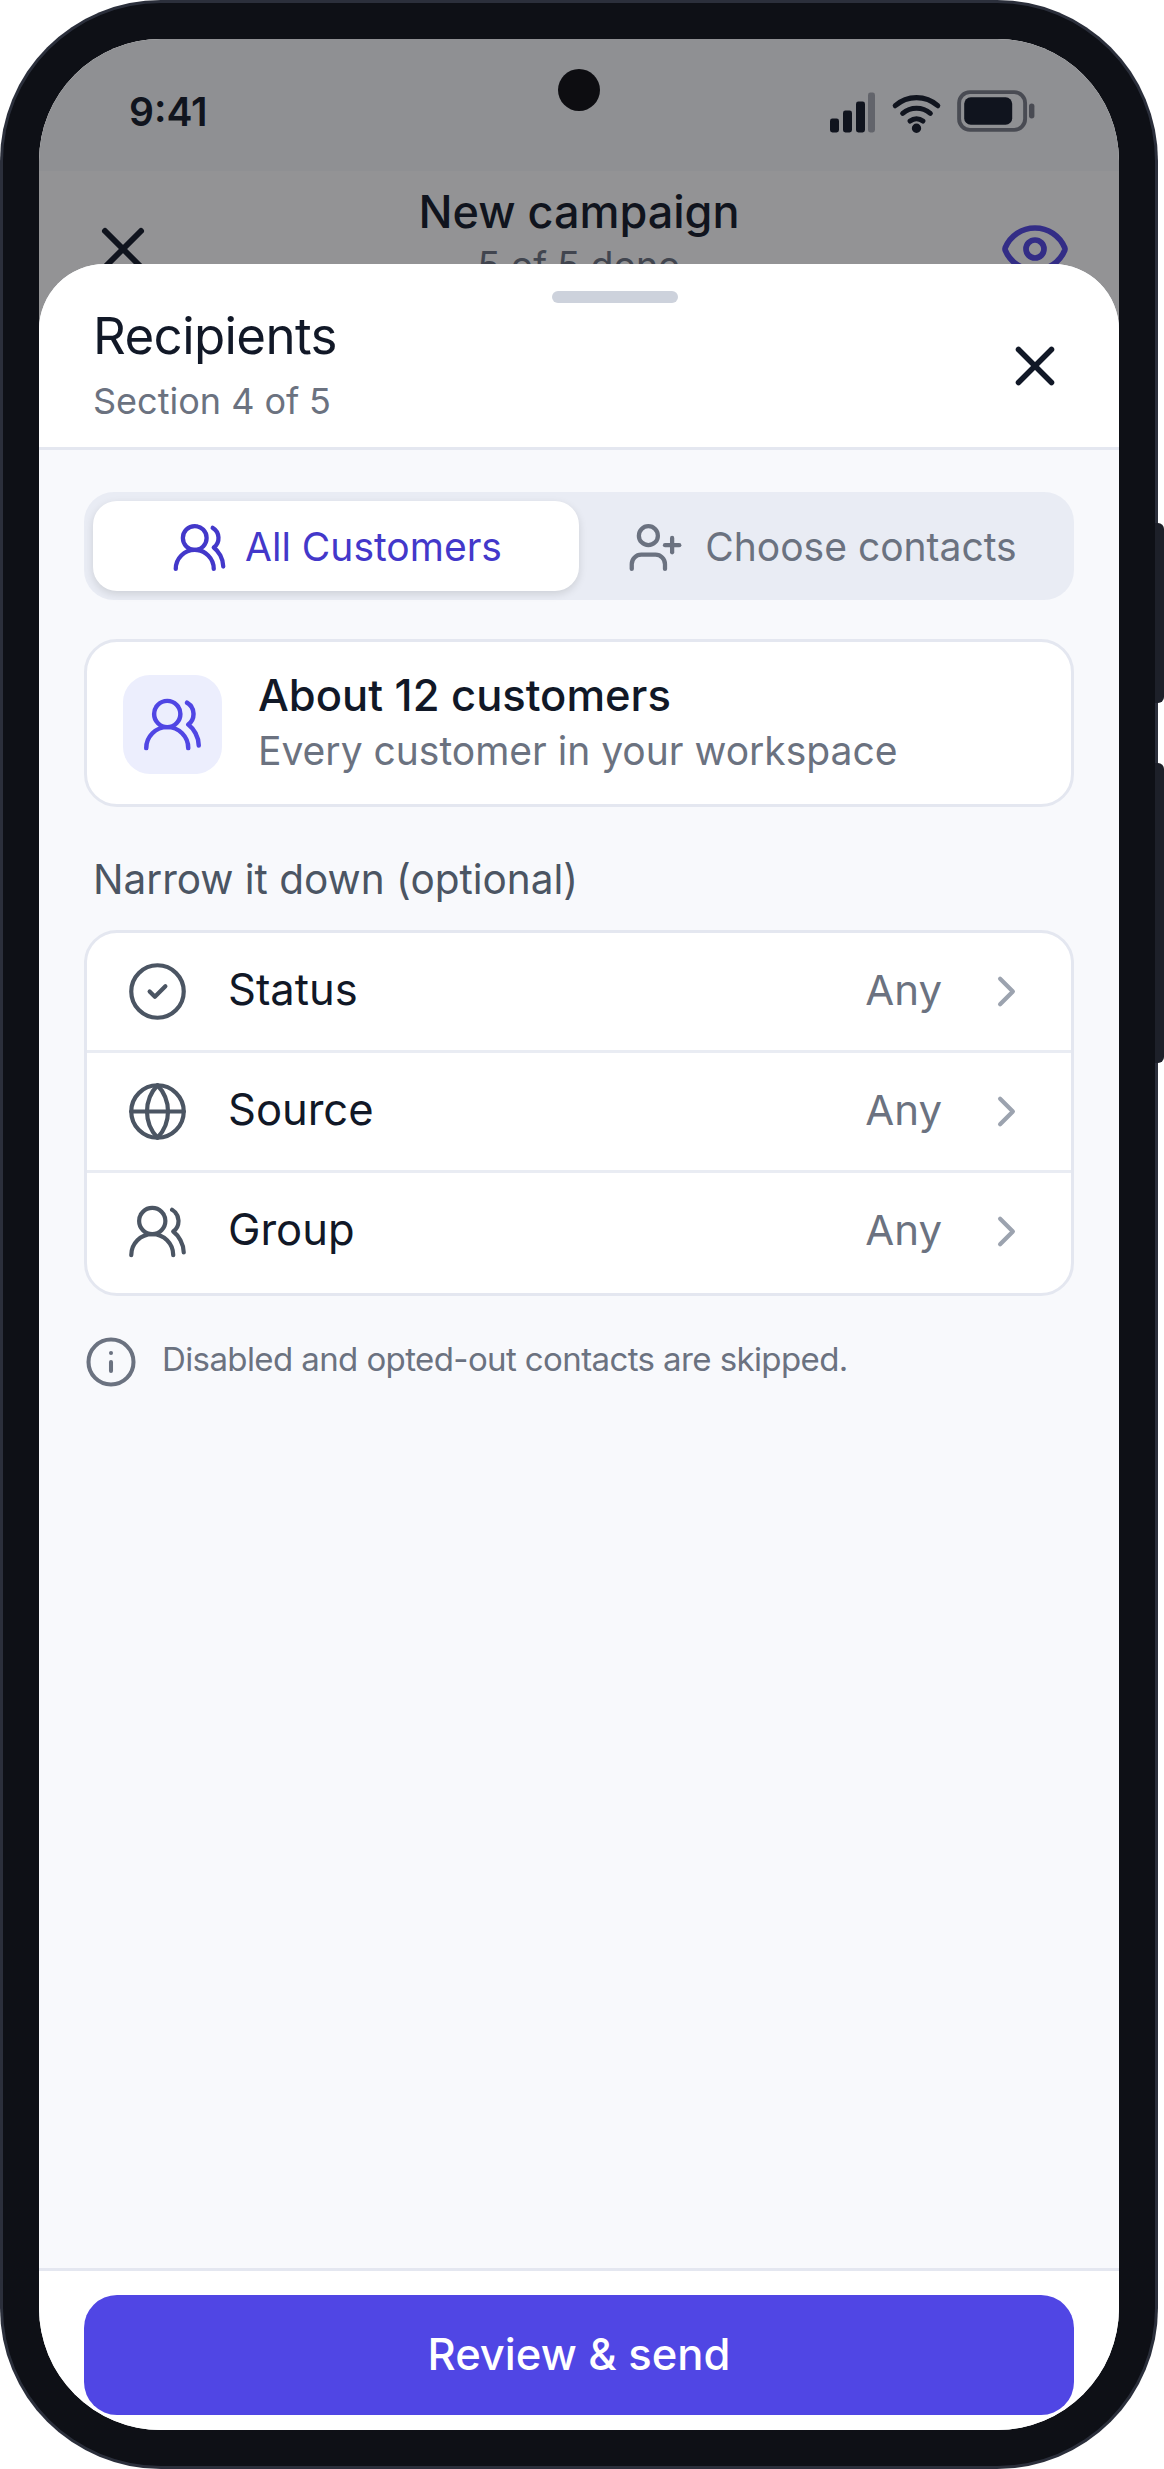
Choose who gets the campaign. You have two options:
- All customers / leads / guests (depending on Step 1): send to everyone of that type. You can narrow the list with Status, Source and Group filters.
- Choose contacts: pick contacts one by one. You can search and filter the list, and tap Select all shown. You can choose up to 5,000 contacts. Contacts who opted out, or who are disabled, are greyed out and cannot be picked. Tap "N selected · Review" to see your list and remove contacts.
By default, the campaign goes to all contacts of the chosen type. You still need to open this section once before you can send.
Step 5: Schedule
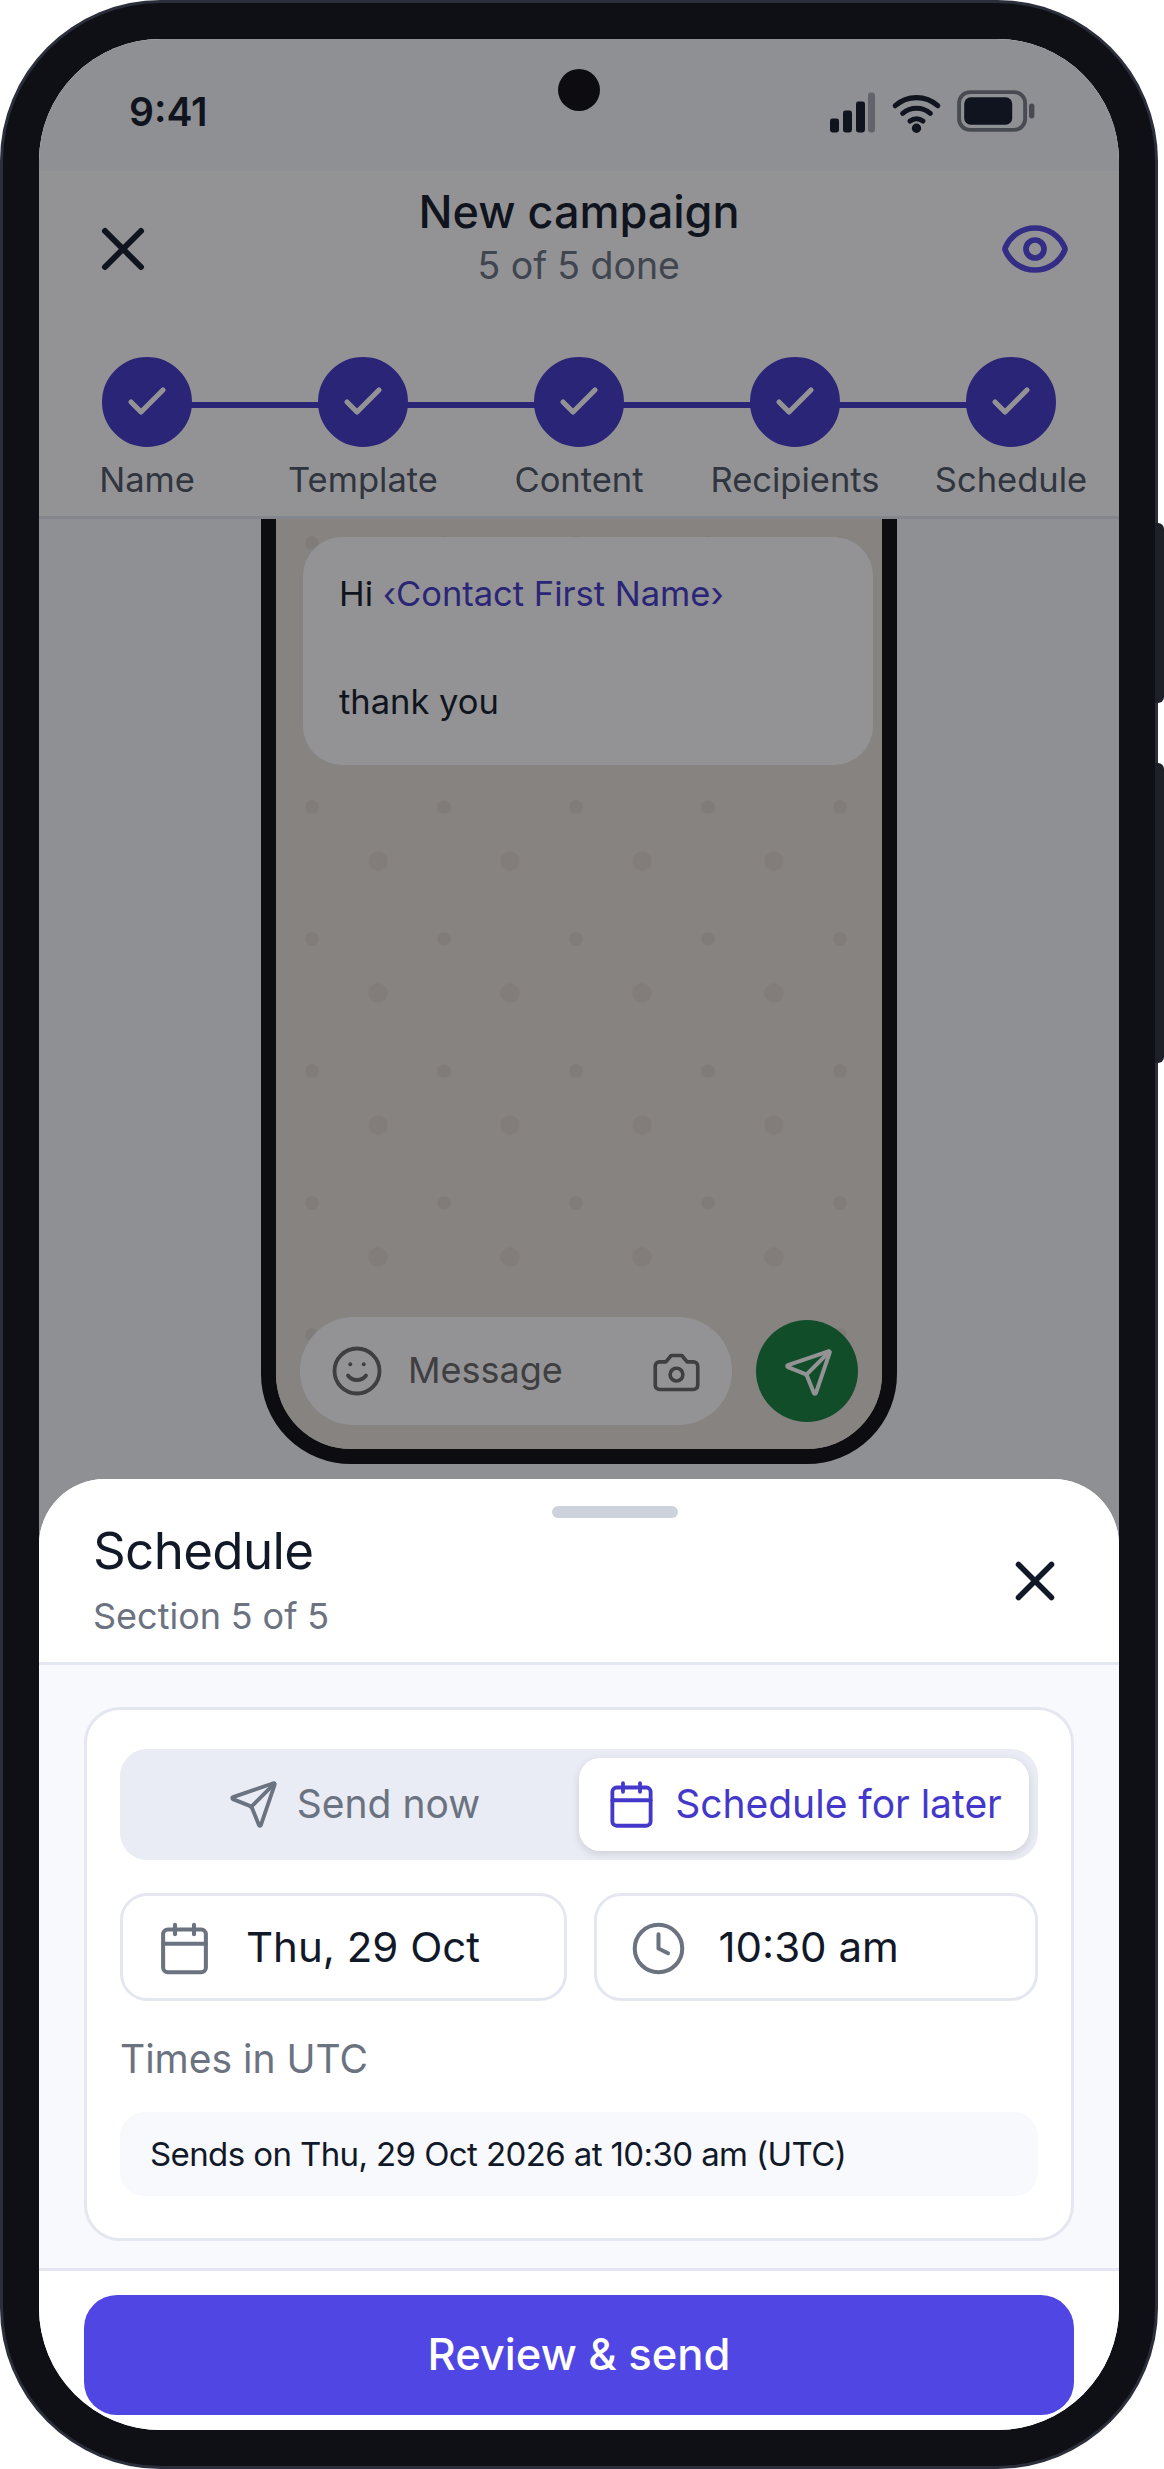
Choose when to send:
- Send now: the campaign starts as soon as you send it.
- Schedule for later: pick a date (from today up to 5 months ahead) and a time.
Times use your workspace's timezone
Scheduled times use your workspace's timezone, not your phone's timezone. The screen shows the timezone, for example "Times in Asia/Kolkata". If you pick a time that has already passed, the app tells you.
By default, the campaign is sent right away. You still need to open this section once before you can send.
Review and Send
After you have opened all five sections, the Review screen opens.
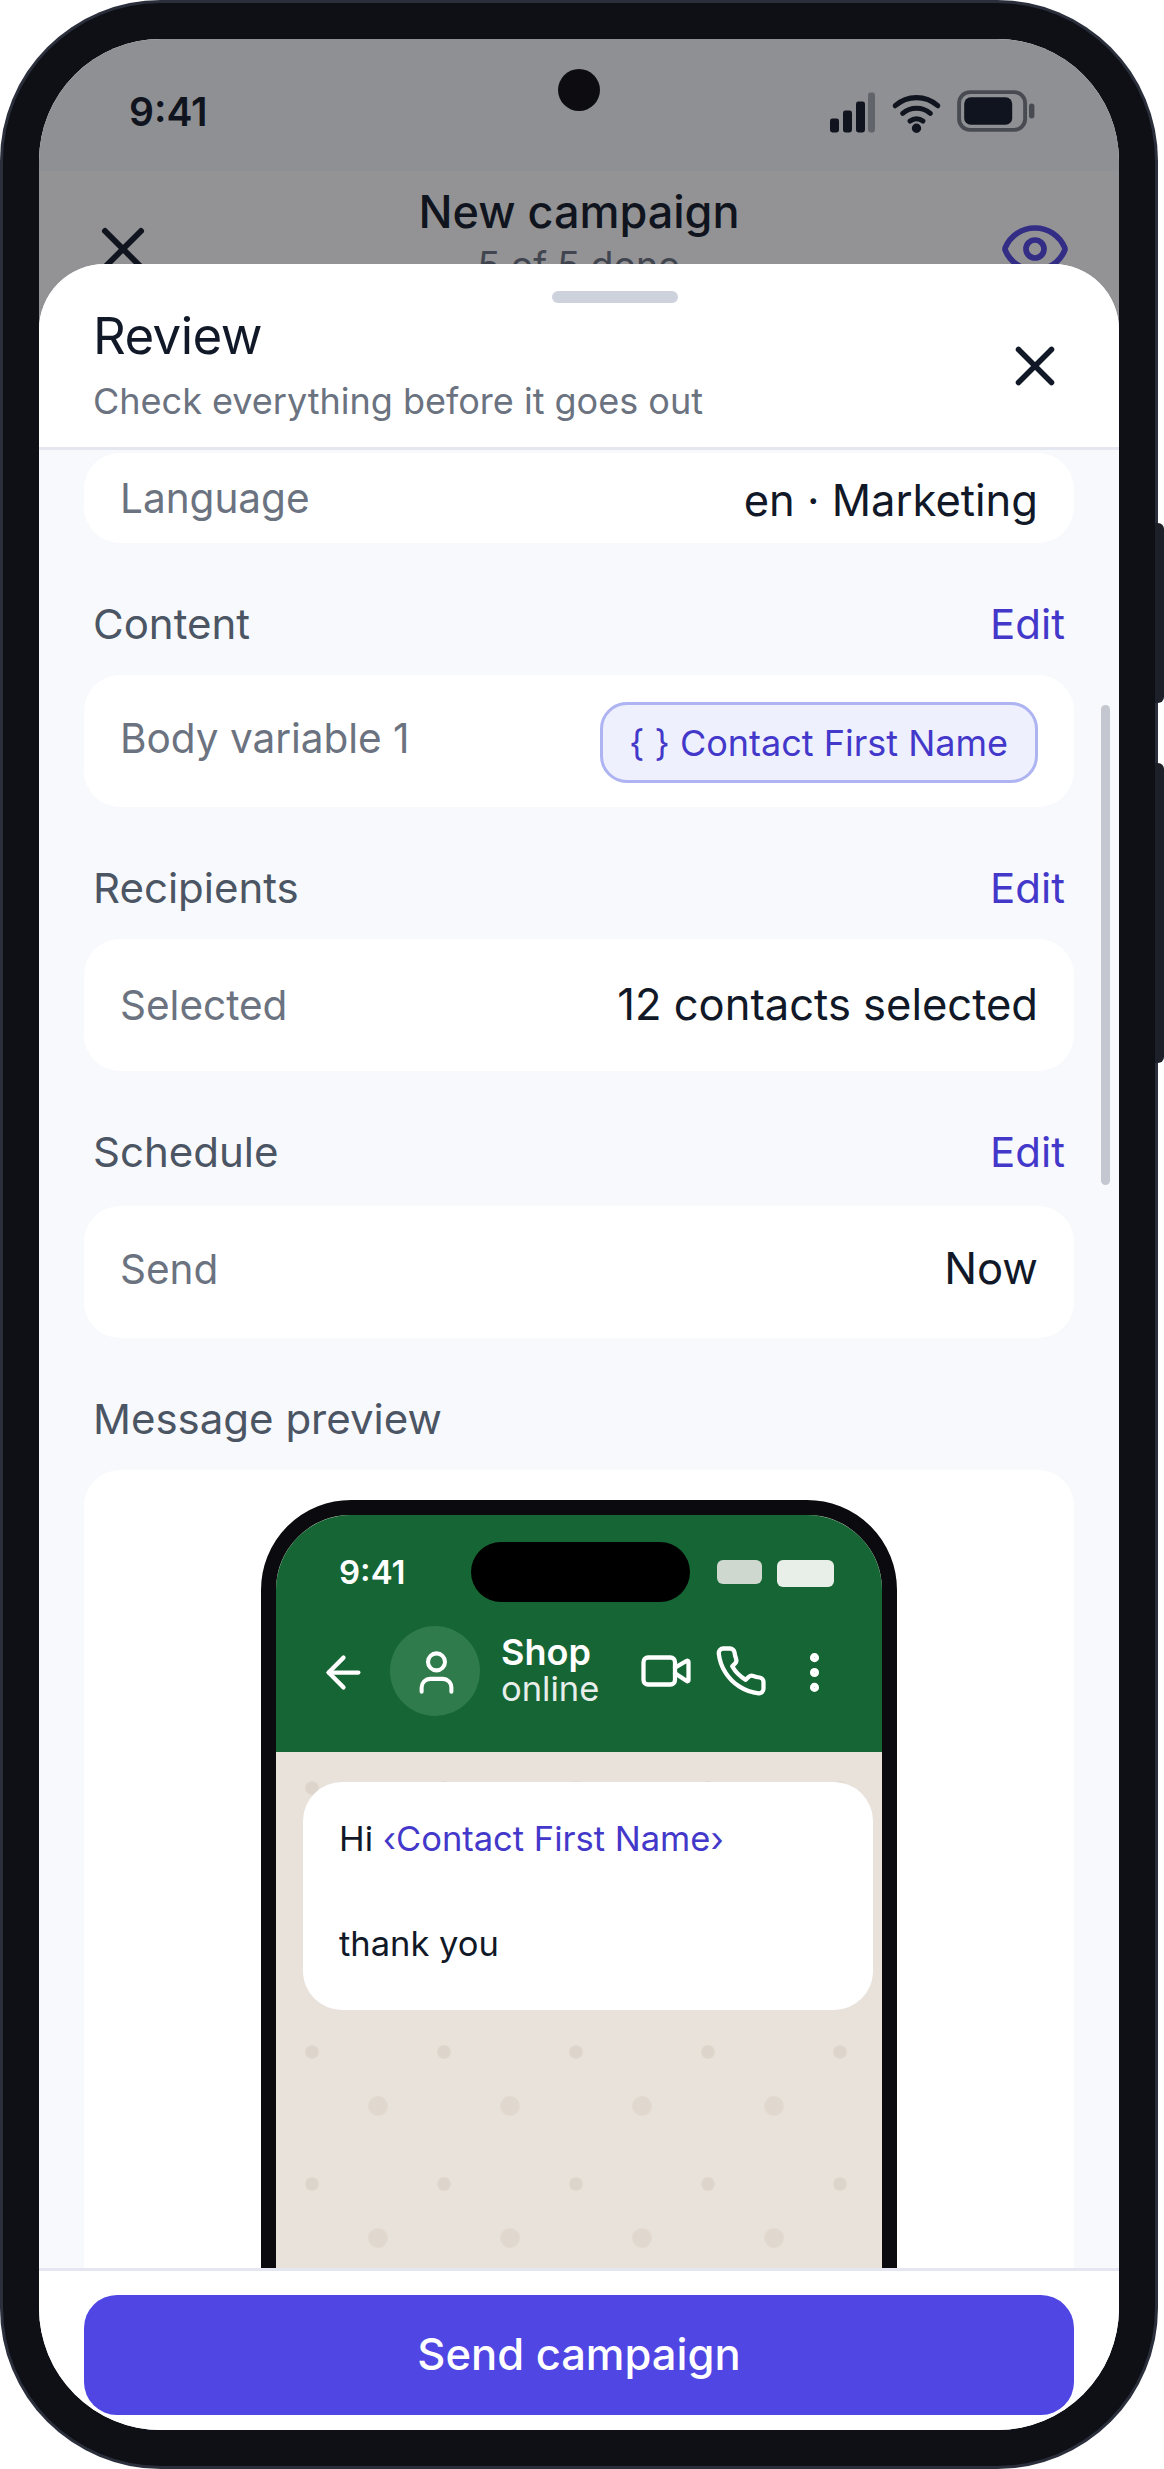
- Check each part. Tap Edit next to a part to change it.
- Tap Send campaign (or Schedule campaign).
- Confirm. For example: "Send to all customers now?" or "Schedule for Tue, 13 Oct at 6:00 PM?"
The app uploads your header file (if any), shows the progress, and creates the campaign.
When it is done, you see "Campaign is sending" or "Campaign scheduled".
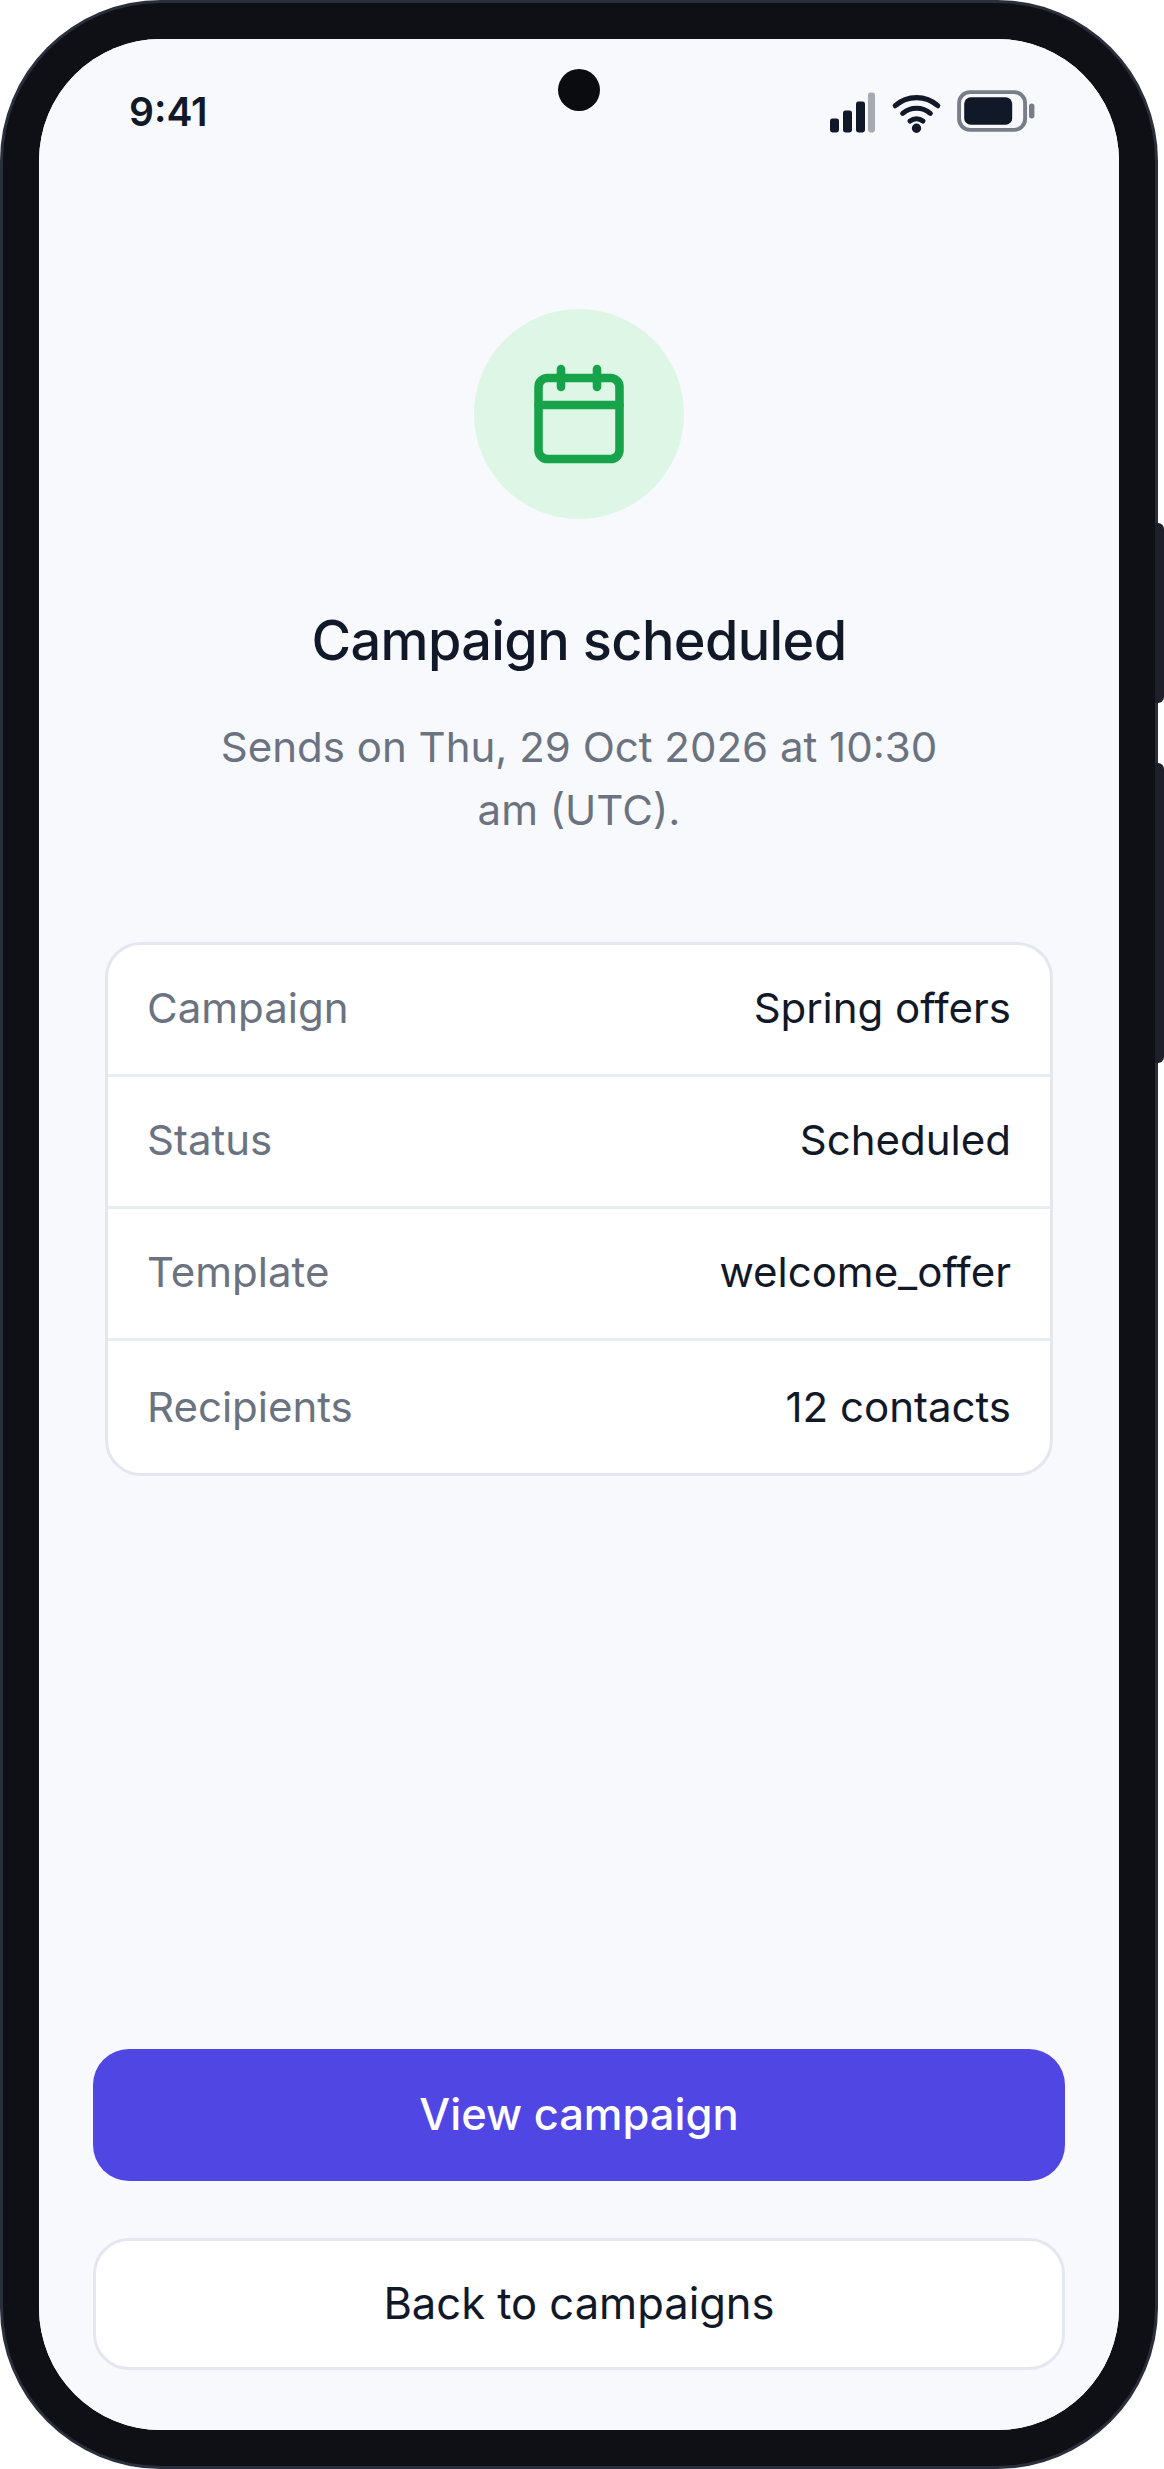
Tap View campaign to follow the results, or Back to campaigns to return to the list.
If Something Goes Wrong
- The website does not accept a value (for example, the campaign name is already used): the app opens the section with the problem and shows the message under the box.
- You lose your internet connection: a banner on the review screen keeps everything you entered. Tap Retry when you are back online. The campaign is only created once.
- WhatsApp refuses the campaign: the reason shows on the review screen with Retry.
Leaving Without Saving
If you tap ✕ or the phone's back button after entering something, the app asks "Discard this campaign?". Tap Discard to leave without saving.
Next Step
Continue with Templates.