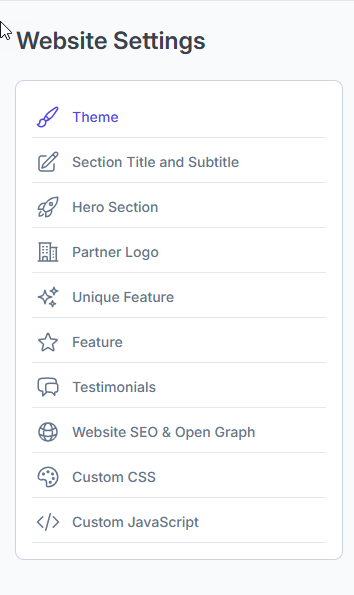
Website Management
Customizes your SaaS website for customer acquisition and creates a professional marketing site to attract customers.
Location:
Admin Panel → Website Settings
Accessing Website Management
Navigation Path
- Login to Admin Panel
- Navigate to Settings → Website Settings
Required Permissions
admin.website.view- View website settingsadmin.website.edit- Edit website content and settings
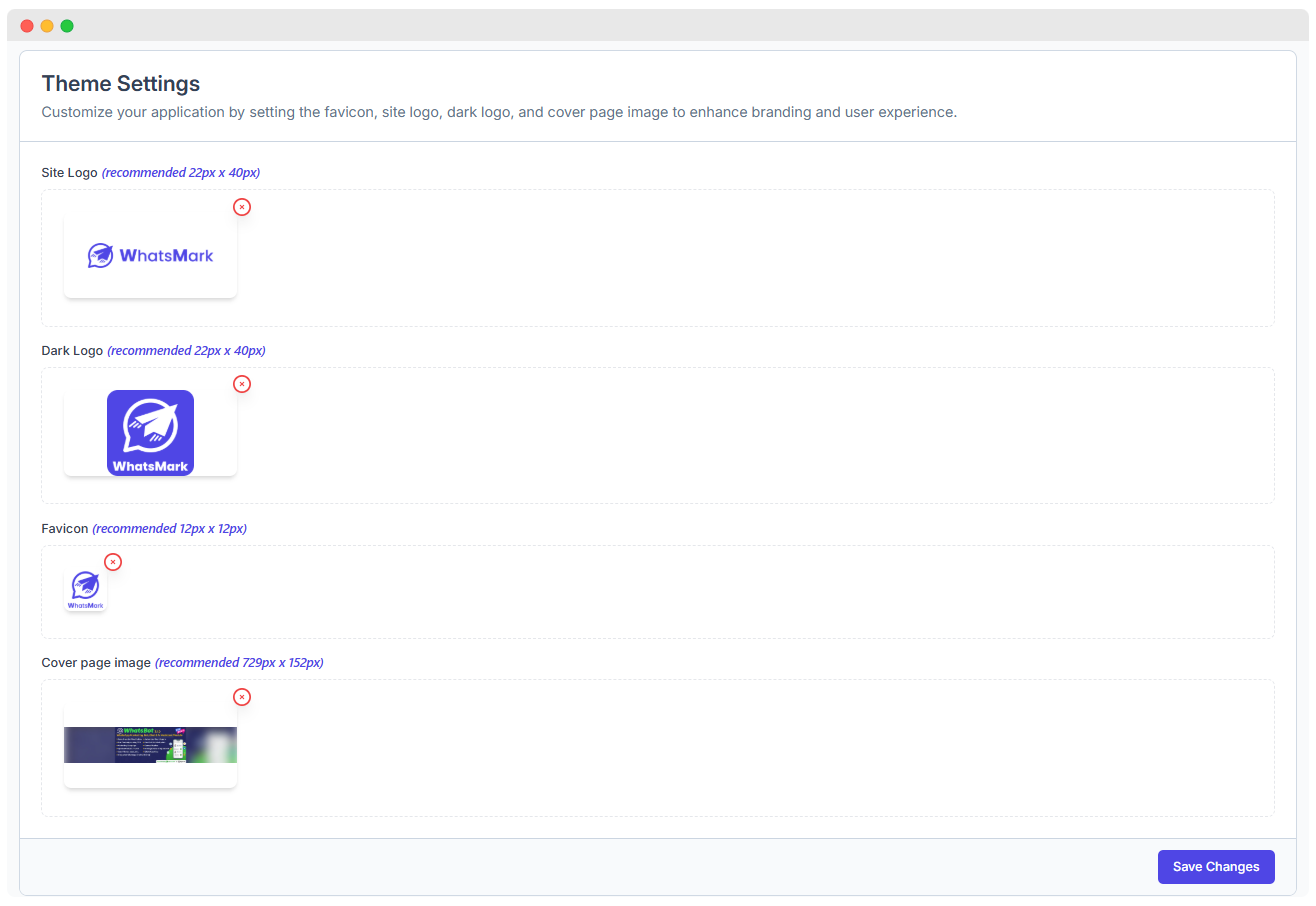
Theme
Location:
Admin Panel → Website Settings → Theme
Customize your website’s visual identity by setting up logos, colors, fonts, layout preferences, and more.
Full Preview
Theme Image Settings
| Setting | Description | Recommended Size |
|---|---|---|
| Site Logo | Logo used on the main website header | 22px x 40px |
| Dark Logo | Logo shown in dark mode | 22px x 40px |
| Favicon | Icon displayed in browser tabs | 12px x 12px |
| Cover Page | Banner shown on authentication page | 729px x 152px |
- To remove an uploaded image, click the icon next to each preview.
Save Your Changes
- Once all your selections and uploads are complete, click the
Save Changesbutton at the bottom to apply your theme settings.
Section Title & Subtitle
Location: Admin Panel → Website Settings → Section Title & Subtitle
Configure the titles and subtitles for key sections of your website to enhance clarity and user engagement.
UI Reference
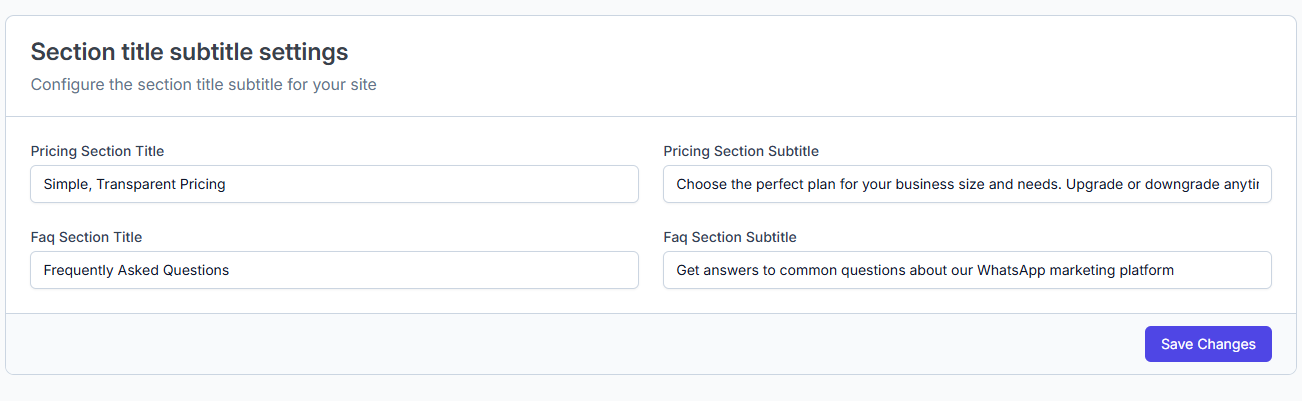
Section Content Settings
| Field | Description | Example Value |
|---|---|---|
| Pricing Section Title | Main heading for pricing section | Simple, Transparent Pricing |
| Pricing Section Subtitle | Supporting text for pricing section | Choose the perfect plan for your business size and needs. Upgrade or downgrade anytime. |
| FAQ Section Title | Main heading for FAQ section | Frequently Asked Questions |
| FAQ Section Subtitle | Supporting text for FAQ section | Get answers to common questions about our WhatsApp marketing platform |
- Each field customizes the copy users see on the landing page, improving clarity and trust.
Save Changes
- Once your section titles and subtitles are set, click the
Save Changesbutton to apply them to your website.
Hero Section
Location:
Admin Panel → Website → Hero Section
- Configure and personalize the hero section of your landing page — the first content block your visitors see.

Hero Content Configuration
| Field | Description | Example Value |
|---|---|---|
| Title | Main headline in the hero section | Scale your business with WhatsApp marketing automation |
| Image Alt Text | Alt text for the hero image (accessibility) | Dashboard illustration showing WhatsMark features |
| Description | Supporting paragraph describing your offering | Transform customer engagement with our powerful WhatsApp marketing platform. Send bulk messages, create chatbots, and automate conversations to boost sales and customer satisfaction. |
Call-to-Action (CTA) Settings
| Element | Primary CTA | Secondary CTA |
|---|---|---|
| Button Text | Start Free Trial | Watch Demo |
| Button Type | Primary | Outline |
| Button URL | https://whatsmark.dev/register | https://whatsmark.dev/demo |
CTA buttons should be action-focused and drive user engagement.
Visual Settings
| Field | Description | Notes |
|---|---|---|
| Image | Main illustration or screenshot | Recommended: SVG or transparent PNG |
| Image Alt Text | Text for accessibility and SEO | Keep it concise and descriptive |
Save Changes
- Once all fields are filled, click the
Save Changesbutton at the bottom right to update your live site.
Partner Logo
Location:
Admin Panel → Website → Partner logos
- Use this form to configure and manage partner logos on your WhatsMark SaaS website.
| Field | Description |
|---|---|
| Logo # | Identifier for the logo block (e.g., logo #1, logo #2, etc.) |
| Label | Describes the logo usage (e.g., Brand identity asset) |
| Logo Image | Upload area for logo file. Drag & drop or click to upload. |
| Upload Format | Accepted formats: PNG, JPG, JPEG |
| Max File Size | 1 MB |
| Recommended Size | 128 × 36 px |
| Current Logo | Preview of the uploaded logo (e.g., WhatsMark logo) |
| Delete Logo | Red trash button to remove the logo block |
| Add Another Logo | Button to insert an additional logo upload section |
| Changes Info | Changes will only apply after clicking Save Changes |
| Save Changes | Button to confirm and save all logo configurations |
Example Preview
| Current Logo Preview |
|---|
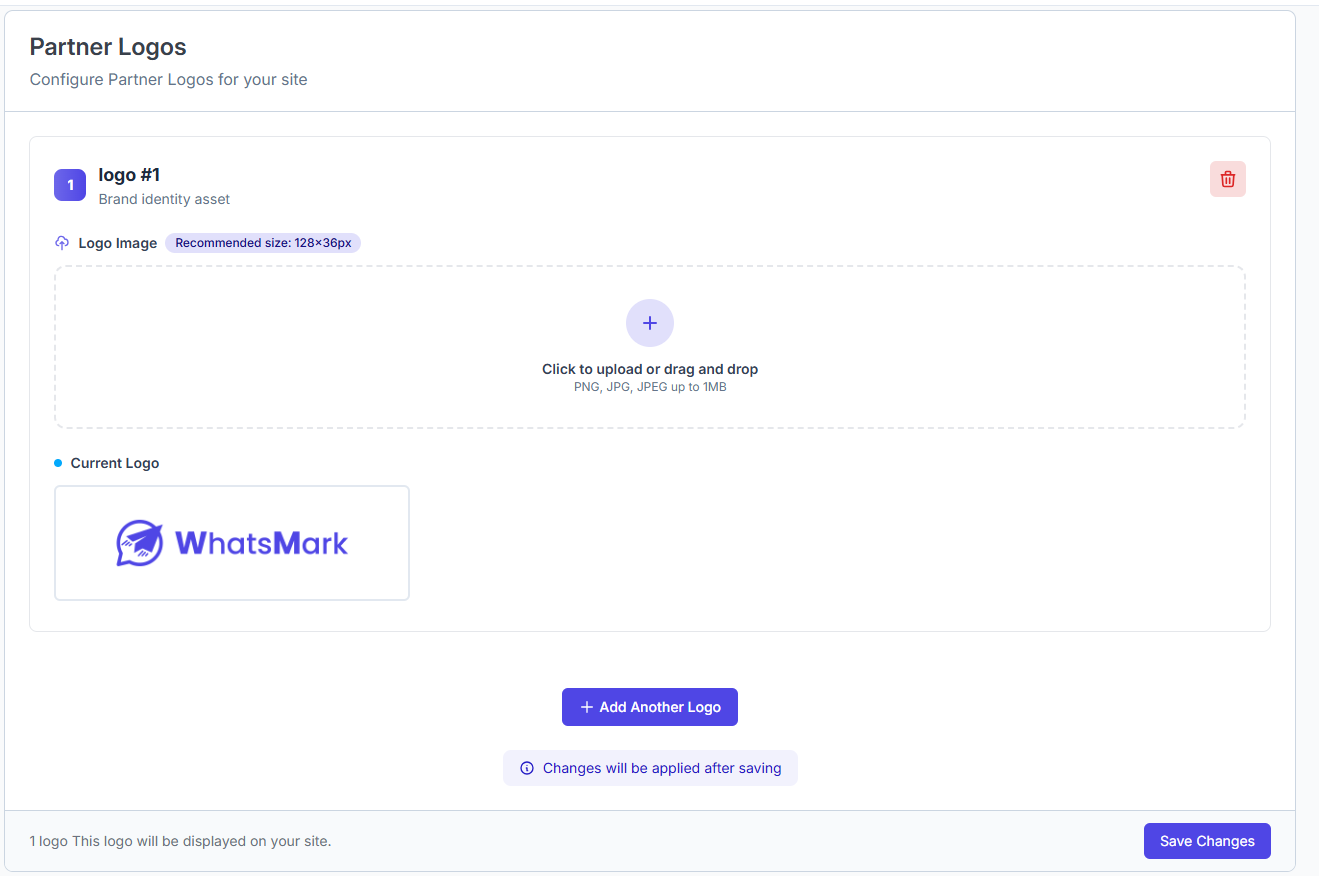 |
Unique Feature
- Configure standout features of your platform to highlight unique capabilities and value propositions.
Location:
Admin Panel → Website → Unique Features
Example Configuration Preview
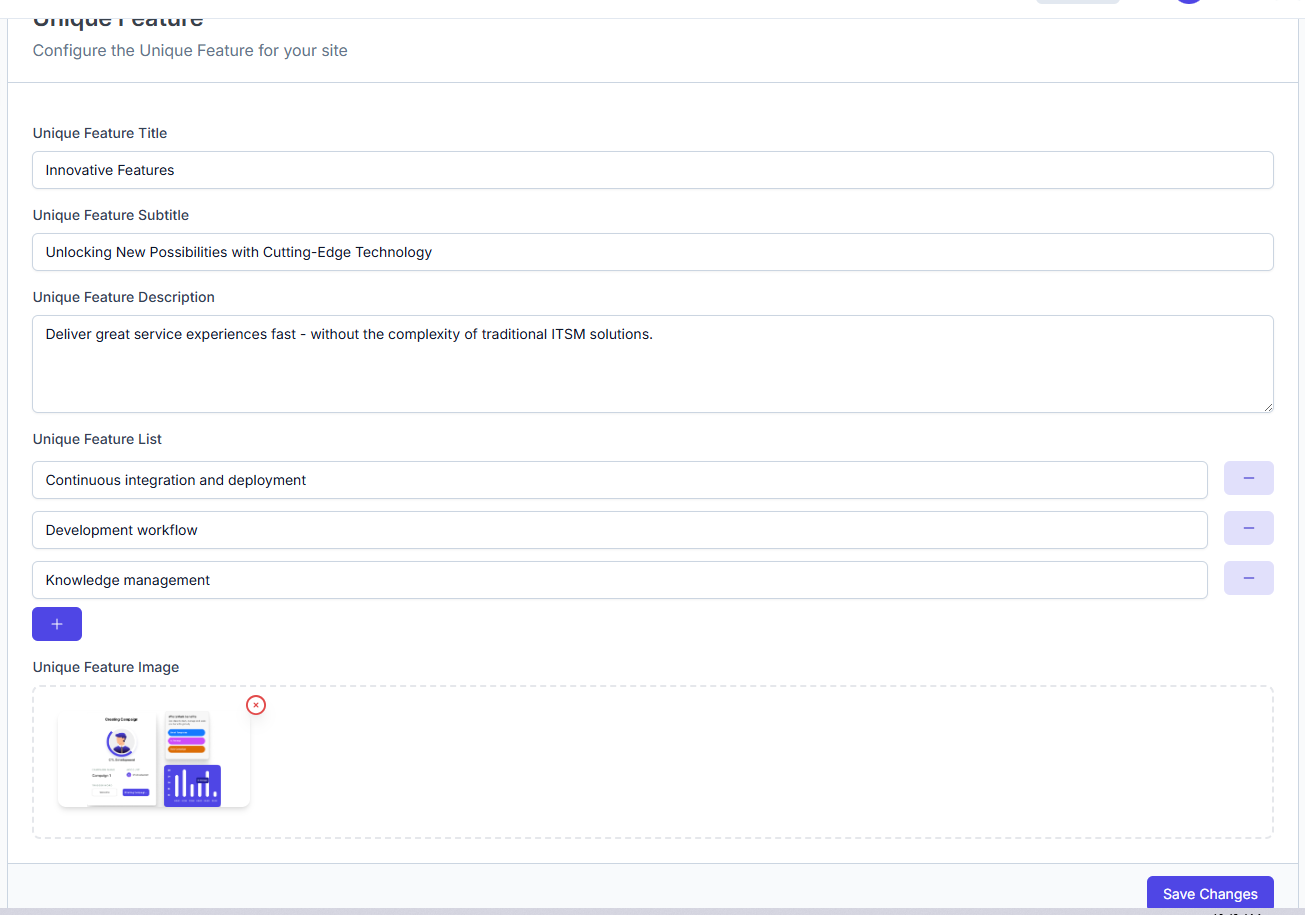
Feature Overview
| Field | Description |
|---|---|
| Unique Feature Title | Main heading text for the unique feature section. Example: Innovative Features |
| Feature Subtitle | Subheading for additional context. Example: Unlocking New Possibilities with Cutting-Edge Technology |
| Feature Description | A brief overview or value proposition. Example: Deliver great service experiences fast - without the complexity of traditional ITSM solutions. |
| Feature List | A list of bullet-pointed features to display. Example entries: |
| - Continuous integration and deployment | |
| - Development workflow | |
| - Knowledge management | |
| Add More Features | Click the + button to add more list items |
| Remove Feature | Use the - button beside a list item to remove it |
| Feature Image | Upload a visual asset representing the unique feature. |
| Supported Formats | PNG, JPG, JPEG |
| Image Size Limit | Up to 1MB |
| Save Changes | Click the Save Changes button to apply updates |
Feature
- The Features Section allows you to showcase the core capabilities of your platform directly on your marketing or landing page. This section is fully customizable from the admin panel and helps convey the value of your SaaS offering.
Location:
Admin Panel → Website → Features
Configuration Screenshot
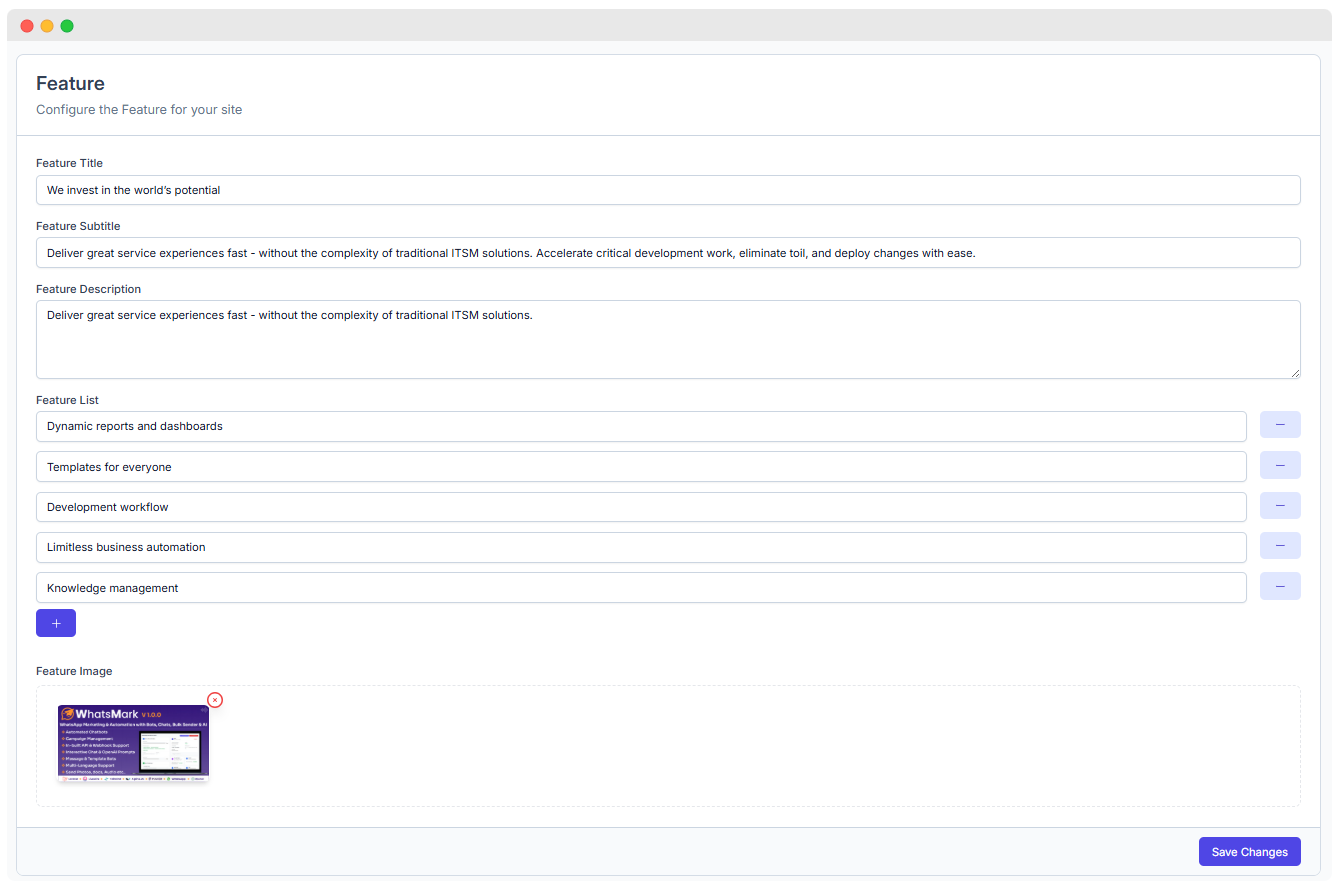
Customization Options
| Element | Description |
|---|---|
| Section Title | Main heading for the feature section. Example: We invest in the world's potential |
| Section Subtitle | Supporting text or tagline. Example: Accelerate development, eliminate toil, and deploy changes with ease. |
| Feature Description | Optional paragraph giving more detail about what this section covers. Example: Deliver great service experiences fast... |
| Feature List | Add individual feature points. Each feature can be added or removed easily. |
| Icons (Optional) | Attach icons for visual aid per feature (not shown in the current image). |
| Layout | Choose between grid or list layout for feature display. |
| Animations | Enable/disable reveal or scroll-based animations. |
Feature Management Actions
- Add, edit, or delete individual feature entries
- Rearrange display order using drag or sequence controls
- Optimize visibility for mobile and tablet views
- Optionally link each feature to a detailed page
Example Feature Title
We invest in the world's potential
Example Feature Subtitle
Deliver great service experiences fast - without the complexity of traditional ITSM solutions. Accelerate critical development work, eliminate toil, and deploy changes with ease.
Example Features List
- Dynamic reports and dashboards
- Templates for everyone
- Development workflow
- Limitless business automation
- Knowledge management
Feature Image
Uploaded visual asset (e.g., version banner, dashboard preview)
Saving
Click the Save Changes button at the bottom-right to apply all updates. Changes will reflect live on your site after saving.
Testimonials
- Use this section to display real customer stories, showcase satisfaction, and build trust with potential users by sharing authentic feedback from current clients.
Location:
Admin Panel → Website → Features### Screenshot:
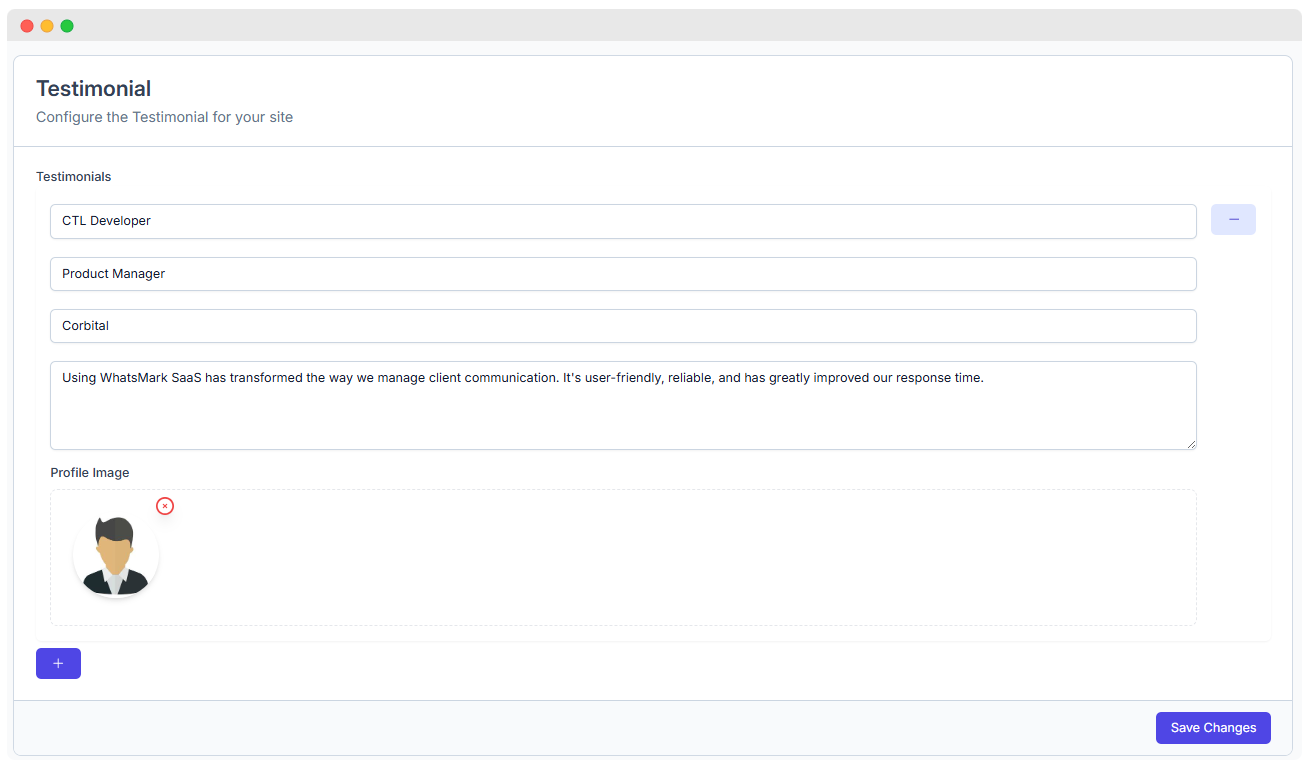
Customization Options
| Option | Description |
|---|---|
| Testimonial Cards | Contains user quotes, names, and roles |
| Customer Photos | Upload profile images (avatar-style or real photos) |
| Company Logos | Optionally display company branding alongside the quote |
| Star Ratings | Show ratings (1-5 stars) to visually represent satisfaction (optional) |
| Carousel Settings | Set auto-scroll, transition time, and navigation controls |
| Video Testimonials | Embed YouTube, Vimeo, or uploaded clips (if supported) |
Testimonial Fields
| Field | Example Input |
|---|---|
| Name/Role | CTL Developer |
| Position | Product Manager |
| Company | Corbital |
| Testimonial Text | Using WhatsMark SaaS has transformed the way we manage client communication... |
| Profile Image | Upload photo of the customer (recommended format: PNG/JPG, max 1MB) |
Management Options
- Add, edit, or remove individual testimonial cards
- Adjust the display order using drag or sort logic
- Choose between grid, carousel, or single-column layouts
- Optionally categorize testimonials by use case, industry, or location
Example Testimonial
"Using WhatsMark SaaS has transformed the way we manage client communication. It’s user-friendly, reliable, and has greatly improved our response time." — CTL Developer, Product Manager at Corbital
Save Changes
Click the Save Changes button after making any modifications. Changes will go live on the public website immediately or after cache refresh, depending on deployment.
Website SEO & Open Graph
The SEO and OG settings allow you to customize how your website appears on search engines and social media platforms, improving visibility and engagement.
Location:
Admin Panel → Website → Website SEO & Open Graph
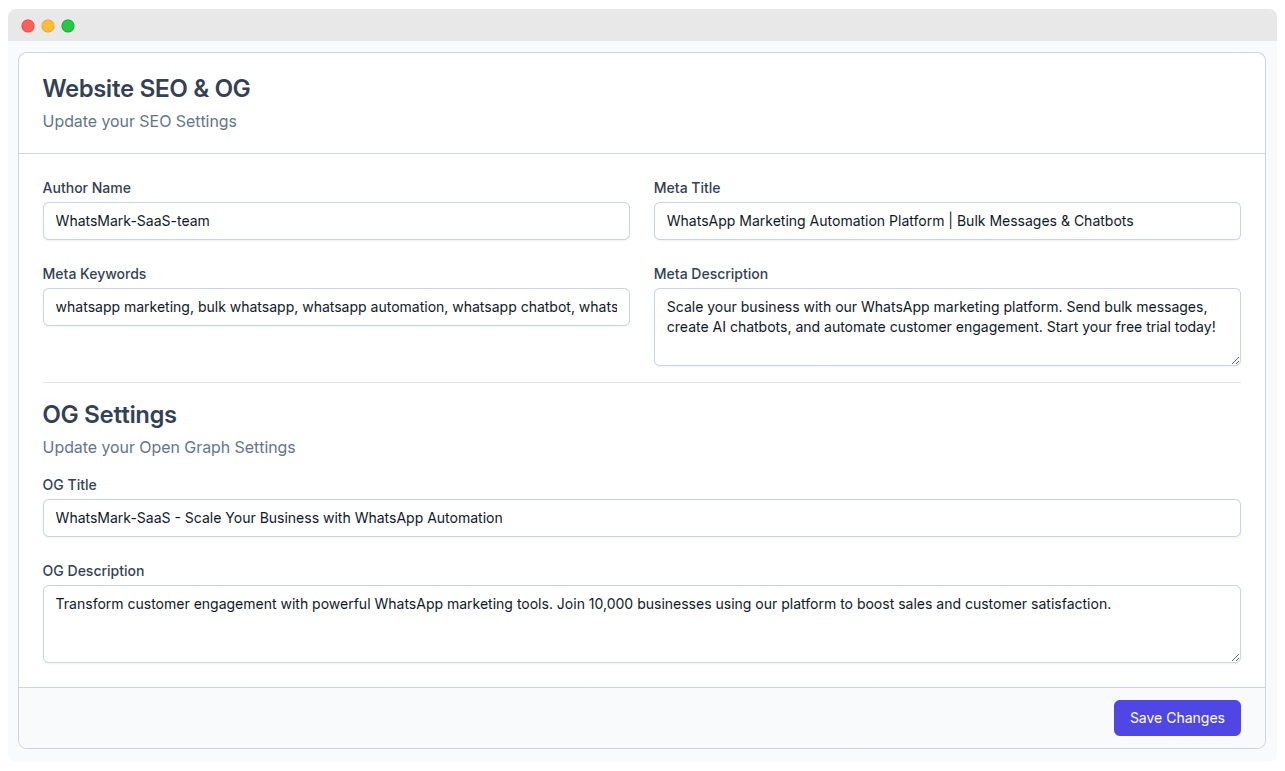
1. Website SEO Settings
These settings help optimize your website for search engines to improve your ranking and attract more organic traffic.
| Field | Description | Example | | -------------------- | ---------------------------------------------------------------------------------------------------------------- | ------------------------------------------------------------------------------------------------------------------------------------------------------------------ | ------------------------- | | Author Name | The name of the author or the team managing the website. | WhatsMark-SaaS-team | | Meta Title | The title of your webpage as it appears in search engine results and browser tabs. | WhatsApp Marketing Automation Platform | Bulk Messages & Chatbots | | Meta Keywords | A comma-separated list of keywords relevant to your website to help search engines understand the content. | whatsapp marketing, bulk whatsapp, whatsapp automation, whatsapp chatbot, whats | | Meta Description | A short description of your webpage content, shown in search engine results. This should be compelling to click. | Scale your business with our WhatsApp marketing platform. Send bulk messages, create AI chatbots, and automate customer engagement. Start your free trial today! |
2. Open Graph (OG) Settings
Open Graph settings control how your website content appears when shared on social media platforms such as Facebook, LinkedIn, and Twitter.
| Field | Description | Example |
|---|---|---|
| OG Title | The title used when your page is shared on social media. | WhatsMark-SaaS - Scale Your Business with WhatsApp Automation |
| OG Description | A description that appears alongside the OG title on social media shares to provide context and encourage engagement. | Transform customer engagement with powerful WhatsApp marketing tools. Join 10,000 businesses using our platform to boost sales and customer satisfaction. |
How to Update SEO & OG Settings
- Navigate to the SEO & OG settings page in your WhatsMark SaaS dashboard.
- Fill in the fields with relevant information as per your business and marketing goals.
- Save changes by clicking the
Save Changesbutton.
Custom CSS
The Custom CSS feature allows you to apply your own CSS styles across your WhatsMark SaaS site. This can be used to customize the look and feel of your user interface without altering the core code.
Location:
Admin Panel → Website → Custom CSS
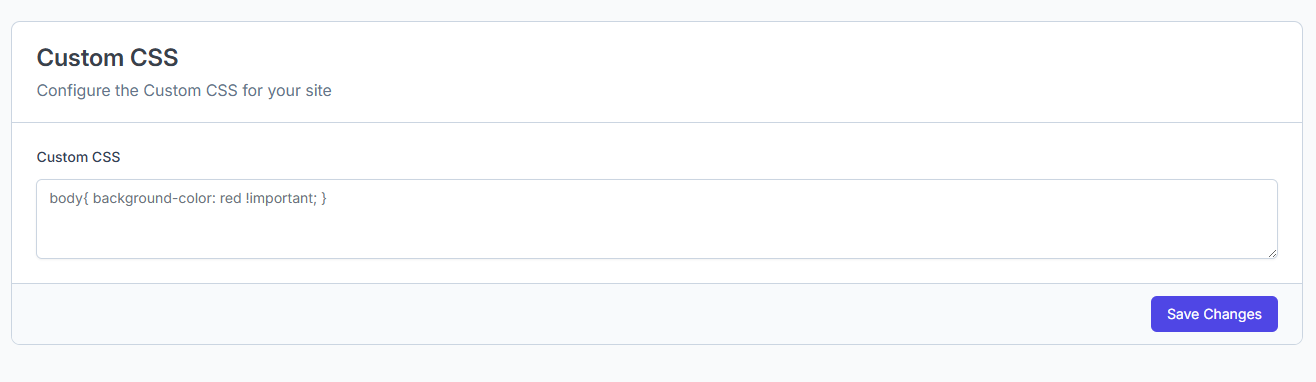
How to Use
Navigate to the Custom CSS section in your admin dashboard.
In the Custom CSS text area, add your desired CSS styles. For example:
cssbody { background-color: red !important; }Click the Save Changes button to apply your custom styles.
Custom JavaScript
The Custom JavaScript feature allows you to add your own JavaScript code to your WhatsMark SaaS site. This is useful for adding analytics, tracking codes, third-party scripts, or custom functionality.
Location:
Admin Panel → Website → Custom JavaScript
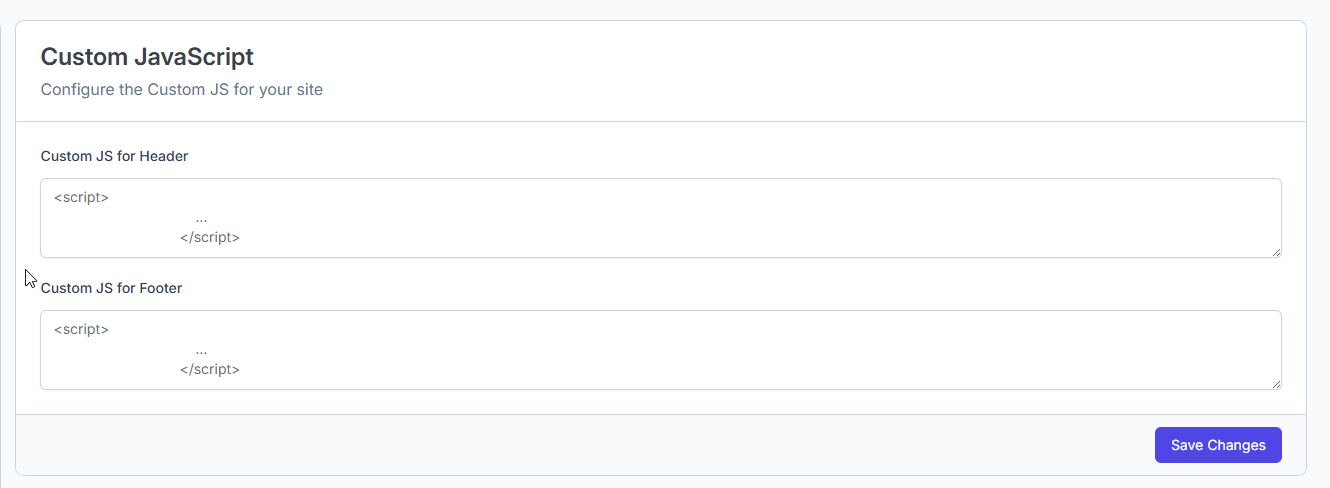
How to Use
Navigate to the Custom JavaScript section in your admin dashboard.
You will see two input areas:
- Custom JS for Header: JavaScript entered here will be injected into the
<head>section of your site. - Custom JS for Footer: JavaScript entered here will be injected before the closing
</body>tag.
- Custom JS for Header: JavaScript entered here will be injected into the
Example:
Header:
html<script> console.log('Header JS loaded'); </script>Footer:
html<script> console.log('Footer JS loaded'); </script>Click the Save Changes button to apply your JavaScript code.
Best Practices for Website Settings
- Use high-quality, optimized images (logos, banners) for fast loading and sharp display across all devices.
- Keep section titles, subtitles, and CTAs clear and customer-focused to drive engagement and improve user understanding.
- Maintain consistent branding by using HEX color codes, font choices, and layout styles that reflect your brand identity.
- Test website responsiveness regularly to ensure seamless experience on mobile, tablet, and desktop devices.
- Optimize SEO and Open Graph settings with concise meta titles, descriptions, and relevant keywords to enhance search ranking and social sharing.
- Use custom CSS and JavaScript sparingly and validate code to avoid conflicts, security risks, and performance degradation.
- Regularly save changes and preview updates before publishing to catch issues early and ensure intended results.
- Limit the use of the
!importantCSS rule to only when necessary, as it can override and complicate styling management. - Be cautious when adding third-party scripts; verify their source and impact on your website’s security and load times.