WhatsApp Configuration
Introduction
What it does: Connects your SaaS platform to the WhatsApp Cloud API, enabling automated message sending and receiving for all users. Handles webhook setup and integration for seamless communication. Why it's useful: Provides essential WhatsApp messaging features to your SaaS customers, allowing real-time engagement and automation. Ensures your platform can deliver and receive messages reliably at scale. Location: Super Admin Panel → WhatsApp → Webhook Configuration
When to Use This Page
This page is only required if you are using the Embedded Signup Addon and have Meta Tech Provider approval from Meta. In that case, configure your Meta application details and connect the webhook from here. Otherwise, webhook configuration is handled on the tenant side and no setup is needed here.
Prerequisites
Before configuring WhatsApp in your SaaS platform:
- Create a Meta Business Account at business.facebook.com
- Set up a WhatsApp Business API account
- Create a Facebook App in the Meta for Developers portal
- Have your Facebook App ID and App Secret ready (found in your Meta for Developers app settings)
Accessing WhatsApp Configuration
Navigation Path
- Login to Super Admin Panel
- Navigate to WhatsApp Webhook → Webhook Configuration
WhatsApp Webhook Configuration
Step 1: Enter Meta Application Details
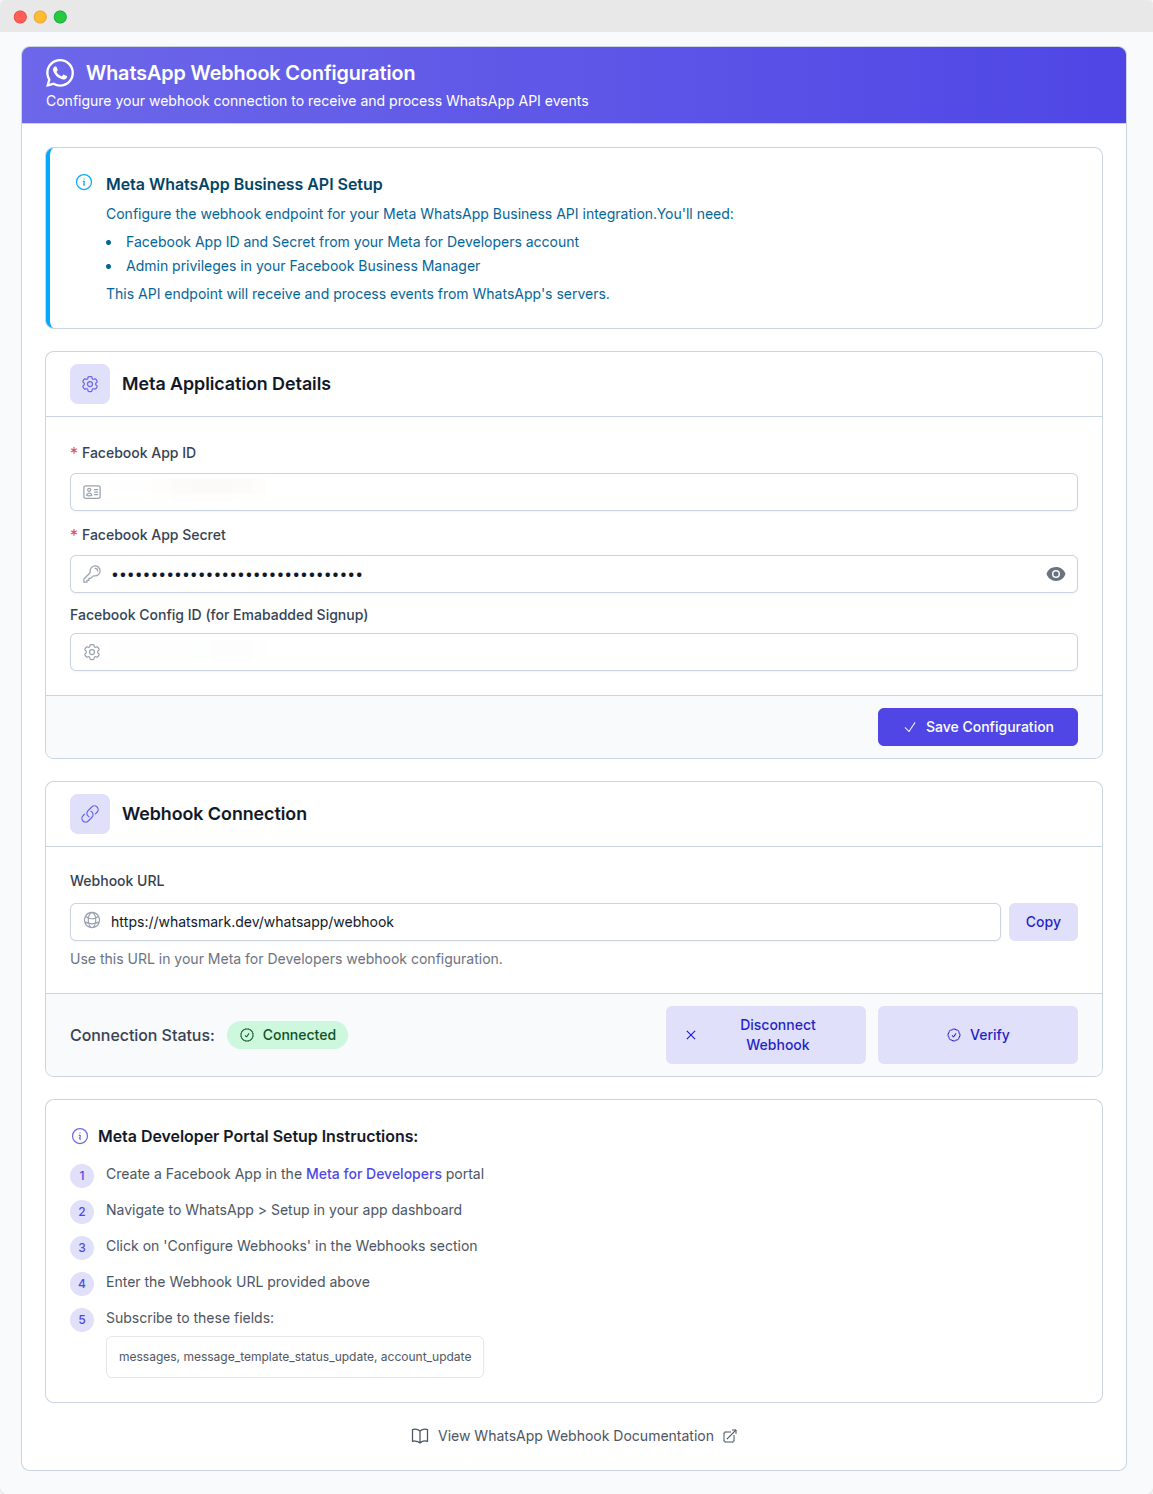
Enter your Meta application credentials:
- Facebook App ID (required) – Your Facebook App ID from the Meta for Developers portal
- Facebook App Secret (required) – Your Facebook App Secret from the Meta for Developers portal
- Facebook Config ID (for Embedded Signup) – Only required if you are using the Embedded Signup Addon and have Meta Tech Provider approval from Meta. Otherwise, leave this field empty.
Facebook Config ID
The Facebook Config ID field is only for Meta Tech Providers who have received approval from Meta and are using the Embedded Signup addon. If this does not apply to you, leave the field empty.
Click Save Configuration to save your settings.
Step 2: Connect Webhook
After saving your App ID and App Secret, scroll down to the Webhook Connection section.
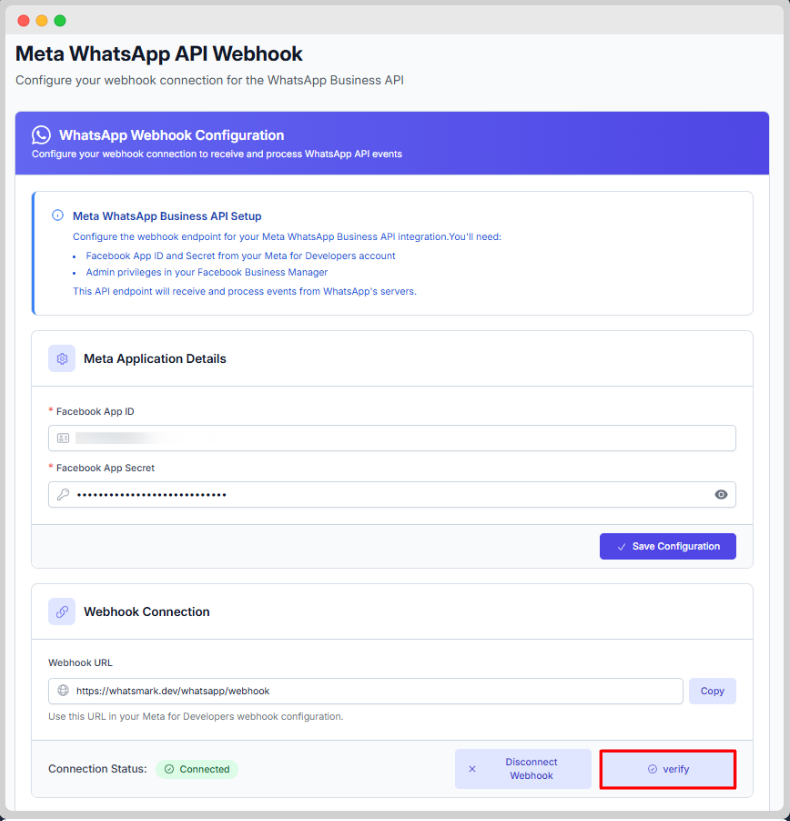
- Click the Connect Webhook button
- The system will automatically create and register the webhook with Meta — there is no need to manually go to the Meta Developer portal to configure the webhook
- Once connected, the Connection Status will change to Connected
Automatic Webhook Setup
WhatsMarkSaaS handles the entire webhook registration process automatically. Simply enter your App ID and App Secret, save the configuration, and click Connect Webhook. No manual webhook setup on the Meta Developer portal is required.
Step 3: Verify Connection
After connecting, you can click the Verify button to confirm the webhook is properly registered and receiving events from WhatsApp's servers.
Webhook Event Subscriptions
Once the webhook is connected, the system automatically subscribes to the necessary events for real-time template synchronization across all tenant accounts:
message_template_status_update– Syncs template approval/rejection statustemplate_category_update– Syncs template category changes
Template Sync
Without these subscriptions, template status and category changes will not sync automatically to tenant accounts. Tenants would need to manually reload templates to get the latest status and category information.